Add a location
Describes how to provide customers with the physical locations of your dealers, branches, or any other locations in Optimizely Configured Commerce.
Enter your Google Geocoder API key
It is important to enter your own Google API key in your Sandbox (and Production) environments so your maps load correctly on your Location Finder page.
- Purchase a key by visiting the Google Maps Platform page and clicking Get Started. Enable the Javascript API and Geocoding API in the Google Cloud Platform Console under your API key to avoid issues with maps loading correctly on the Location Finder page.
- Log into the Admin Console and go to Administration> System > Settings > Site Configurations.
- Scroll down to the Geocoding section and enter your key in the Google Geocoder API Key field. Scroll to the General section and enter your key in the Google API Key field.
- Click Save.
Fill-in location settings
- Log into the Admin Console and go to Administration> System> Settings > Site Configurations.
- Scroll down to the Locations section and fill-in the following fields:
- Default Latitude - Default latitude to use for point to find dealers if a user doesn't provide a location. Default value: 44.9805206.
- Default Longitude - Default longitude to use for point to find dealers if a user doesn't provide a location. Default value: -93.273896.
- Number of Locations Shown Per Page - Number of locations to show a user per page. Default value: 5.
- Search Radius - Radius in miles to look for locations. Default value: 50.
- Click Save.
Add a location
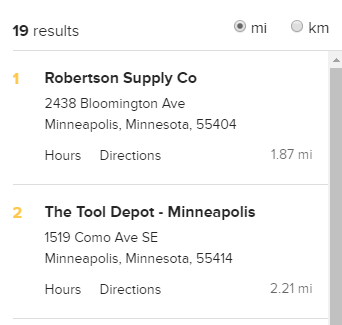
For a Location to show up in the Location Finder, you must first create it in the Admin Console.
-
Go to Admin Console > Shipping & Fulfillment > Locations.
-
Click Add Location to create a new location.
-
Fill in the applicable information for the location. Only Name is required, but the location's address and phone number are recommended.
-
To show the location's website in the Location Finder, add a valid URL in the Website URL field.
-
Once the location address is entered, click Geolocator; this populates the location's Latitude and Longitude fields.
NoteComplete this step only when creating single locations. For multiple locations, Insite recommends a geocoding service.
-
Click Save.
-
Add additional information, such as the location's operating hours, in the Content Management section.
-
Select Create Revision, and enter the appropriate information in the pop-up editor.
-
Click Save, then click Publish to push the revision to the live site.
NoteYou must assign the location to a website before it displays in the Location Finder. See Assigning a Location to a Website.
Updated 5 months ago