Add users from the Admin Console
Describes using the Admin Console in Optimizely Configured Commerce to create users.
Creating Console and Website Users is one of the many responsibilities of an Admin Console Administrator. The User page contains all of the available profile information fields, as well as the option to assign the necessary Roles.
Create a console user
-
Log into the Admin Console.
-
Go to Administration > Users > Console Users.
-
Click Add Console Users .
-
Populate the form as needed and select the appropriate Roles.
-
Click Save or Save & Add New.
-
Once a user has been created, a notification at the top of the form is displayed stating the user has not been activated.
This notification will update depending on the activation status, that is it will display an option to Resend Activation Email or it will disappear entirely if the user is activated.
-
Once the user has been created, click Send Activation Email .
-
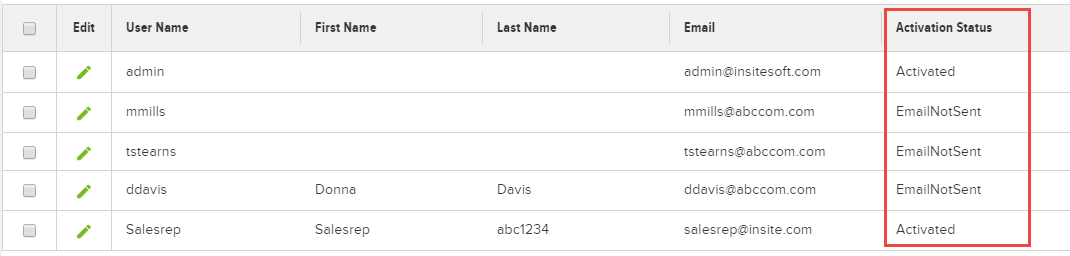
If multiple users were created using Save and Add New , you will need to click Edit for each user and then click Send Activation Email. It may be helpful to add the Activation Status column, using Manage Columns , to see which users need to be activated.
Create a website user
-
Log into the Admin Console.
-
Go to Administration > Users > Website Users.
-
Click Add Website User.
-
Add any additional details and update any fields as needed.
-
Do NOT assign any Roles at this time. Assigning a Role at this time will result in a notification that the User is required to have an Approver assigned. However, the Approver field is not displayed unless the User is first assigned to a Customer.
-
Click Save or Save & Add New.
-
Once a user has been created, one of two notifications is displayed at the top of the form stating the user has not been activated. The message displayed is dependent on whether users are required to be assigned to a website. This is controlled by the Restrict Users to Assigned Websites Setting.
If the user is not assigned to a customer and a website, and the Restrict Users to Assigned Websites Setting is set to Yes, the following message is displayed:

If the user is not assigned to a customer and a website, and the Restrict Users to Assigned Websites setting is set to No, the following message is displayed:

This notification will update depending on the activation status, that is the red text disappears once the customers and/or websites and have been assigned, it may display an option to Resend Activation Email, or it will disappear entirely if the user is activated.
-
Once the User has been created and a Website and Customer have been assigned, return to the Details finger tab and assign the appropriate Roles. If the assigned Role requires an Approver, the Approver must be selected prior to saving the changes.

-
Click Save.
-
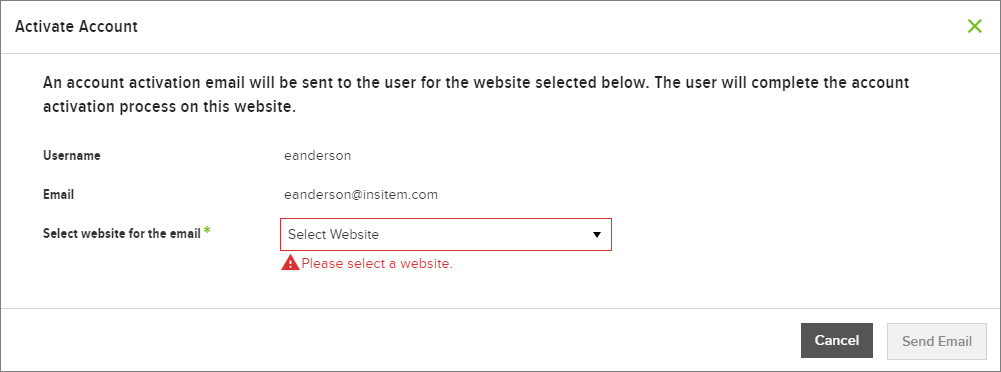
Click Send Activation Email . If a user is assigned to multiple websites, an Activate Account window will display requesting that a website be selected. This is to allow, among other things, for custom messaging based on the website.
-
If multiple users were created using Save and Add New, you will need to click Edit for each user, assign the Customer and Website, and then click Send Activation Email.
NoteYou will also need to, for any users assigned to multiple websites, identify the website- as stated in the previous step. It may be helpful to add the Activation Status column, using Manage Columns , to see which users need to be activated.)
Updated 5 months ago