Create integration jobs
Describes how to create integration jobs in Optimizely Configured Commerce.
NoteWhile reviewing this article, it may be helpful to have the Admin Console open to follow along and click through the screens and tabs.
Optimizely {user["product-name"]} has a platform to enable integration between {user["product-name"]} and external systems. It has a number of capabilities built into it which are supported by a variety of documentation. It includes understanding the Windows Integration Service (WIS), how the data flows between the systems, and many of the prepackaged plug-ins that support integration. This document specifically focuses on the various fields and options used when setting up an integration. The entire process is supported through a meta-data driven structure which is represented by the Integration Job Definition.
The Integration Job Definition screen is the primary screen used to create Job Definitions that are used as the basis for specific Integration Jobs. These jobs define all the appropriate attributes used in performing the integration.
Additionally, these jobs can be imported for specific enterprise resource planning (ERP) systems or product information management (PIM) systems or simply moved from a pilot environment to a production environment. For example, all the field mappings and setup options for Infor SXe can be imported separately from the same integration job definitions for SAP.
NoteThe internal WIS must be identified in the Computers Allowed for Integration Setting. This requirement is intentional to avoid having every web server processing every internal integration request. The setting itself provides the option of adding multiple computer names that are explicitly allowed to connect. If a computer not in the list calls the integration service, an email alert is sent to the administrator.
Job Definitions are found in the Admin Console > Jobs > Job Definitions.
The Job Definitions page displays all current definitions which can be filtered by Job Name in the search box.
The following tables define the various fields encountered while creating a new Job Definition. The tables are organized by the finger tab hierarchy shown in this screen shot.
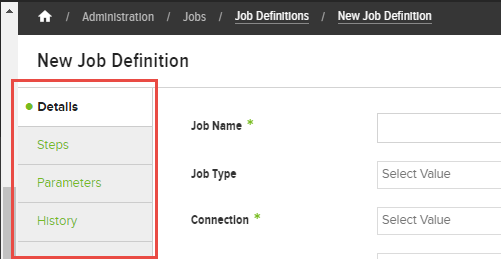
This list identifies the sections or pages that exist under the 4 primary sections (Details, Steps, Parameters, and History). The Steps primary finger tab is the only one that has secondary finger tabs, which are exposed when creating new a new Step or reviewing and existing Step.
- Details Finger Tab
- Setup Information (First Section)
- Notifications Section
- Run Options Section
- Recurrence Section
- Steps Finger Tab
- Details Finger Tab
- Parameters Finger Tab
- Field Mapping Finger Tab
- Parameters Finger Tab
- History Finger Tab
Details finger tab
Field | Description |
|---|---|
Setup Information (First Section) | |
Job Name | Create a descriptive name to identify the Job, such as Rebuild Search Index. |
Job Type | Refresh: This option will cause the job to pull data from the integrated system and transcribe it into the `< |
Submit: This option will cause the job to take a dataset as a result of either a Preprocessor or a dataset submitted via code and make it available to the Windows Integration Service (WIS). This type of job is typically used for Customer creation, order creation, and payment submission | |
Report: This option will cause the job to run a data query, typically locally, to pull ecommerce data out and make the data available for a report | |
Execute: This option will cause the job to run a SQL statement or stored procedure. Typically used for scheduling maintenance and archiving tasks | |
Connection | This drop-down is used to select the connection that will be used for the job. The drop-down will be populated by the names of the connections defined in the Integration Connection screen. The connection named Internal is defined by the system and is used for Imports and Exports and for any jobs that should be initiated directly by the web server instead of the WIS. |
Preprocessor | This drop-down is used to select the plug-in for pre-processing the job. None is an acceptable option and would always be appropriate for Execution jobs. The preprocess is a plug-in that runs before the job is submitted to the WIS/Internal WIS. |
Integration Processor | This is the processor plug-in running on WIS that will be sent down with the task DTO packet to indicate to WIS what process to run. None would be an option as well, especially for Execution jobs. |
Postprocessor | This is the processor that runs once the result is returned. Only processors that support the job type listed will be available in the drop-down. This is the plug-in that has the largest list of function-specific options. If a stored procedure is desired to be run, then the Postprocessor should be set to ExecuteStoredProcedure and a job parameter called StoredProcedureName should be set up with the specific procedure to run. None is an available option. |
Description | Provide a detailed description of what purpose the Job serves and any other information that would be helpful to another user who may use or inherit the job in the future. |
Use Delta Dataset | Toggle turns on the delta dataset function to do a compare of the acquired data to the last saved "good" set (if any) and construct an add/change/delete dataset. This function should only be used for refresh job types. This option should only be used if the integration process is taking a full snapshot of the source data. The WIS essentially takes this snapshot and compares it against the last saved snapshot and sends up the differences. If you are processing flat files, for example, it would not be an appropriate selection and could end up disabling/deleting records that are not intended to be modified. |
Debugging Enabled | If the Debugging Enabled is for the associated Connection, then all jobs running under that Connection will have debug messages. If it is not on, then debugging will only occur for those Job Definitions where it is specifically turned on. Debugging should only be enabled when troubleshooting an issue. This is true for both the Integration Job itself, as well as Connections. Enabling Debugging causes jobs to run longer and collect far more additional information for every job tied to it. |
Notifications Section | |
Notification Email List | This field is used to identify the email addresses to send a notification email to (if applicable). If multiple email addresses are used, they should be comma delimited. |
Notify Condition | Completion: This condition is used to send an email once the selected integration job has completed, regardless of success or failure |
Success: This condition is used to send an email once the selected integration job has successfully completed | |
Failure: This condition is used to send an email once the selected integration job has completed in a status other than Success. | |
Email Template | This drop-down is used to select the email template that will be used for the notification email if an email is being generated. If not template is selected, the system will use a default notification template. |
Linked Job | This drop-down is used to select another job to immediately spawn and run after the currently selected job has completed, depending on the link condition. |
Link Condition | SuccessOnly: Linked job will only run if the current job was successful. |
SuccessOrWarning: Linked job will run if the current job was successful or if the job triggered a warning. | |
SuccessWarningErrorOrFailure: Linked job will run if the current job was successful, or if the job triggered a warning, error or even if the job failed. | |
SuccessWarningOrError: Linked job will run if the current job was successful or if the job triggered a warning or error. | |
Run Options Section | |
Max Errors Before Fail* | This field will create a threshold for error log messages (you can check them in the History tab). If this threshold is passed, the job execution stops, already completed changes try to commit to database and we get "The job was failed because the maximum amount of allowed errors/warning ( `{logCount}` ) has been exceeded." log on history tab. If 0 is chosen for one of this setting, it will not limit number of errors encountered and will run to completion. Entering a value of 0 = unlimited. |
Max Warnings Before Fail* | This field will create a threshold for warning log messages (you can check them in the History tab). If this threshold is passed, the job execution stops, already completed changes try to commit to database and we get "The job was failed because the maximum amount of allowed errors/warning ( `{logCount}` ) has been exceeded." log on history tab. If 0 is chosen for one of this setting, it will not limit number of warnings encountered and will run to completion. Entering a value of 0 = unlimited. |
Max Deactivation Percent | This setting will skip delete execution if the number of records expected to be deleted/deactivated exceeds the specified percentage. The intention is to disallow accidental deletion of masses of records. If the job has multiple steps, only the delete action on the current step will be skipped - it will still execute subsequent steps. If 0 is chosen for this setting, it will use 20% as a default. |
| Processing Batch Size | This setting allows each job to have a custom batch size or to set a different default value for batch sizes. When the job runs, if there is a batch size > 0 in the job definition, the job will use this value instead of the default setting value. Default processing batch size is 50. |
Recurrence Section | |
Run as a Recurring Job | This toggle is used to flag the job as a recurring job. If this flag is turned on, when the record is saved, the system will automatically create a queued job at the next appropriate time that matches the start date/time and repeat cycle. |
Start Date/Time | This field is used to select the starting date and time for the recurring job to operate. |
End Date/Time | This field is used to select the ending date and time for the recurring job to operate. It can be left blank which indicates that the job has no end date. |
Repeat Every | Enter a value that corresponds to the radio buttons below that refer to Minutes, Hours, Days or Months. |
Steps finger tab
Job Definitions can have one or more individual steps. The parameters entered on the Job Definition string are global for the job.
Clicking the Steps finger tab displays a list of the existing Job Definitions Steps.
The following information describes each field within each finger tab of the New Job Definition Step page. To see these fields, either click Add Job Definition Step to create a new Step, or click Edit of an existing Step to make changes. The following descriptions are tied to the 3 secondary finger tabs (Details, Parameters, Field Mapping) within the primary Steps finger tab.
Details finger tab
Field | Description |
|---|---|
Setup Information (First Section) | |
Sequence | This field represents the execution sequence that will be used to run the steps - the user should make sure to enter a value other than 0. |
Step Name | This field is an informational field to identify what is being done |
Target Object | This field defines the `< |
Connection Override | This is a drop-down of the connections available. It may optionally be overridden from the one at the job definition level. |
Integration Processor Override | If the specific step needs a custom processor, this field may be set to instruct the WIS to use a different set of code to process this step with. This should only ever be necessary on multi-step jobs. |
| Delete Behavior Section | |
Action | The Action is applicable only for Refresh jobs and helps define what action to take when a record is not including in a full dataset or a delete record is sent up from a delta dataset. |
Delete Record: This would attempt to actually delete the record - this could potentially cause referential integrity issues or fail due to a database constraint | |
Ignore: Don't do anything | |
Set Field: This option will expose a Field To Set control to select the field to set. This is used typically to "deactivate" an item by setting its "Active" boolean value or DeactivateOn date but could be used to set most fields to a specified value | |
Field to Set | This field is only available for refresh jobs where Set Field is chosen for the Action in the previous field. This field lists the fields in the object that can be set. During the transcription/post processor, the system would set the field depending on the field type - if it is a date field, we would set it as the current date, otherwise set it to the value as specified in the Field Value The user must take care to set the Value To Set as a valid value for the field being set. For example, if the field is a boolean value, use 0 or 1 (or true/false) as the selected values. A blank date will set a date field to the then current date/time as it is being set. |
| [4.5]Delete Children | ON/OFF toggle. Used for removing. Selecting YES will cause the Job Definition Step to delete all of the order lines associated with the order header records received in the order header refresh step. |
| Flat File Options Section | |
| Note: The following fields are dependent on the type of Connection Override selected from the menu options and will show or hide accordingly. | |
File Masks | The integration connection will define the directory to scan for files and this field is designed to select a file mask for files that match. For example, if the files have a leading name such as "ProductFeed_xxxx"? where xxxx is a date/time stamp, use ProductFeed*.* as the mask. If several file names are valid for the step, you can enter multiple masks using a comma to separate them. You can also signify a subdirectory as part of the mask so that the system will search for the files within a subdirectory, thus avoiding having to set up separate connections. |
Missing File Action | This field defines how you wish the system to behave under different conditions. This value should be set based on when the integration job runs and if you expect any files to be present or not and how you wish to be notified if there are no files that match the mask entered. Error: if the file is missing, it will issue an Error message in the log and increment the #/errors encountered. The job will ultimately fail with an error if no file is present. Warning: if the file is missing, it will issue a Warning message in the log and increment the #/warnings encountered. The job will ultimately fail with warnings if no errors are encountered after the missing file condition. Ignore: this indicates that no files present is a normal and expected condition and an Info message will be generated and the job would end as successful as long as there are no other steps with other issues. |
Skip Header Row | This should be turned on if the flat file has a header in it showing the column names - this setting will skip the first row. If this setting is not on, all rows will be processed. |
Columns/Select Clause | For Refresh jobs, this is essentially the first part of a "SELECT"? clause and defines the columns to be retrieved from the remote data source. For flat files, this is a simple list of columns. The #/columns defined must match the data in the flat file if a flat file is being used or an error condition will occur. You do not need to map all the columns, but you do need to define them all for ingestion. You can use whatever functions are supported by the connection. For example, if the source db is SQL Server, you can use a SUBSTRING command or even a subquery. |
From/From Clause | For Refresh jobs using a database connection, this indicates the tables to use and the join conditions |
Where/Where Clause | For Refresh jobs, this is the WHERE clause of a SELECT statement and defines any data-based conditional expressions. Use single quotes for static variables such as Status = "A". This can also be used to conditionally include records from a flat file You can also use a parameterized value from the Application Settings by setting the name of the setting in braces such as transdt > getdate() - `{ERP_Lookbackdays}` |
Paramaterized Where | This is a special-purpose field to define an override where clause when the job is set up with a step parameter defined and was intentionally created to allow for the same job to be used to refresh all customers or a single customer. The intent is to have a separate WHERE clause that is invoked only if there are parameters on the job. If there are any parameters defined on the job, the parameterized where clause will be used. To use the parameter within the WHERE clause, prefix the name of the parameter with an @. In 4.2 we have eliminated this capability and, therefore this field may be eliminated in the future. |
SAP Connection Type |
|
SAP BAPI Options | When an SAP DotNetConnector option is used, several different fields will appear on the details tab. |
BAPI | This represents the specific BAPI within SAP to call |
Result Table Name | BAPIs can return Function (property list), Structure (like a single record with properties) or an actual Table. Entering the table name will refer to the table itself that is returned. Entering the function name surrounded by `{curly braces}` will denote that the function data is being returned. Entering the structure name surrounded by [square brackets] will denote the structure being returned. Note that the Bapi Info can define the specific values from any of these by using the same convention to reference data in any of the 3. If something is entered here, it does not need to be referenced again in the list of properties - it becomes the default. |
Parameter Table Name | Parameters can be passed into the DotNetConnector either as individual parameters as defined in the Step Parameters or they can be grouped together into a Parameter Table. Enter the parameter table name if the parameters should be consolidated and grouped together as a parameter table. |
BAPI Info | This control represents all of the data fields to return from the BAPI call. The names will be defaulted to the proper construct in the returned object based on the Result Table Name (that is if's a function, the fields represent the function). If the Target Object is Dataset then the system can return and access Function, Structure and Table data back. If the job is a refresh job with a specific target `< If the Target Object is a Dataset, then you can access any of the different values returned by the BAPI call. To retrieve Function data, simply enter the function return value name (that is SHIP_TO_NUM). To retrieve Table data, prefix the property with the table name and period (that is HEADER_DETAIL.SHIP_TO_NUM). You can reference any table that is valid in the return from the BAPI. You do not have to specify the result table name. To retrieve Structure data, enter the structure name in curly braces, followed by a period and the structure property name (that is `{HEADER_DETAIL}`.SHIP_TO_NUM) |
Parameters finger tab
Clicking the Parameters tab displays a list of Job Definitions Step Parameters. The following information describes each field within each finger tab of the Job Definition Step Parameters page. To see these fields, either click Add Job Definition Step Parameter to create a new Step, or click Edit of an existing Step Parameter to make changes.
| Field | Description |
|---|---|
| Name | This field define the name of the parameter - it should be unique within the job definition |
| Value Type | This drop-down is used to select the type of value for the parameter |
| Default Value | The default for the entry. If the value type is Application Setting, then the value will come from the application setting defined here |
| Prompt | This is the prompt that the user will see when prompted for a value interactively for a report |
Field mapping finger tab
The intent of Field Mapping is to tie a piece of data from a source system (that is ERP on a refresh) and the target system (that is {user["product-name"]} on a refresh). This process is only necessary when using the FieldMap post processor.
NoteWhen the system runs integration jobs, you only see progress if debugging is on, which shows a record count on every 100 records. However, a record count displays every five minutes within the field mapper for each thread, even if debugging is off, to show that progress is being made.
Clicking the Field Mapping finger tab displays a list of Job Step Field Mappings. The following information describes each field within each finger tab of the New Job Step Field Mapping page. To see these fields, either click Job Step Field Mapping to create a new Job Step, or click Edit of an existing Job Step to make changes. The fields displayed are dependent on the selected Field Type.
Field | Description |
|---|---|
Field Type | This drop-down indicates in context the type of data we are either reading (refresh) or writing (submit) |
Field: Indicates a data field from the object (submit) or ERP source (refresh). | |
Static Value: A specifically entered value - used when you want the data value to be a fixed value. | |
Application Setting: The value comes from the application setting - it becomes a static value from the application setting. If this is selected, the From Property will be replaced with a list of valid application settings. | |
Content: This is a special field type and is reserved for refresh jobs. Since content has a context defined by language, persona and device, the job can define either the default values, static values or values from the import data. | |
Lookup: This is used for looking up an object to be used in a parent/child relationship. This is a very important field type and is used when referencing to another entity in the system. Only entities of the target object should be display. An example is if we are refreshing Products, then a valid Lookup would be Vendor. The "natural key"? is used to look up the alternate entity (that is Vendor Number) and then embed the underlying Id field into the Product. For example, if we are refreshing Inventory (ProductWarehouse entity), we would do a lookup on the Product using the Product Number and a lookup on the Warehouse using the Warehouse Name. If Lookup is selected, the user must first select the To Property after which the From Property will be shown | |
Child Collection: Used for cross matrix selections - assignment records that have no data themselves. Notice that we used ProductWarehouse using Lookup mapping because there is additional data we want to capture for that record. The Child Collection is used when there is an assignment but no actual data added onto that assignment. An example is WebSiteCurrency - since there is no specific entity/target object, we import using Website as the target and the child collection of Currency. The data stream must have the natural key of the website (name) and of the currency (currency code) to create the record. | |
From Property | This defines the source of the data that will be used. For a refresh job, it will give you a list of the entries from the SELECT clause. It may not always display properly if there are functions and subselects in the query, so the user may type in the actual value intended to use. |
To Property | This defines the target of the data that will be transcribed. For a refresh job, it will give you a list of the entries in the Target Object. |
Language | This is reserved for Content field types and will provide a list of the data elements defined in the query and a list of available language codes in the system. Leaving this field empty will use the System Default. |
Persona | This is reserved for Content field types and will provide a list of the data elements defined in the query and a list of available personas in the system. Leaving this field empty will use the System Default. |
Device | This is reserved for Content field types and will provide a list of the data elements defined in the query and a list of available device types as defined in the System List. Leaving this field empty will use the System Default. |
Lookup Error Handling | This is only used for refresh jobs and lookup field types. If the related entity cannot be found, the system can determine how the job should log it - either as an error, a warning or to ignore it altogether. |
Overwrite | If this flag is set to true, the data will always be overwritten from the data feed on a refresh. This flag is intended to allow the refresh to establish an initial value but then never overwrite that value since the user would be responsible for maintaining it going forward. A good example is the Product Title field - we want to populate it initially from the ERP but then let the site administrators change that value and no worry about having it overwritten. There is no need to set this for key fields - anything that is a dataset key should NOT be set to overwrite. There is no defined behavior for this field on submit jobs. |
Dataset Key | This flag is used to determine if the data is a Dataset key. This only applied to refresh jobs. The dataset key is designed to uniquely identify records within the dataset - it is key to delta datasets and important for all refreshes. This flag must be turned to YES for any child collections we are importing or it will not transcribe the data. |
Parameters finger tab
This tab displays a list of the existing Job Definition Parameters. Clicking the Parameters finger tab displays a list of the existing Job DefinitionParameters. The following information describes each field within the New Job Definition Parameter page. To see these fields, either click Add Job Definition Parameter to create a new Parameter, or click Edit of an existing Parameter to make changes.
Job Parameters are a generic way to enable a specific processor (pre/integration/post) to garner additional information when running a job. Different processors will require different entries to be valid and, if the parameter is not set up, expect to see an error message generated in the job indicating that it is missing.
An example is a job that uses the CleanupExportSpreadsheets post processor. There is a job parameter required with a name of RetentionDays which has a value type of number. The actual value can be changed if run manually or if code creates the job - otherwise, the default value in the parameter defined here will be used.
Some fields are hidden by default and can be exposed by clicking Manage Columns.
Field | Description |
|---|---|
Sequence | This field is used to identify the order in which the parameters are either prompted for or passed into the processors. This field is hidden by default and is typically not necessary to be filled in. |
Parameter Name | This field define the name of the parameter - it should be unique within the job definition |
Value Type | This drop-down is used to select the type of value for the parameter |
Default Value | The default for the entry. If the value type is Application Setting, then the value set here represents the actual name of the setting. The value of that setting will be used at runtime. If the value type is RelativeDateTime, then the value is a simple integer indicating the number of days forward or backwards from the current date. This is useful if you want to run an integration that "looks back"? a set number of days. |
Prompt | This is the prompt that the user will see when prompted for a value interactively then the job is run. |
History finger tab
The History finger tab provides a list of all Integrations Jobs that have run and provides important information about the jobs, such as scheduling dates, job run time, and status. Click View to see the job details which include information on the Parameters and Job Logs.
As necessary, use the Search box at the top of the page to filter for a specific job.
If the job has been queued, the user may select it and delete it from being processed. No other jobs may be deleted.
If the user selects the view icon, the system will display the details of the job including when it was run, how long it took, if it was run in a chain and the dataset size. The user may also see all of the parameters that were set when the job ran and have visibility into the detailed job log which often must be consulted to determine the source of an error or warning.
Updated 23 days ago