Widgets
Describes widgets in Optimizely Configured Commerce.
Widgets are small, reusable components that can be placed most places in the website. Examples of widgets include the title of a page (usually uses the <h1> tag) and the product detail view, which includes other components like product images and price. Widgets are assigned a widget template to render visual components.
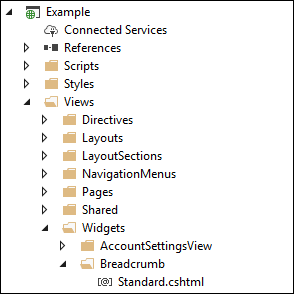
Widget templates are the files that actually reside in the ~\Views\Widgets\ directory. They can be named with a .liquid or a .cshtml extension. Inside the Widgets directory is another level of directories, each named according to the widget they are responsible for displaying. For example, inside the Widgets directory is a directory named "Breadcrumb". This corresponds to the Breadcrumb widget which is used on the website. Inside that directory is a single template named Standard.cshtml.
Multiple templates for a widget
Widgets in Optimizely {user["product-name"]} initially all use a default template named "Standard". By convention, the platform will display this template. However, a widget can have multiple templates. This enables you to modify the original template or create different templates for different purposes. Individual widgets may be modified to use different templates, or a new theme default template can be configured.
Prerequisites
- Visual Studio and SDK installed
- Theme created (read about how to create a new theme)
Create a new widget template
{user["product-name"]} ships with a PageTitle widget. This section will add a new template for the PageTitle widget.
-
In Visual Studio, open the {user["product-name"]} solution.
-
Find your theme project.
-
In your theme project, find the ~\Views\Widgets\PageTitle\ directory.
-
In the PageTitle directory, make a copy of the Standard.cshtml file and rename it to "Smaller.cshtml".
-
Open the Smaller.cshtml file.
-
Change the <h1> tag to an <h3> tag.
<h3 class="page-title [[Model.CssClass]]">[[CurrentPage.Title]]</h3> -
Save the file.
-
Build your solution.
The PageTitle widget now has multiple templates.
Before your new template can be displayed, you need to configure the platform to display it. You have two options for configuring a new widget template. The new widget template can be configured to display for a specific instance or all instances of a widget.
Change the template for a specific instance of a widget
To configure a widget template for a specific instance of a widget, you need to use the CMS.
-
Log into the Admin Console.
-
In the top level navigation, select View Website.
-
In the View Website flyout, toggle the Content Editor field to "ON" and select the website link from the menu.
-
In the top-left corner of the CMS, select Content Tree to toggle on the Content Tree display.
-
In the Content Tree, expand the Home node and select the Contact Us node to go to the Contact Us page.
-
Back in the top-left corner of the CMS, click Edit CMS to change the CMS to "edit" mode.
-
On the Contact Us page, find the PageTitle widget.
-
Select Edit Widget in the top-right section of the widget.
-
In the Edit Widget flyout, uncheck the Use Default Template checkbox and select the Unlock link next to the Template field.
-
In the Template drop-down, find and select the "Smaller" template you just created. It should have the theme name preceding the template name.
-
Click Save.
Now the PageTitle widget on the Contact Us page is using your new template. If you go to the About Us page, you will notice that the template for the PageTitle has not changed. Don't forget to publish if you want the changes to appear on the Storefront. If you add the PageTitle widget on a different page, it will display the Standard.cshtml template. You will need to run through these steps again to display the new widget template:
Change the default template for a widget
Any instances of a widget that were not modified to use a specific template will use the theme's default template for that widget. To configure a different template as the default for your theme, you need to use the theme.json configuration file.
- In Visual Studio, find your theme project.
- In your theme project, find the theme.json file located at the root of your theme.
- Open the theme.json file.
- Scroll to the bottom and find the Widgets property.
- In the Widgets property, add a property named "PageTitle" and give it a value of "Smaller". The property name matches the widget name and the value name matches the widget template name.
- Save the file.
- Build your solution.
- Go to the Contact Us page on the Storefront. Notice the PageTitle widget.
- Go to the About Us page. Notice the PageTitle widget.
All instances of the PageTitle widget still use the default template, but the default template is now your new "Smaller.cshtml" template. Keep in mind that this is just the default template. Somebody can still change the template for a specific instance of a widget using the CMS.
Updated 23 days ago