Install basic Google Analytics
Describes how to install Google Analytics for Optimizely Configured Commerce
Optimizely Configured Commerce business users have the option to install either basic Google Analytics or a Google Tag Manager container on their various websites and domains. The steps to install Google Analytics are shown below.
Locate Google Analytics ID
Using the basic Google Analytics implementation will allow you to provide a unique Google Analytics property ID (often referred to as a "UA ID") and the domains in which you want that tracker installed, and Configured Commerce will place the Google Analytics Universal Analytics tracking snippet with your provided UA ID in the correct location across all pages on your site. If you are having trouble locating your UA ID, see the Google Support article located here. This is typically the easiest way to implement Google Analytics tracking.
Make note of the UA ID you wish to use for tracking, as we will need to enter it in the next step.
Optional: site search tracking
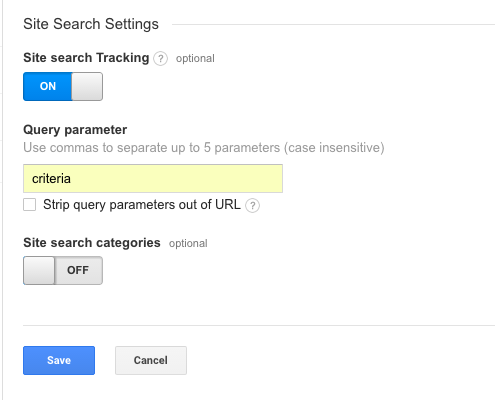
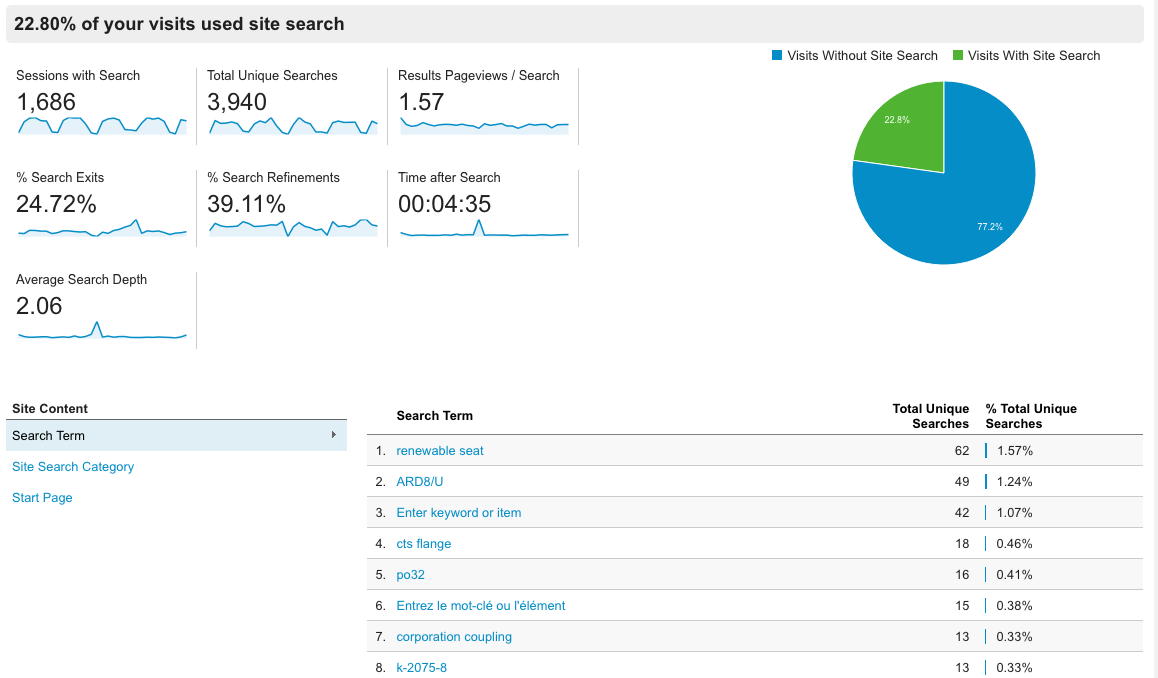
Optionally, you may also choose to enable Site Search Tracking in Google Analytics. Site Search Tracking lets you understand visitor engagement metrics regarding the search box on your site. Metrics such as percentage of sessions with search, all keywords that have been searched and more are captured with this setting enabled.
To enable this, go to View Settings in the Google Analytics view you are using on your Configured Commerce website. Scroll to the bottom of the page, use the slider to turn on the Site search Tracking option, and enter "criteria" without any quotes as the Query parameter. Be sure to Save your changes.

Example of the Google Analytics site search tracking reports:

Updated 5 months ago
