Work with the import template
Describes how to use the import template in Optimizely Configured Commerce.
The Admin Console provides a unique template for the various import record types, such as Products, Customers, and Categories. The Microsoft Excel based templates are used to create the respective records and then import the data into the Admin Console. The spreadsheet has several rows of information:
The header row (color coded- see the requirements below) of each column in the template contains the field name associated with the corresponding field within the Admin Console.
The second row states whether the data is required.
- Required (green) – This field is a category data point necessary within Optimizely Configured Commerce
- Recommended (yellow) – This field is recommended, but not necessary to create a viable record in Configured Commerce
- Optional (white) – This field is optional based on the configuration of Configured Commerce features
The third row contains a brief description of the field and any necessary instruction.
The remaining 3-4 rows contain sample data.
NotePrior to performing an import with a template, there are two important steps to complete:
- All the cells in the template must be formatted as text in order to upload successfully.
- All informational/sample rows, with the exception of the top row (column headers), should be removed.
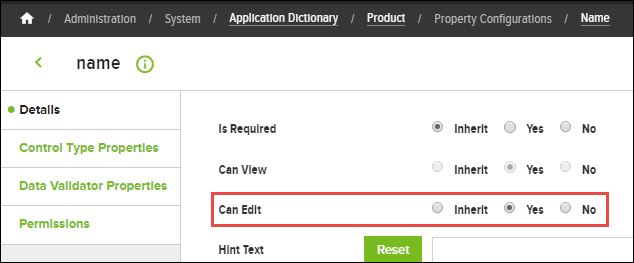
If importing the Name field of the Product is desired, the base values in the Application Dictionary need to be overridden.
- Go to Admin Console > System > Application Dictionary.
- Search for Product.
- Click the Properties finger tab.
- Search for Name.
- Select Yes for Can Edit.

Once overridden, the Name column can be added to the import spreadsheet and the values can be populated.
Include multiple product images in an import
The Product import template includes several image columns:
- ProductImage1.Small?Image - Optional
- ProductImage1.Medium Image - Required
- ProductImage1.Large Image - Optional
- ProductImage1.Alt?Text - Recommended
- ProductImage1.Name - Optional
If the column names don't include the numeral 1 in the naming convention, the import will assume the unnumered image data is the first in the sequence. If there is both unnumbered image data and image data that has the number 1 association, the number 1 will overwrite the unnumbered image data.
To import more images, you would need to add additional columns maintaining the same naming conventions. These columns need to be in sequential order, however, they can omit numbers. For example, if you were wanting to replace images 1 and 3, and keep image 2 as is, you would just skip the image 2 data.
Updated 5 months ago
