Create a microsite
Describes how to create a microsites in Optimizely Configured Commerce.
Creating a microsite and deploying it on a new sub-domain URL does not require a new domain registration; however, a public DNS entry is usually required. The new sub-domain will require a public DNS CNAME record of the same value as the pre-existing live domain (or an A Record potentially, but usually a CNAME). This is done either in the interface for the registrar, or some DNS service such as Route53, whatever is being used for public DNS.
The server on which the site lives will also need a new binding set up to accommodate the new sub-domain. This is set up in the IIS management console.
SSL also must be considered. Often times a wildcard cert is used, or a UCC SAN SSL certificate for multiple domains. That cert would then live on the load balancer, or IIS server if there is no load balancer.
The database will also need an entry for the new sub-domain.
Create a microsite using site copy
In this scenario, a user wants to copy a website to create another website. The user wants to create a microsite for specific customers and also wants to copy content from the user's main website to the new microsite. This process is used in initial development of a website and should be accessed only by developers or Insite representatives.
NoteOnly ISC_System and ISC_Implementer users can create websites. For an ISC_Admin user to create websites, they must first be given permission to access the theme entity, configured in the Application Dictionary.
Below are the steps to copy content to a website.
-
Go to Admin Console > Websites
-
Click Edit for the website that will be copied.
-
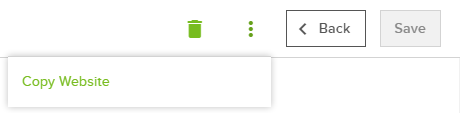
Click More Options in the Secondary Header and click Copy Website.
-
Enter the Name, Domain Names, and Microsite Identifier. The microsite identifier appends the URL (ex. knowledge.insitesoft.com/microsite). Microsite identifiers should be added for microsites ONLY, not for subdomains.
NoteIf the site is a Microsite, the Domain Name is the same as the parent site. For example, if the parent site can be accessed at knowledge.insitesoft.com, enter knowledge.insitesoft.com in the Domain Names field. Subdomains in Sandbox need to follow the form: <microsite>-<site>.insitesandbox.com.
-
Check the box if the copy is to be set as the parent website.
-
Using the checkboxes, select what content will be copied to the new website:
- Categories
Note
Copying categories can cause site slowdown, therefore it is recommended, when selecting this option, to do so during off-peak hours.
- Configuration Options
Note
This includes Website Settings.
- Promotions
- Cross Sells
- Carriers
- Countries
- States
- Dealers
- Currencies
- Languages
- Application Messages
- Bill To/Ship To Address Fields
- CMS Content
- Categories
-
Click Copy.
-
In the Primary Header, click View Website and launch the new website to verify copy success.
Updated 5 months ago