Customers
Describes customers and how to create them in Optimizely Configured Commerce.
Customers in Optimizely Configured Commerce contain customer information (such as Address, Phone Number, and so on.) and are assigned to a User. Customer records are versatile and accommodate the following models:
-
Single Customer to Single User (such as a typical B2C or direct B2B relationship)
This is the default option when a customer creates an order.
Single User to Multiple Customers (for example, B2B implementation where a sales rep needs the ability to place orders for multiple customers)
-
Multiple Users assigned to a single customer (such as a department store with multiple buyers)
Customers can be added to the Admin Console in four different ways:
- Prepopulated through an ERP integration.
- Uploaded using a template.
- Automatically when a new customer creates an order.
- Manually via the Admin Console.
Create a customer
-
Go to Admin Console > Customers.
-
Click Add New Customer in the Secondary Header to create a new customer.
-
Complete the Customer Information under the Details tab. At a minimum, the following fields should be populated: Customer Number, ERP Bill To Number, Company Name, First Name, Last Name, Address 1, City, State, Postal Code, Country, Email, and Phone.
-
To set the Customer as active, ensure the Active toggle reflects Yes.
-
Under the Other Information header, populate the fields as necessary. At a minimum the Primary Sales Rep should be selected from the drop-down menu.
NoteEnsure the Bill To and Ship To toggles reflect if the Customer records are Bill To, Ship To, or both. When linking a Bill To Customer to a Ship To Customer, they must share the same customer number. Also, the Bill To Customer's "Customer ShipTo" number must > be blank, and the Ship To customer's "Customer ShipTo" number must be populated.
-
Click Save & Add New in the Secondary Header to save the changes.
After the new Customer record is created, additional information can be added to the Customer record. The Customer can be assigned all of the following: Users, Billing Information, Products, Product Restrictions, Restricted Websites, Carriers, or other properties as needed.
Create multiple Bill To Addresses for a customer
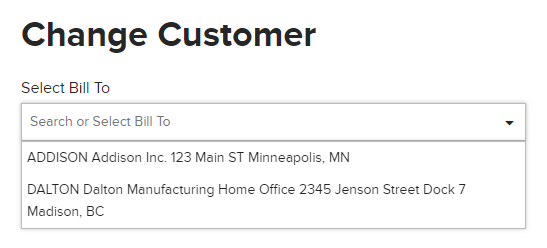
Create and assign multiple Bill To's to a customer to allow the user to select from a list of Bill To addresses upon sign in. To create multiple Bill To's, follow the instructions above, and mark the record's Bill To toggle as YES. Then, create a second customer record with the same Customer Number. Add a Customer ShipTo Number, and mark the record as a Bill To. Save the record, and assign both records to a user. Sign in to the website with that user's information, and the system prompts you to select one of the two assigned Bill To's.
Import customers from a file
One way to create customers is to export the existing customer list. Even if the current list is empty, export it, then populate the list with the new customers and re-import it back into the Admin Console. Exporting a blank or populated customer list ensures you are working with the correct headings and data columns.
-
Go to Admin Console > Customers.
-
Click Export in the Primary List Header.
-
Open the exported Excel file and populate the necessary information:
- Customer Number
- Customer Ship To Number
- Company Name
- First Name
- Last Name
-
Save the Excel file.
-
Click Import on the Secondary Header.
-
Select the file and make your selections in the Import Options section.
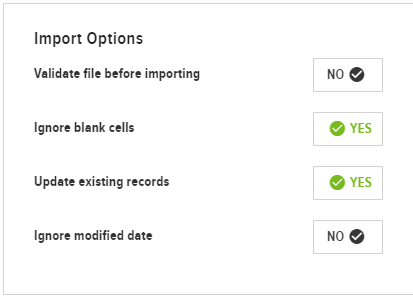
- Validate file before importing forces the integration service to check the data for errors before importing. If there are any errors, the entire import fails.
- Turn Ignore blank cells to NO to allow the imported records to remove existing data. This option is used when an import should update existing records. For example, remove the data in the Deactivate On column, then upload the promotion records. The import recognizes the blank cells, and removes the existing Deactivate On dates from the system.
- Select Update existing records to push changes from the import file to preexisting records, like a promotion rank change.
- Finally, Ignore modified date allows the import data to override that section's existing data.
-
Click the Import .
-
The import job is submitted to the job queue and customers are added upon success of the integration job.
Updated 5 months ago