Translate fields
Describes how to translate individual commerce objects fields, such as Products, Promotions, or Categories in Optimizely Configured Commerce.
Field translations translate individual commerce objects fields, such as Products, Promotions, or Categories in Optimizely Configured Commerce. Translations can be managed at the record level, using the Field Translation icon and or through the Field Translation screen, where all field translations are stored. Changes can be made in either location, as they linked back to the same database table. Use the steps below to provide any necessary translations.
NoteTranslations can be included as part of an integration job or they can be managed manually.
Translate fields using the field translation icon
As stated above, wherever the Field Translation icon is displayed within the Admin Console a translation can be provided.
-
Go to the Admin Console,
-
Go to the screen that contains the field needing a translation.
-
Click Field Translation.
-
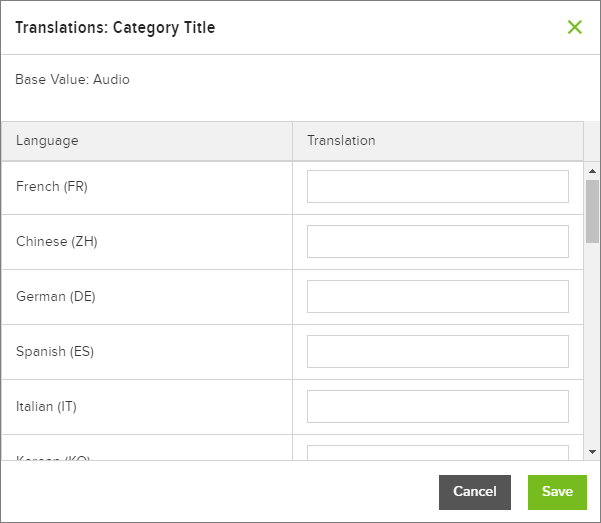
A new window appears with the languages assigned to the website. Select the desired language to translate.
-
Enter in the translation for the Base Value in the Translation field.In this case the Base Value is "Audio", so "l'audio" would be entered into the French field.

The Base Value appears in the top right of the Translations window.

-
Click Save.
Use the field translation screen
When updating a field translation using the Field Translation screen, first make a note of the actual text on the website that needs translation and then, within the Admin Console > Field Translation screen, search for that text. This is further explained in the steps below:
-
Go to Admin Console > Administration > Localization > Field Translation.
-
If the desired record is not found, click More Options and select Generate Records from the menu to generate an updated list of translation records.
-
Switch the Only Show Missing Translations toggle to On.
-
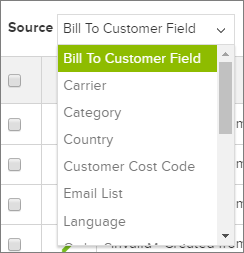
Select the Source table that contains the fields to be translated.

-
Change the Search filter to Original Text and search for the desired text.

-
At this time it may be helpful to sort on the Original Text column by clicking the column header .
-
Click Edit for the desired field.
NoteAs multiple languages may exist, be sure to select the record with the desired language.
-
Enter the translated text in the Translation field.
For reference, Base Value is the Original Text
-
Click Save.
Updated 5 months ago
