Widgets and device-specific content
Describes widgets and device-specific content in Optimizely Configured Commerce.
Based on their mobile access strategy, organizations may wish to use widgets to change the way page content is displayed on various devices. Keep in mind, widgets themselves do not support the targeting of specific device types or other variables. Despite this, it is still possible to provide device-specific content.
For the purposes of this article, the focus is on the Rich Content widget.
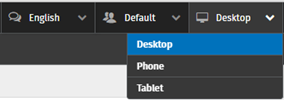
First, using the device selector menu, choose the device type where content is to be displayed.
Second, add a widget to a page using the standard steps below:
-
Hover over the CMS icon and click Show CMS.
-
Click Show Content Tree.
-
Using the chevrons, expand the menu and select the page that will host the widget.
-
Click Edit to expose the page editing options
-
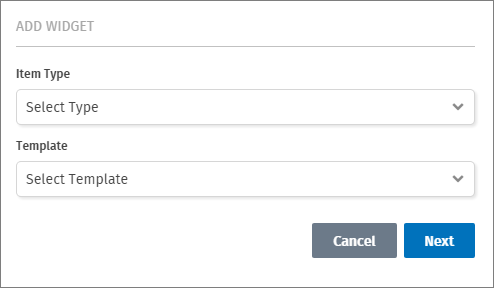
Click Content Add, which opens the Add Widget menu.
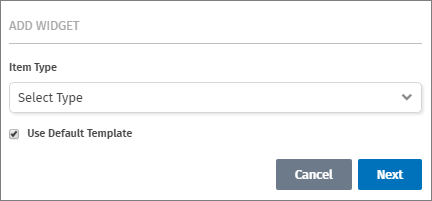
 Note
NoteIn Configured Commerce 4.3, the Add Widget menu appears like so:
Select Rich Content from the Item Type menu and choose Next.
-
Add the Css Class (optional).
-
Enter the desired content in the WYSIWYG editor
-
Click Save.
Third, select the device type where you do not want content displayed and follow the steps below:
-
Click widget Edit.
-
Clear the content, and type a space in the text editor.
NoteAdding the space is necessary, as the WYSIWYG editor requires that there is content in the text area.
-
Click Save.
-
Click Publish.
-
Approve the publishing, by clicking Publish.
-
Click Edit in the upper left corner to hide the page editing options.
-
Test the results by toggling between the device types.
Updated 5 months ago