Manage lists
Describes how to manage lists in Optimizely Configured Commerce.
Website users may create Lists to save and manage products they plan to purchase in the future or keep a static list of products they purchase frequently. These lists can be accessed on the website under My Account.
List settings
-
Allow Multiple Lists – Yes/No values - If Yes, the website prompts users to choose a list or create a new one when adding a product to a list; users may copy lists; and a page with a summary of all user lists is accessible under My Account. If no, the user is allowed only one list, and lists may not be copied or shared.
-
Allow List Sharing – Yes/No values - If Yes, list owners can send a copy of their list to others, or invite others to view or edit a list.
NoteIf Allow Multiple Lists is set to No, Allow List Sharing is hidden.
-
Setting Wishlists by Customer has been deprecated, and is no longer available.
Access lists
To access lists, log in to the website as a website user, or impersonate a user through the Admin Console's Impersonate function. Hover over the My Account menu, and select My Lists.
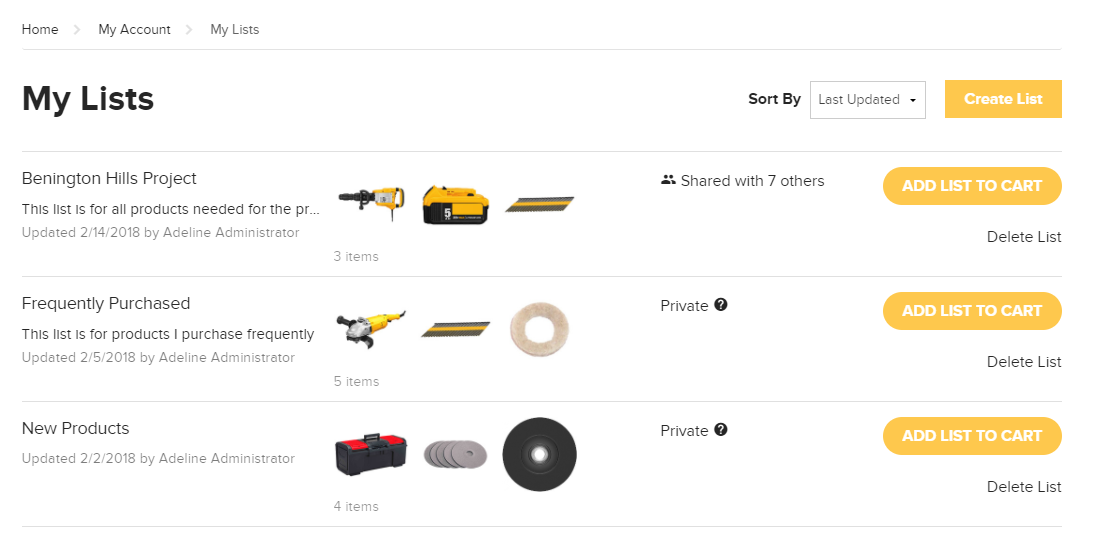
- Click a list's linked name to view the list's Details Page.
- Select one of the items shown to access the item's Product Details Page.
- Select the Shared with... or Shared by... links to manage or view sharing permissions
- Choose a Sort By option from the drop-down to sort the lists by Last Updated, List Name: A-Z, or List Name: Z-A.
- Select Create List to create a new list.
- Select Add List To Cart to add all items to the cart at the specified quantities. If the list has no purchasable items in it, this button is grayed out.
- Click Delete List to delete the list. On a list that has been shared with this user, this link changes to Leave List.
List details page
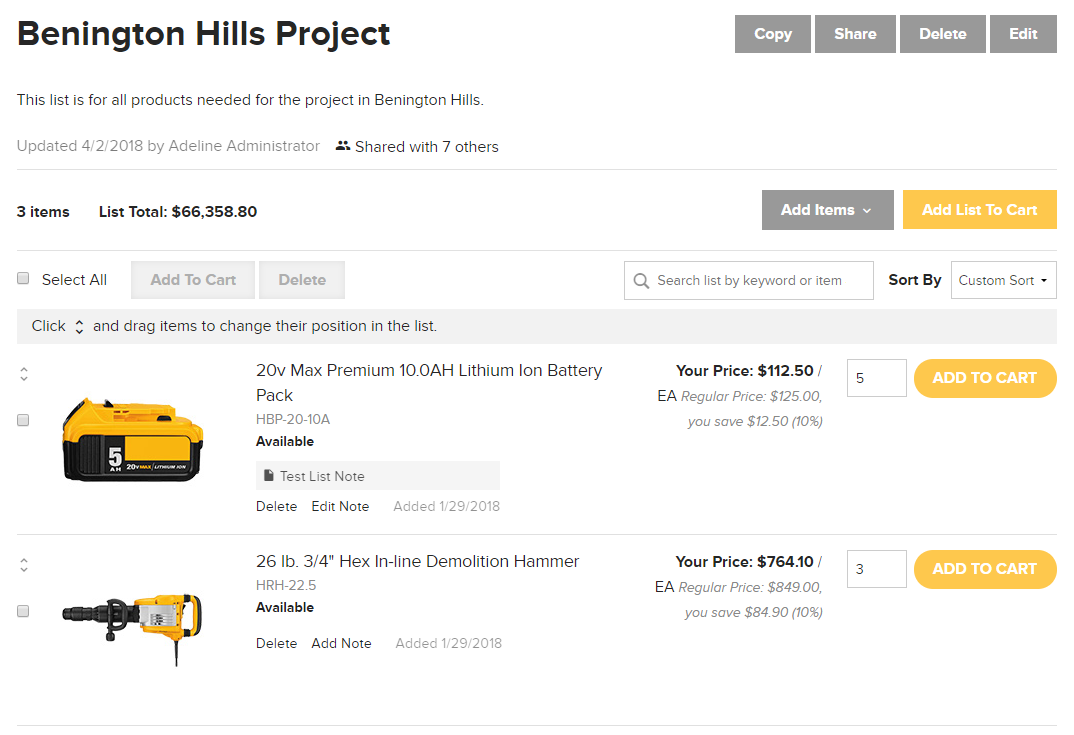
Select the list's linked name to view the list's Details Page. Use this page to modify a specific list, copy it, or share it with others.
List action buttons
-
Select Copy to copy the list's items to a new or existing list. Select an existing list, or enter a new list name. Click Copy to List.
NoteCopying items to another list does not remove them from the current list.
-
Select Share to send a copy of the list to selected users, or to allow selected users to view or edit the list. See Share a List for more information on sharing.
-
Select Delete to delete the list. If the user is accessing a list that has been shared with them, and they do not have editing permissions, this button does not appear.
-
Select Edit to edit the list name and description. If the user is accessing a list that has been shared with them, and they do not have editing permissions, this button does not appear.
Other list actions
-
If the list is being shared with others, select Shared with... at the top of the screen to edit sharing permissions for the list.
-
Select Add Items to reveal a drop-down like the Quick Order widget. Search for an item by keyword or item number, enter the quantity and unit of measure (if applicable), and click Add To List. Or, select Upload Items to upload an Excel or CSV file of products.
-
Select Add List to Cart to add all items in the list to the cart.
NoteThis action does not remove the items from the list.
-
Select the Select All checkbox to select all items in the list, or select individual check boxes to choose a specific number of items. Click Add To Cart to add the selected items to the cart, or Delete to delete the selected items. These action buttons appear at both the top and bottom of the list. You should complete these actions before moving to another list page for any selected items, as they only apply to selections on the current page.
-
Use the Search bar to narrow list results by keyword or item number.
-
Select the Sort By drop-down to sort the list by Custom Sort, Date Added, Product: A-Z (product name field), or Product: Z-A (product name field). If Custom Sort is selected, click and drag the up and down arrows to arrange products manually. This order is retained, and reappears whenever Custom Sort is selected.
If a product is no longer available due to being deactivated or discontinued, a message appears notifying the user the products has been removed from the list. If products are unavailable due to product restrictions set on the user's active customer, a notification appears at the top and allows the user to elect whether to remove the products from the list.
Create a new list
There are multiple ways to create a new list. The most common is creating a new list from the Product Detail Page. After accessing the website as a user, or impersonating a user using the Admin Console's Impersonate functionality, complete the following:
- To create a new list from the Product Detail Page, browse or search for a product.
- Select Add to List .
- Select a list from the drop-down, or create a new list.
- Click Add to List.
Alternately, go to My Account > My Lists, and select Create List.
Updated 5 months ago