Languages and contextual content
Describes languages and contextual content in Optimizely Configured Commerce.
Set default languages
The CMS (Content Management System) Edit Mode in Optimizely Configured Commerce lets you switch displayed languages and preview translated content.
Widgets that have language variants will display the language that has been selected. However, if an language variant does not exist, the widget will display the default language.
The default language is controlled in the Admin Console under Administration > Localization > Languages. See the related articles on Multi-Languages and Translations in the Localization section.
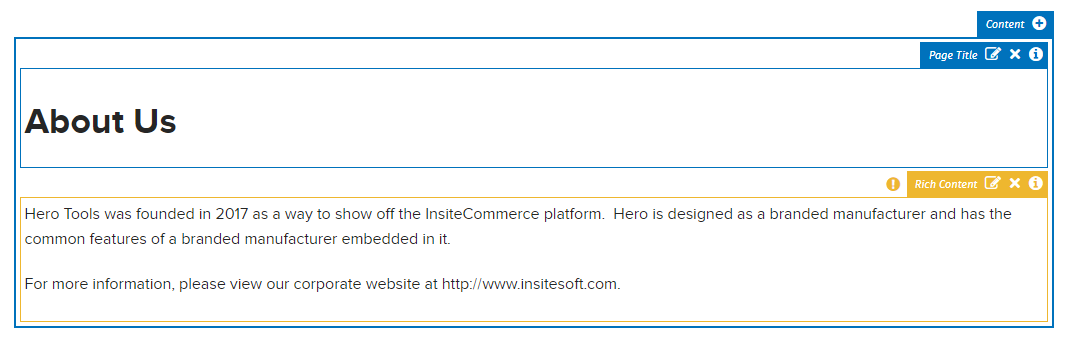
In the following example, a website has two language variants set up: English and French. On the About Us page of the site, there is a Content zone with two widgets: PageTitle and RichContent. The RichContent widget currently only has an English variant, so when English is the selected language, we see the following:

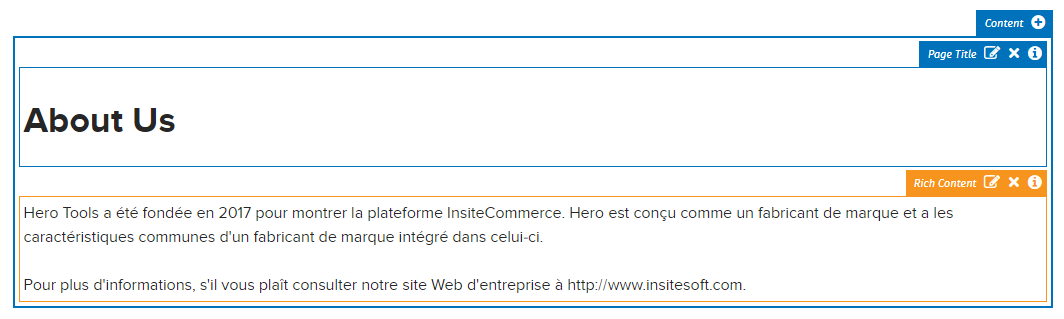
Now, if we change the displayed language to French, we will still see the same English message because there is not a French variant and English is the default language. However, in the screenshot below, notice that the widget has changed from orange to yellow and an exclamation icon is displayed to the left of the widget toolbar.
This color change and icon indicate that default language variant is being presented because there is not a French language variant available.
Finally, if we add a French language variant to the RichContent widget, and French is the displayed language, we are presented with the French variant and the color of the widget returns to orange and the exclamation icon disappears.
Work with language variants
Multiple language variants provide site visitors with a more tailored experience, providing them the information they need in their preferred language. To manage this, update site widgets with the desired language variants.
NoteApply a non-default language variant to the site before continuing. Read the article on adding additional languages for more information.
-
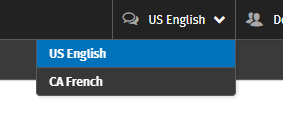
Change the site's language.
-
Hover over the CMS icon and click Show CMS in the upper left hand corner of the website.
NoteTo change content in the CMS, a user must be assigned an ISC_Content role (ISC_ContentEditor, ISC_ContentApprover, or ISC_ContentAdmin) or the ISC_FrontEndDev role.
-
Click Content Tree and select the page containing the widgets to be modified.
-
Click Edit.
NoteWhen a widget displays content for the default language rather than the selected language, that widget is outlined in yellow and an exclamation point icon appears. This indicates that content does not exist for the selected variant language, so the default language is displayed.

-
Click Edit on the widget to be modified.
-
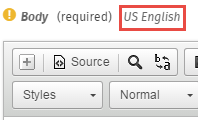
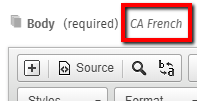
A yellow exclamation point displays next to any field name displaying the default content. The field also shows the default language (outlined in red below) currently displayed.
-
Add content in the appropriate language.
-
Click Save. The language variant is now displayed, the outline around the widget is now orange, and the exclamation point is gone.
-
If you click Edit again on the modified widget, the field now shows the variant language.
-
Test this by switching back and forth between the languages, using the language selector the top of the screen.
Updated 5 months ago