Security - Platform
Describes how Optimizely Configured Commerce processes user and customer security.
Optimizely {user["product-name"]} uses Identity Server and the OWIN middleware to authenticate requests to the platform. This contains information that shows how the security architecture is applicable in varying scenarios such as site access and calls to the RESTful API's.
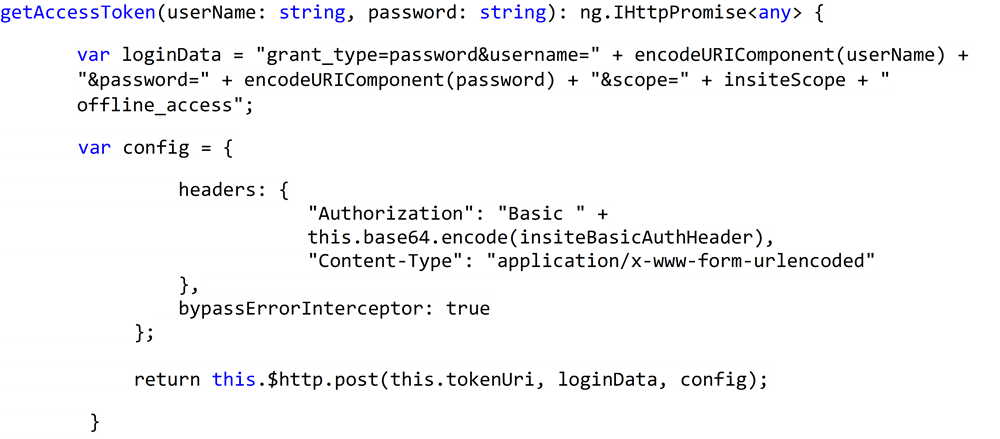
The Session service has a method called getAccessToken. This provides a bearer access token to use for future requests.
There is custom code in IDS that validates the username, password, and scope which cannot be overridden.
OWIN middleware sits in between the {user["product-name"]} API and IIS. It validates all the requests and it is using an Identity Server Token Authentication OWIN middleware that will look for this bearer token in the header and validate it. Once the calls go into IIS it will then process through the OWIN workflows. This is also where the cookie authentication middleware takes place.
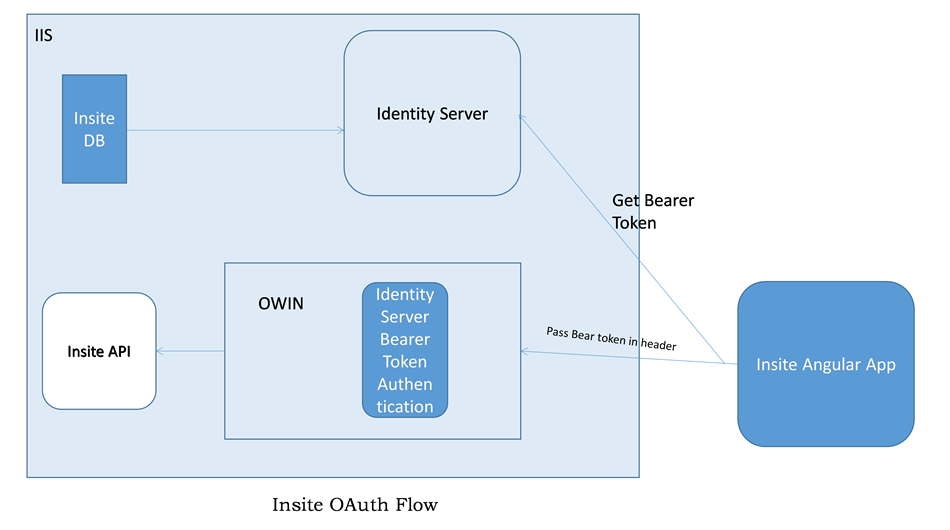
Get a bearer token
To get a bearer token in the angular application, call the getAccessToken method on insite.session.service.ts.
Send bearer tokens
Once a token has been given to the client, it is sent with every request to the website. This bearer token is attached to the request by an interceptor. The code that does this can be found in insite.authenticationinterceptor.factory.ts
Timeout settings
To maintain compliance with PA-DSS, {user["product-name"]} controls the timeout periods for the website and Admin Console separately. These settings are built into the platform and are not configurable through the Admin Console.
Website timeout settings
By default, the website is set to timeout after 20 minutes of inactivity.

NotePA-DSS requires a timeout of 20 minutes or less, so if the client accepts credit card transactions, this should not be overridden.
Admin console timeout settings
By default, after 12 minutes of inactivity, the user will receive a notification they will be logged out soon. After 15 minutes of inactivity, the Admin Console will timeout and log the user out of the console. It will then redirect the user to the login screen and once they sign in again, it will return them to where they left off.
Because some clients will not be taking credit cards as a form of payment and will instead rely on purchase orders, being able to adjust the time settings may be necessary. However, it is important to understand that changing timeout settings could possibly cause a site or environment to fall out of compliance with security standards such as PA-DSS.
The timeout settings for the website can be found in the SecurityOptions.AuthenticationCookieLifetimein the Startup.Auth.cs class.
And for the Admin Console, the settings for the startInactivityTimer() function are located in the admin-session-service.ts file.
Account lockout settings
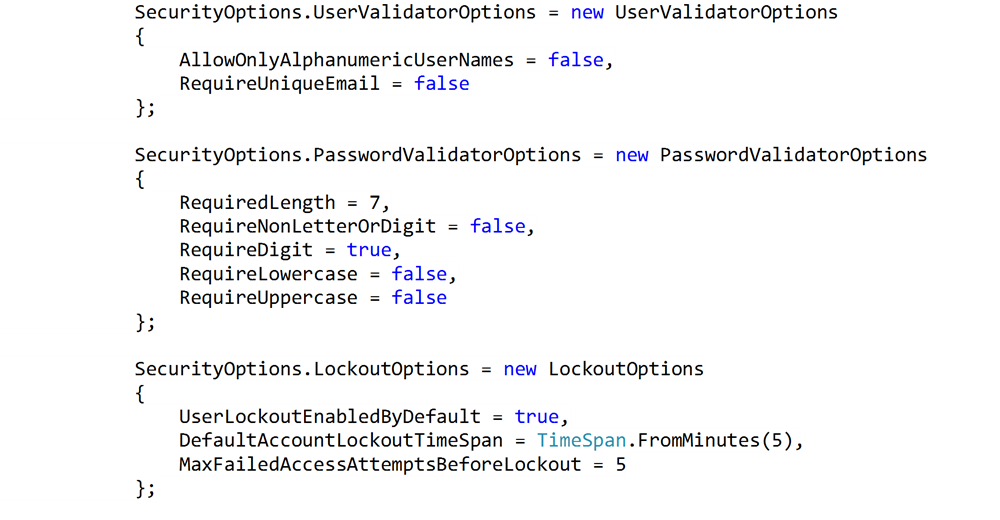
User lockout is built into Identity Server, which is enabled by default. When enabled, Users who make five sequential failed login attempts will be locked out for a period of five minutes. After the five-minute period has expired, the User will have five more attempts to login. If those fail, the User will be locked out for an additional five minutes.
This cycle repeats until a successful login is made.
The settings to modify the user lockout are found in the Startup.Auth.cs files in the
App_Start folder.
Searching for LockoutOptions exposes the following three options:
- Enable lockout or not
- Default Lockout Timespan
- Max Failed attempts before lockout
Configure appsettings
The following app setting have to be set in the appSettings.config file.

- IdentityServerUrl: The url of the identity server. This defaults to websiteurl/identity
- IdentityServerCertificatePassword: The password for the client certificate.
- IdentityServerSkipUrlValidation: This needs to be set to true if identityserver is disabled.
Certificate
Identity server uses certificates to sign the authentication tokens. This certificate can be a self-signed certificate and should not be the certificate that's used for website SSL. The signing certificate is set on the IdentityServerOptions using the SigningCertificate property.
Below is a batch command to create a self-signed certificate. The -e parameter sets the expiration date for the certificate.

Once the certificate is installed the on the server, the Personal Information Exchange (.pfx) files has to be exported from the certificate store and stored at the @"~\App_Data\insiteidentity.pfx." Additional information on how to create certificates and export the Personal Information Exchange files can be found at the following link.
https://technet.microsoft.com/en-us/library/dd261744.aspx
Startup.Auth
Configure identity server
The options to configure IdentityServer are set in the Startup.Auth file.
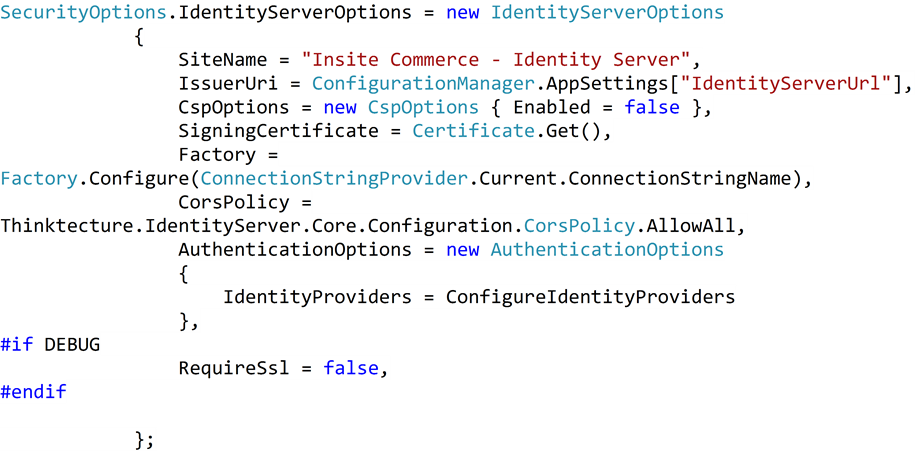
Set RequireSsl to false to allow non-SSL connections between the load balancer and IdentityServer.
Set IssuerUri to the public Url Name if the application is hosted on a web farm.
Username and password options
Clients often have custom username and password requirements for their applications. Here is an example of the out of the box options:
Angular.js
Most of the changes for setting up the security is done on the server, so no changes are needed on the Angular app.
External authentication
{user["product-name"]} supports Windows, Google, and Facebook login out of the box.
Facebook
Facebook authentication is enabled by toggling the Allow Sign in with Facebook Account setting to show YES
The credentials to connect to Facebook are stored in the following settings:
- Facebook App ID
- Facebook App Secret
Google
Google authentication is enabled by toggling the Allow Sign in with Google Account setting to show YES
The credentials to connect to Google are stored in the following settings:
- Google Client ID
- Google Client Secret
Windows
Windows authentication is enabled by toggling the Allow Sign in with Windows Account setting to show YES
Two additional toggle settings exist to control whether a Windows account can be used to log into the Storefront and/or the Admin Console:
- Use Windows Sign In on Storefront
- Use Windows Sign In on Admin Console
Use the Windows Metadata URL setting to store the address to retrieve WsFederation metadata.
Customization
Configure a custom external OAuth provider
In addition to Facebook and Google {user["product-name"]} platform can be extended to use other OAuth providers.
These are the steps to extend {user["product-name"]} for installing a new authentication provider(Twitter).
-
Install the OWIN package for the Oauth Provider using nuget package manager. Eg: Install-Package Microsoft.Owin.Security.Twitter
-
Within the startup.Auth file create a new method to configure the authentication provider
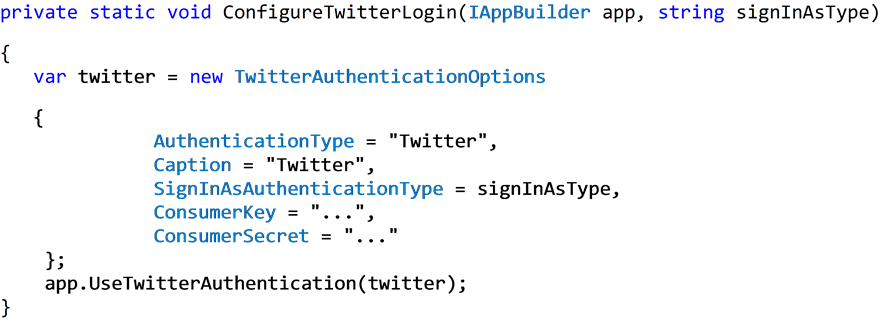
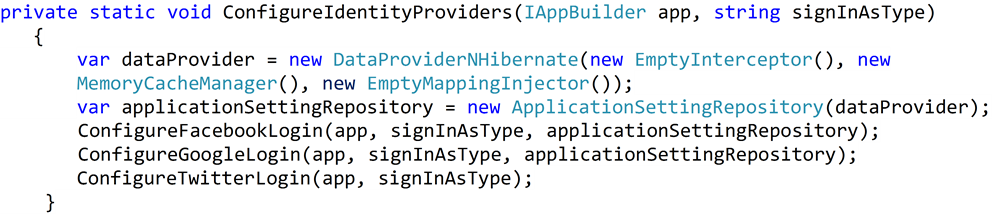
-
Add the new Configuration method to ConfigureIdentityProviders
Updated 23 days ago