Create a custom integration processor for order submit
Describes how to create a custom integration processor for order submit and configure the Optimizely Configured Commerce Admin Console for the integration job.
In this article we are going to create a custom Integration Processor for Order Submit, and configure the Admin Console for the integration job. This example uses a local SQL Server database as a fake ERP to complete the job. This job will work for any ERP of your choice.
NoteAll source code and db scripts used in this article can be found in the attached zip file so you don't have to re-type anything.
The first step for creating a custom Integration Processor is to ensure that Optimizely {user["product-name"]} and your respective ERP have established a connection. See screen shot below for a sample integration job connection:
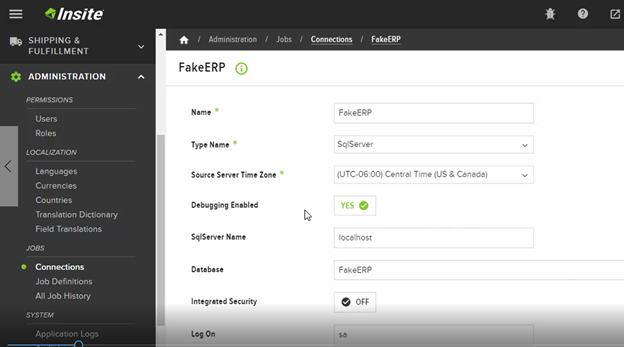
NoteIn this example the backend ERP is a SQL Server database hosted locally.
The next step is to create the integration definition for the job. Submitting order data requires several parameters and steps specifically configured for the order submit type of integration job. When a customer clicks the Check Out button, {user["product-name"]} looks for a job called Order Submit. Because of this, an Order Submit job must be created to fulfill this request.
Create an order submit job
-
In the Admin Console, go to Administration > Jobs > Job Definitions.
-
Click Add Job Definition to create a new job.
-
In Job Name enter Order Submit.
NoteThis job must be called Order Submit due to the way {user["product-name"]} Handlers search for the job. To name the job something else, the handler must be overridden.
-
In Job Type, select the Submit value.
-
In Connection, enter in the connection value. In this example the connection value is FakeERP.
NoteThere are three processor types: Preprocessor, Integration Processor, and Post Processor. Each processor has several different fields available.
-
In Preprocessor select GenericSubmit. (GenericSubmit populates the CustomerOrder table. Using the out of the box GenericSubmit, requires a parameter in the job step called Order Number.)
-
In Integration Processor select the value None.
NoteWe will change this value later, once we've written our custom integration processor to describe what is happening in the WIS.
-
In Post Processor select the ProcessSubmitResponse value.
-
Click Save to complete saving the job.
-
Go to the Steps finger tab.
-
Click Add Job Definition Step to add a new step.
-
In Sequence, set the value to 1.
-
In Step Name, enter in the value SubmitOfAnOrder.
-
In Target Object, select the Cart value.
NoteWe select the Cart value because it will resolve to the Customer Order entity.
-
Click Save. Clicking Save lets you access the Job's Parameter and Field Mapping fields.
-
Click the Job Step's Parameters finger tab.
-
Click Add Job Definition Step Parameter.
-
In Name, enter in the value OrderNumber.
-
In Default Value, set the value to 0. This is the value if someone wants to run the job from within the Admin Console.
-
In Prompt, enter in the message that will be shown when users run the job from the Admin Console.
-
Click Save to save the job parameter.
Create a custom integration processor within Visual Studio
At this point, we are now ready to create our custom integration processor.
-
From within Visual Studio, create a new class library called Training.Integration.
-
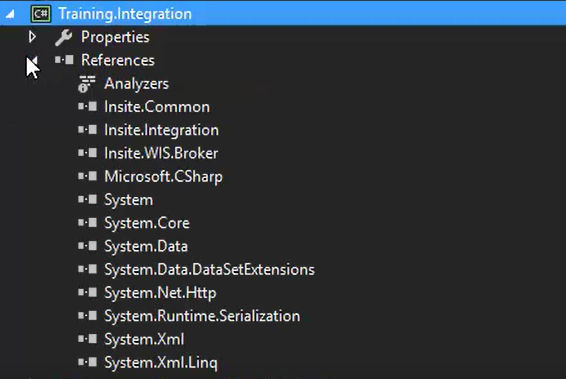
Add these references to the class library:
- Insite.Common
- Insite.Integration
- Insite.WIS.Broker
The insite. references are required by {user["product-name"]} methods, while System.Runtime.Serialization is needed due to the way {user["product-name"]} uses data sets.
-
Add a new class called IntegrationProcessorFakeERPSubmit.
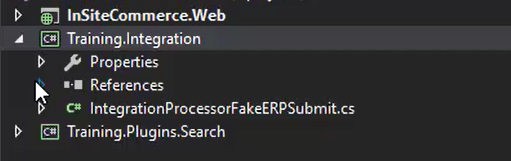
If you start the beginning of the class name with "IntegrationProcessor", then by convention the system will use whatever is after "IntegrationProcessor" as the name of the Integration Processor in the drop down list located in the Admin Console on the Details tab of the integration job. So in this example the Integration Processor drop down list will contain the value of "FakeERPSubmit".
Now that the class has been created, the class needs to be groomed.
-
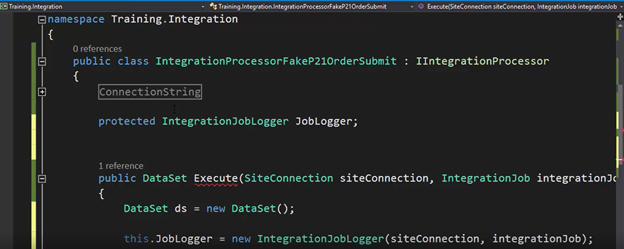
Implement the IIntegrationProcessor interface.
-
Implement the ConnectionString.
-
Add a Job Logger. The Job Logger is able to provide alert messages, information, warnings, and so on.
-
Implement the execute method.
-
From within the execute method, create a data set that can be set up and returned. The parameters that were created earlier (siteConnection, integrationJob, JobStep) are passed along and contain the information that is required, including the data set.
-
Create "this.JobLogger = new IntegrationJobLogger (siteConnection, integrationJob);"
-
-
Capture the data set that was passed over from the integration job preprocessor using "var initialDataset = XmlDataset.convertXmlToDataset (integrationjob.InitialData)". This XML dataset comes with the Insite.Common.Helpers library.
-
Grab the data row for the customer order using "var dataRowCustomerOrder = intitialDataset.tables [Data.CustomerOrderTable].Rows [0];"


-
Define the customer and order numbers using, "string customerNumber = dataRowCustomerOrder [Data.CustomerNumberColumn].ToString ();" and "string orderNumber = dataRowCustomerOrder [Data.orderNumberColumn]. ToString ();"
NoteThis example has a simple orders table containing two columns: OrderNumber and CustomerNumber. Other fields could be added, however for this example these are the only fields we are gathering.
-
Call to SQL using "string sqlString - String.Format("INSERT INTO.Order (OrderNumber, CustomerNumber) VALUES ('{0}','{1}')", orderNumber, customerNumber).
-
Create a SQL connection using the connection string crated earlier, "SqlConnection sqlcnn = new SqlConnection(cnn);
-
Create a SQL command with the connection string using, "SqlCommand cmd = new SqlCommand (sqlString, sqlcnn);
-
Add a log entry to tell users that work has been completed, "JobLogger.Info("Finished Processing Order.",);
-
Open the Connection. "sqlcnn.Open();
-
Run the SQL command. "cmd.ExecuteNonQuery();
-
Close the connection. "sqlcnn.Close();
-
Return the initial data set. "return initialDataSet;"
-
Build the project. Once the build completes go to the Training.Integration folder within your project and copy the Training.Integration.dll file.
-
Go to the install path of the WIS and paste the Training.Integration.dll file into your dll folder. (Make sure to stop the WIS service first before copying in the dll file. Once the file is in your dll folder then start the WIS service again.)
-
Verify in your WIS logfile.txt that you see the following: "Found Custom Integration Processor FakeErpSubmit, registering in Unity".
-
Return to the Admin Console to complete the configuration of the integration job definition.
-
Go to the Order Submit job built earlier.
-
In the Integration Processor field select the newly created processor "FakeErpSubmit."
If properly set up, a newly completed order will write a record in your FakeERP Orders table.
Updated 23 days ago