Add instructional text to checkout address page
Describes how to add instructional text to checkout address page in Optimizely Configured Commerce.
With most widgets, you can add additional content zones to allow for Optimizely {user["product-name"]} users to add content. One place that could benefit from additional content is the Checkout Address page. This task requires the following customizations:
- Create a custom CheckoutAddressView widget template and add a content zone
- Configure the custom CheckoutAddressView widget template as the default template
- Add content to the new zone using the Content Management System (CMS)
Preconditions
- Visual Studio and SDK installed
- One or more products and categories configured (this is only required if you want to view the workflow on the Storefront)
Create a custom CheckoutAddressView widget template
-
In Visual Studio, find your theme project.
-
In the ~\Views\Widgets\CheckoutAddressView directory, make a copy of the Standard.cshtml file and name it Custom.cshtml.
-
Open Custom.cshtml.
-
Find the <form id="addressForm"> tag.
-
Right above that tag, insert a new content zone using the zone DotLiquid tag. Give the zone the name "Instructional Text". {user["product-name"]} ships with several DotLiquid tags you can use in the template.
[% zone 'Instructional Text' %]
<form id="addressForm" name="addressForm" ng-show="vm.countries">    ...
</form>
Right now, this custom widget template won't display anywhere on the Storefront. First, you need to set it as the default template for the CheckoutAddressView widget.
Configure the custom CheckoutAddressView widget template as the default template
-
In your theme project, find the theme.json configuration file.
-
In the Widgets property, add a property named "CheckoutAddressView" and set the value to "Custom". This will register your custom CheckoutAddressView widget template as the default template anywhere the CheckoutAddressView widget is used on the Storefront.
"Widgets": { // override the default template used for a widget. Standard will be used unless one is specified here. // This will make a view that lives at ~/Themes/MyTheme/Views/Widgets/HeaderView/MyCustomView.cshtml be set as the default "CheckoutAddressView": "Custom" } -
Build your solution.
Now your content zone should be displaying on the Checkout Address page. You can add content to the zone using the CMS.
Add content to the new zone using the CMS
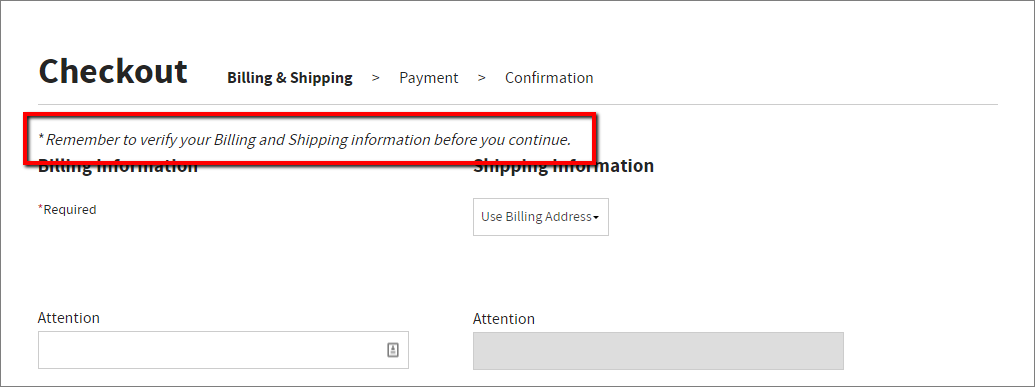
The Checkout Address page is located at Home > Cart > Addresses in the CMS Content Tree. You can log into the CMS and add content to the widget. Once you have added content, you can run through the checkout process until you reach the Checkout Address page. There, you will see your new content. Below is an example of what you might add for content on the page.
Updated 23 days ago