Modify customer address fields
Describes how to modify address fields in Optimizely Configured Commerce.
Users with ISC_System, ISC_Implementer, and ISC_Admin roles have access to website specific Bill To and Ship To Address Configuration pages. Users can configure what fields are shown, how many characters each field allows, and what fields are required for registration and checkout.
NoteAt this time, users cannot add additional fields to either table.
The following fields are designated as System Fields and cannot have their Required and Visible values modified:
- Address 1
- City
- Country*
- State**
*If a website supports only one country, the user is not required to select a country, and the Country field is hidden.
**The State field is unique in that it displays based on system logic. The State field displays and is required if states or provinces are assigned to the country the user selects. If no states or provinces are assigned to the selected country, the State field does not display. This logic cannot be modified using address configuration.
NoteYou can mark a Ship To address field as Required, while not marking it as a Required Bill To address field. If the website user selects the same Bill To and Ship To address, the Bill To address fields automatically populate the Ship To address fields, making the Ship To address fields uneditable. It is possible the system could prevent the user from proceeding through the checkout process because data is required in an uneditable Ship To field. An Insite Software best practice is to ensure Ship To fields are not required unless they also are required under the Bill To.
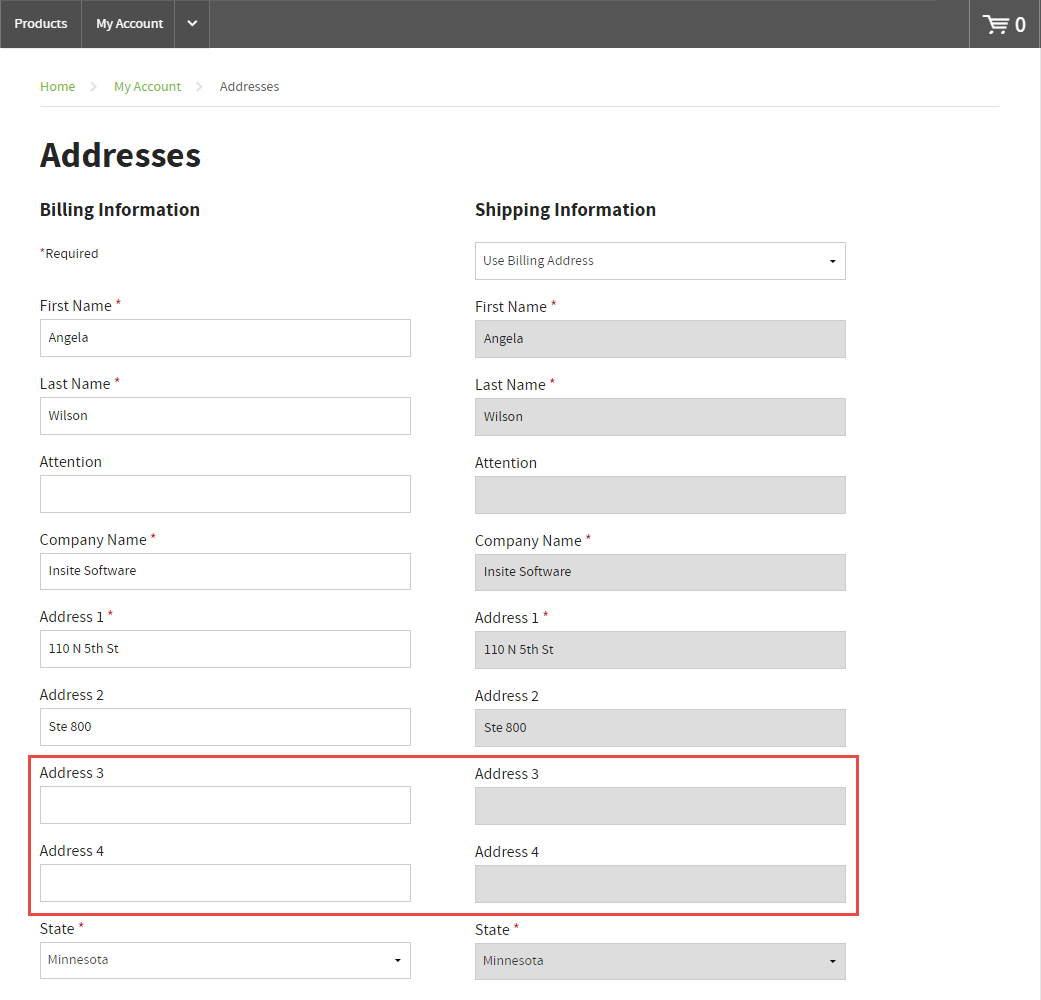
Use the following scenario to show how to modify an address field: The Address 3 and Address 4 fields are displayed by default on the Addresses page under the My Account menu.

Because they are not required, we want to remove them to keep our form as clean as possible.
-
Go to Admin Console > Websites > edit the desired Website.
-
Select the Bill To Address Config finger tab.
-
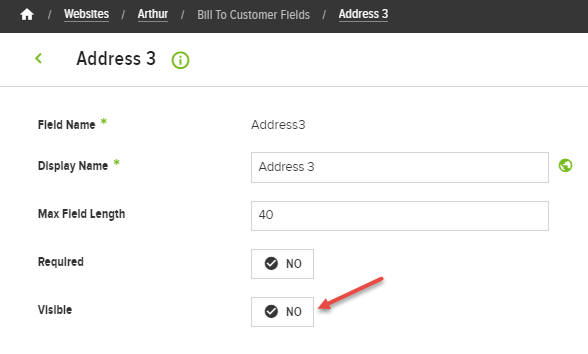
Click Edit for the Address3 field.
-
Change the Visible toggle to display NO.

- Click Save. And repeat to hide the Address4 field.
Next, we will configure the same fields for the Shipping Information address form. The steps are nearly the same, except we will start on the Ship To Address Config page.
- Go back to the Website page and select the Ship To Address Config finger tab.
- Click Edit for the Address3 field.
- Change the Visible toggle to display NO.
- Click Save. And repeat to hide the Address4 field.
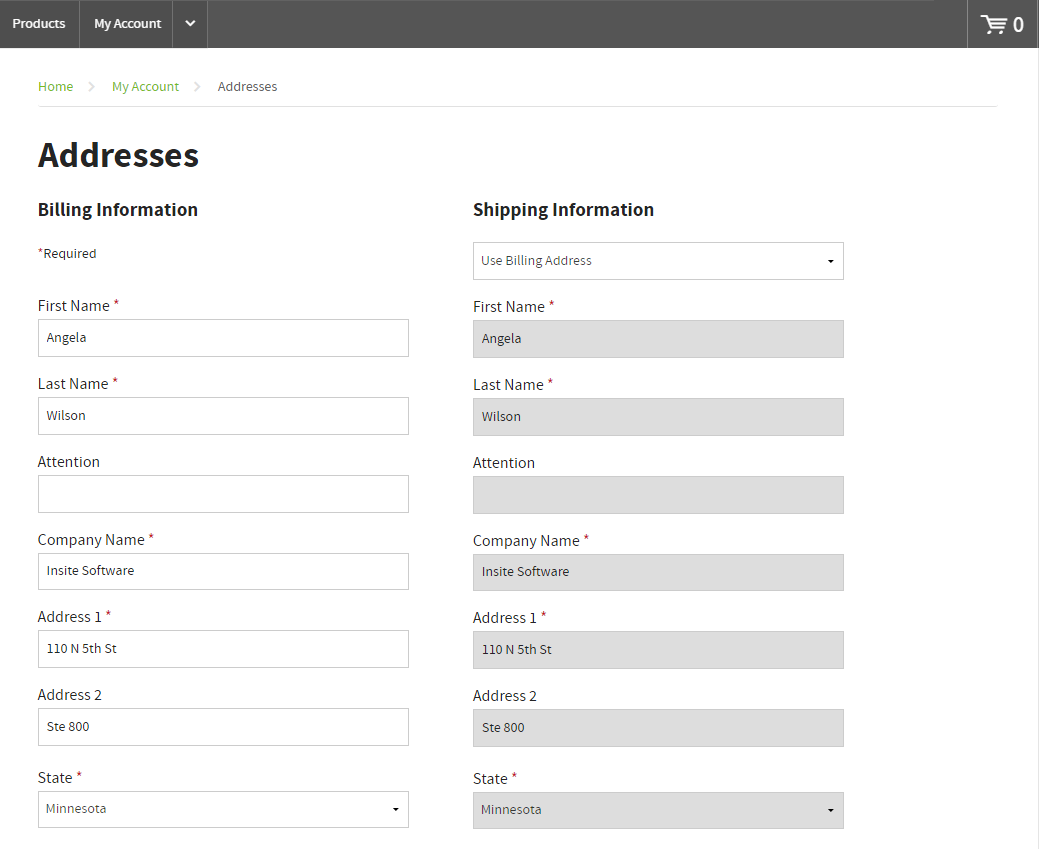
Finally, we will validate our changes on the Website.
- Log into the website
- Go to My Account > Addresses
- Scroll down to the Address 2 field.
Notice that both the Address 3 and Address 4 fields are no longer displayed for Billing or Shipping.

Updated 5 months ago
