
Share lists
Describes how to share lists in Optimizely Configured Commerce.
Share a list to allow other users to view or edit a list you have created.
Note
If a user is accessing a list that has been shared with them, and they do not have editing permissions, the Share option does not appear.
To share a list, complete the following steps:
-
On the website, go to My Account > My Lists, and select a list.
-
Select Share to send a copy of the list to selected users, or to allow selected users to view or edit the list.
-
Select Send a copy to take a snapshot of the list in its current state and send it to any valid email address. Select Allow others to view or edit this list to provide other users with a list that is updated as the current list is updated.
-
Click Next.
-
If copying, enter your name, the recipient email address, and a short message. Click Send.
-
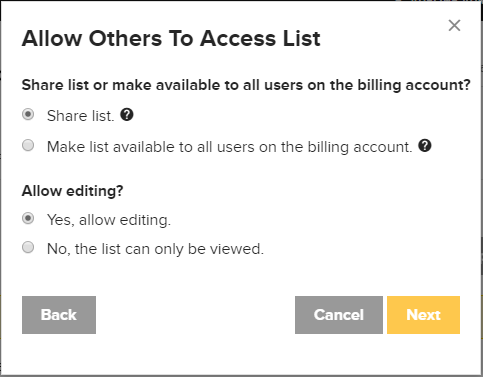
If adding others to the list, choose whether to share the list, or make the list available to all users on the billing account. Then, choose whether to allow editing. If editing is not allowed, the list will be read only - users will see a tooltip that indicates that they are unable to edit this list.
-
If sharing with all users on the billing account, select to send an email notification to users, and click Finish.
Notes
If a list is shared with multiple users simultaneously, all users receive separate email notifications.
When a new user is created within a bill to record that has a list shared with all users on the account, the new user can access the list without the list being reshared.
Once a website user has access to a list, they have the ability to adjust the sort order of the list if necessary.
Sharing permissions
As a general rule, customers without edit permissions on lists cannot update them. However, they can change the quantity of products to add a specific quantity to the cart without having to adjust quantities within the cart. They will not be able to update the saved quantity on the shared list.
Customers with edit permissions will see an Update Saved QTY button after they change the quantity of a shared list. The updated quantity only saves for the list when the customer clicks this button. Customers can update the quantity for multiple products , then click the Update Saved QTY button for any product to update and save the new quantities for all updated products.
| Action | List Owner | Edit Permission (Shared) | Read Only Permission (Shared) |
|---|---|---|---|
| Delete List | x | ||
| Print List | x | x | x |
| Copy List | x | x | x |
| Share List | x | ||
| Edit List | x | ||
| Manage Sharing Permissions | x | ||
| View Sharing Details | x | x | |
| Add Items to List | x | x | |
| Delete Item | x | x | |
| Delete Items (Bulk) | x | x | |
| Add Note to Item | x | x | |
| Edit Note on Item | x | x | |
| Add Item to Cart | x | x | x |
| Add Items to Cart (Bulk) | x | x | x |
| Add List to Cart | x | x | x |
| Edit Sort Order of Items | x | x | |
| Changes Made to Units of Measure are Saved (Opt-in) | x | x | |
| Changes Made to Quantity are Saved (Opt-in) | x | x |
Share lists with multiple customers
You can create, manage, and share lists with multiple customers from the Admin Console. This lets you target marketing efforts by sharing lists with one or multiple customers to promote products or streamline access to their most-purchased products. Customers will see lists shared from the Admin Console on their My Accounts > My Lists page, including who created and shared the list. Customers will not be able to share, edit or delete this list.
Create a list
To share a list with multiple customers, you first need to create it in the Admin Console.
-
Log in to the Admin Console.
-
Go to Marketing > Lists.
-
Click + List to add a new list.
-
Enter the list Name, Shared By and Description information on the Details finger tab.
-
Click Save.
The list management table only shows lists that have been created in the admin console.
Add individual products to a list
You can add products to the list one at a time.
-
Select the Products finger tab.
-
Click + List Product to assign products individually to a list
-
Select a product from the Product drop-down list. These fields only include products that are available for addition to this list.
-
Select the appropriate Unit of Measure.
-
Enter a value in Qty Ordered.
-
Enter a value in Sort Order based on where you want the product to appear in the list.
-
Click Save. Repeat these steps to add more products individually.
Add multiple products to a list
You can use the import functionality to add multiple products to the list at one time.
- Click the Import icon to add multiple products at once.
- Create an import spreadsheet with the following columns: Product, Unit of Measure, Qty Ordered and Sort Order. Fill-in the product information and save your spreadsheet. For more information about importing, see the Importing and Exporting Data and the Working with the Import Template articles.
- Click Choose File to search for and select your import spreadsheet.
- Click Save.
Assign or unassign customers to a list
You need to assign customers to the list for it to appear on their My Accounts > My Lists page.
-
Select the Customers finger tab.
-
Click Assign Customers or Unassign to add or remove individual customers from this list.
-
Select the customer name from the list or search for a customer name.
-
Click Save.
Any website user who has access to these customers will be able to see this list on your website.
Updated almost 2 years ago