
Manage forms
Create web forms for registrations, surveys, and applications in Optimizely CMS 13. Use form containers and elements, manage submitted data, and integrate with marketing automation.
Use Optimizely Forms to create web forms for event registrations, job applications, and customer surveys. Optimizely stores submitted data and lets you export it in multiple formats.
NoteOptimizely Forms requires JavaScript enabled in your web browser.
Access Optimizely Forms
Optimizely Forms provides two gadgets for building and managing forms in the assets panel. Add these gadgets to your panel if they do not appear by default.
To add the gadgets:
- Click Settings in the assets panel.
- Click Add Gadgets.
- Select Forms and Form Elements.
The Forms gadget displays a folder structure where you store forms. The Form Elements gadget displays available form elements that you drag and drop onto a form container.
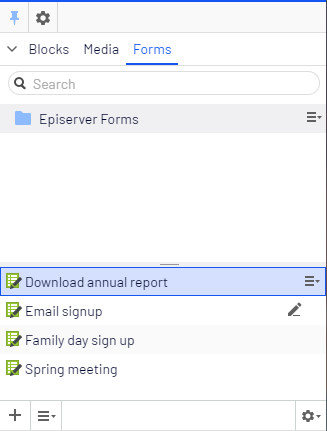
See the examples in this section to learn how to create forms.
Form containers
A form container holds the configuration and metadata for a form. Define settings such as anonymous submissions, multiple submissions from the same IP address, and confirmation pages after submission.
Form elements
Form elements define the fields, buttons, and text used on a form. Add form elements to a form container, then configure them to match your requirements. Reuse each defined form element across multiple forms or as a template.
Optimizely Forms includes predefined form elements such as text boxes, drop-down lists, radio buttons, checkboxes, and CAPTCHAs. Some form elements depend on other form elements, letting you create conditional forms that adapt based on visitor input. See Example: Create a customer satisfaction survey for an example.
Optimizely Forms supports file uploads for visitors who need to attach files such as a resume in PDF format.
Add tooltips, labels, and validators to form elements. Set form elements as mandatory or optional. Create multi-step forms where the steps change based on visitor input.
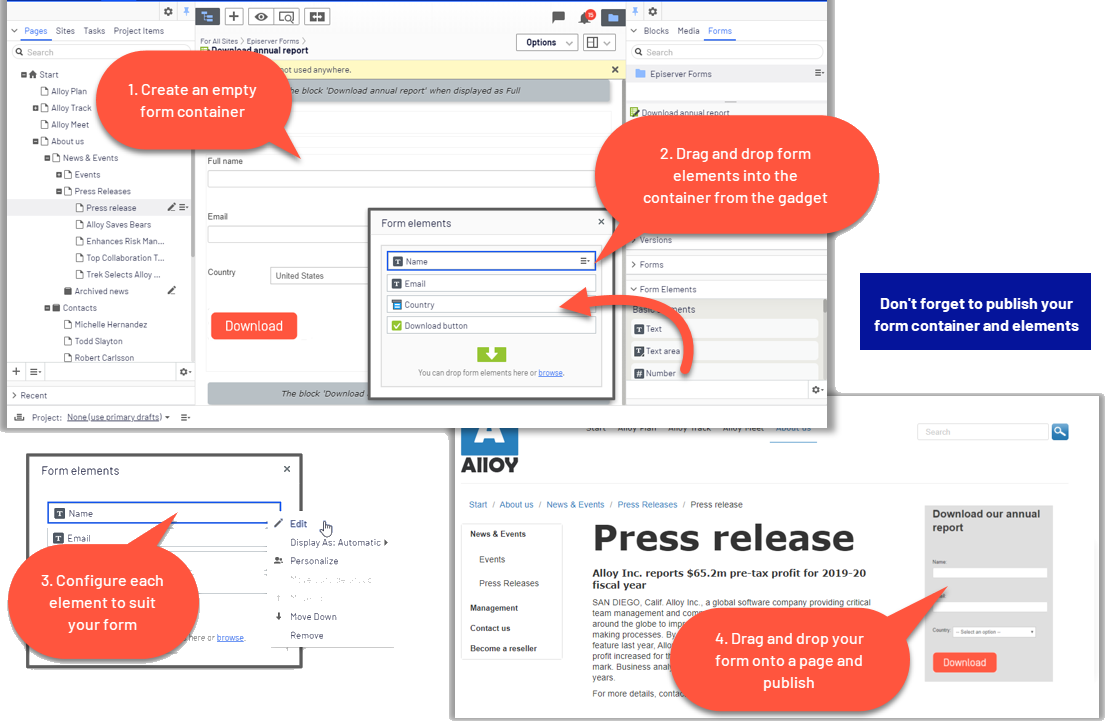
Form workflow
After you define a form, drag and drop it onto a page on the website. A typical workflow follows these steps:
- Create a form by dragging predefined form elements into a form container. Label the elements, define validation, and map them to a marketing automation system.
- Drag the form onto a page and present it to visitors.
- The visitor fills in and submits the form. Optimizely captures the data and sends it to the mapped marketing automation system.
- Export and analyze the submitted data.
- Create content based on personalized information received through the form.
Optimizely Forms Samples package
Some form elements use services from third-party providers and are maintained outside the standard Optimizely Forms installation for legal and maintenance reasons. A developer must install the Optimizely Forms Samples package to use these form elements. Optimizely provides a Demo project to help developers start with Optimizely Forms, the Samples package, and the Forms API. Find the Samples package and the Demo project on GitHub. Install the Samples package with Visual Studio.
Marketing Automation connectors for Forms
Connect form fields to a marketing automation database using Optimizely Forms connectors. When a visitor submits a form, Optimizely transfers data such as name, email address, and title to your marketing automation database.
For a list of available connectors, see Marketing Automation connectors.
Updated 2 months ago