
Example: Create a customer satisfaction survey
Build a conditional customer satisfaction survey in Optimizely CMS 13. Create multi-step forms with dependent elements for dynamic visitor feedback and photo uploads.
This example shows how to create a customer satisfaction survey that displays different form elements depending on how the visitor answers. The survey is for a coffee shop that wants to know what customers like and do not like about its services.
The form contains three steps:
- Collect basic personal information (name and email address).
- Collect customer opinions.
- Upload a photo.
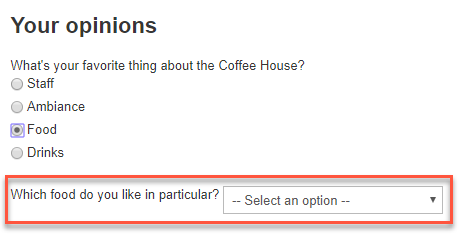
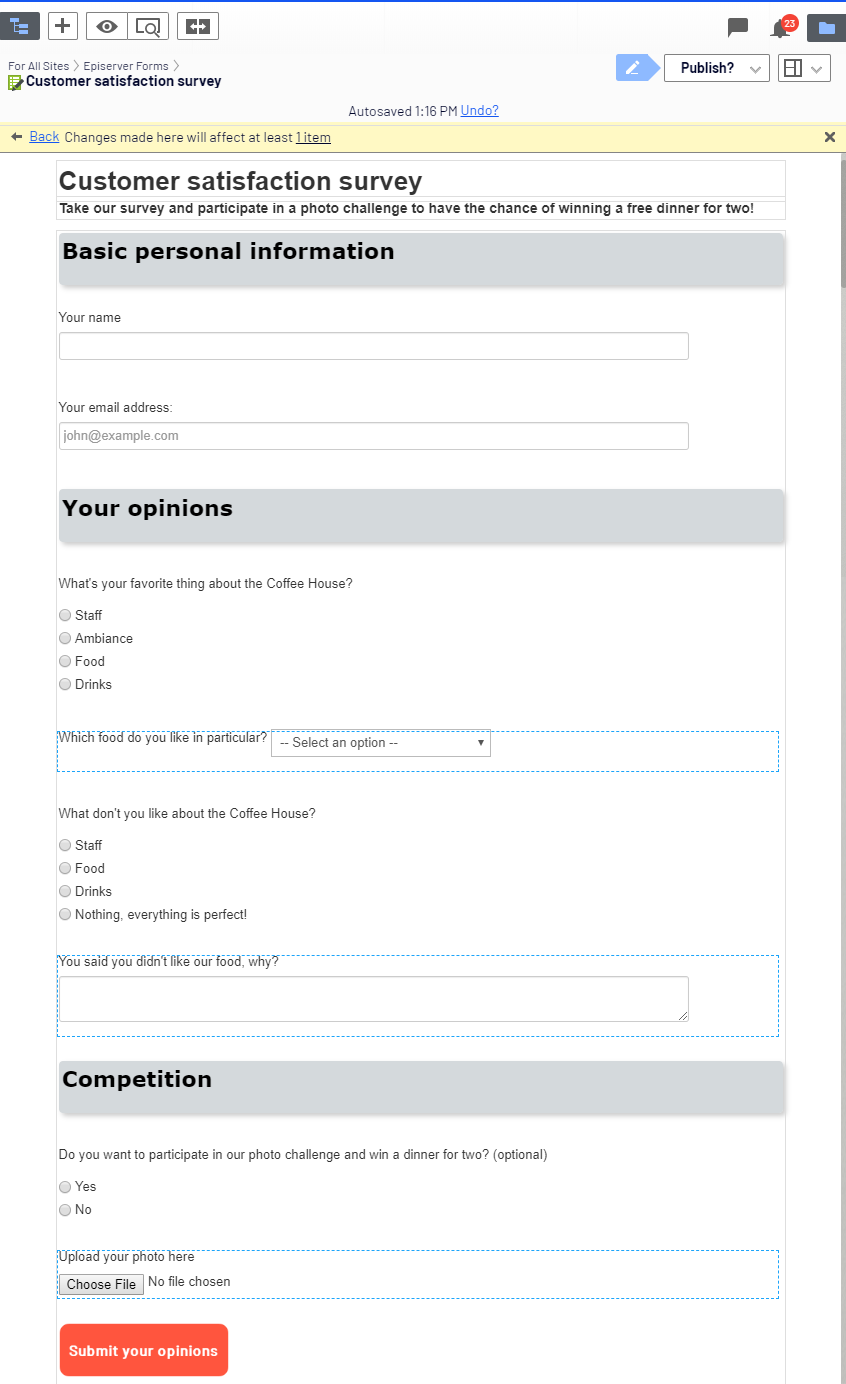
In the second step, some form elements depend on another form element. When a visitor answers Food to the question What is your favorite thing about the Coffee House?, an additional question displays. The question Which food do you like in particular? does not display when the visitor picks Staff, Ambiance, or Drinks.
Publish form elements and the form container to make them available.
Use the Projects feature to track items and publish them together.
-
Select the Forms tab from the assets panel.
-
Go to a folder where you want to save the form or create a folder by selecting New Folder from the context menu.
-
Select New Form from the folder's context menu and give it a name such as Customer satisfaction survey.
-
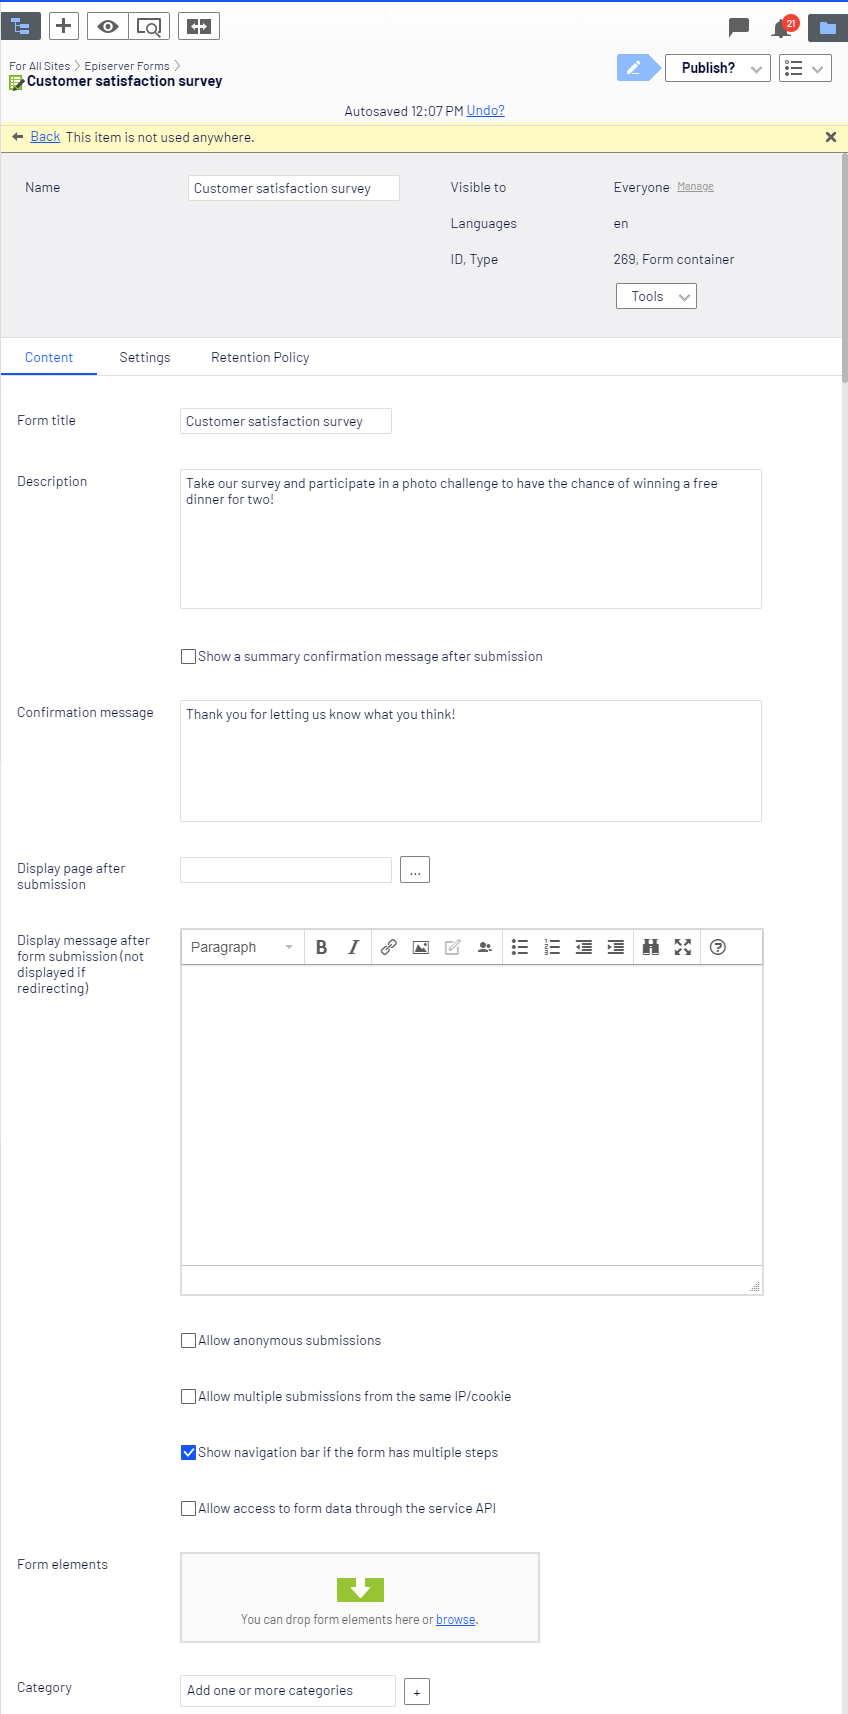
Open the All Properties view and edit the form container settings:
- Form title – Enter Customer satisfaction survey.
- Description – Enter Take our survey!
- Allow multiple submissions from the same IP or cookie – Select this checkbox to test the form multiple times or to let visitors submit the survey more than once.
- Show navigation bar – Select the Show navigation bar checkbox.
-
Drag the following form elements onto the Form elements section in the form container. Configure the elements as described (add your own Tooltips and Placeholder text) and publish each element:
-
Form step – Label the form step Basic personal information. (Name identifies the form element in the CMS UI. Step title displays to the visitor.)
-
Text – Label the form element Your name. Select the Required checkbox.
-
Text – Label the form element Your email address. Select the Email checkbox.
-
Form step – Label the form step Your opinions.
-
Multiple or single choice – Configure the element:
- Name the element – Best thing about the Coffee House
- Label text – What is your favorite thing about the Coffee House?
- Select the Required checkbox.
- Under Choices, select Use manual input and add the following items by clicking + (set Value to the same as Choice):
- Choice – Staff
- Choice – Ambiance
- Choice – Food
- Choice – Drink
-
Selection – Configure the element:
-
Name the element – Best food
-
Label text – Which food do you like in particular?
-
Select the Required checkbox.
-
Under Choices, select Use manual input and add the following items by clicking + (set Value to the same as Choice):
- Choice – The pizzas
- Choice – Fish and chips
- Choice – Tuna and mayo sandwich
- Choice – The velvet cake
-
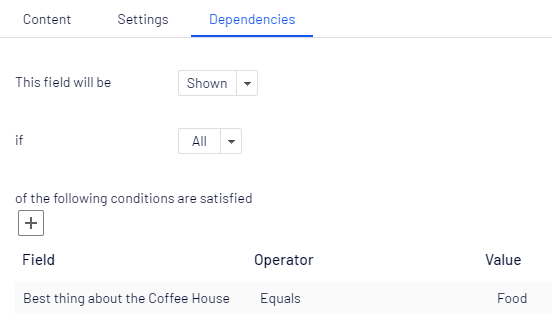
In the Dependencies tab, set:
-
This field will be to Shown
-
If to All
-
Add a condition:
-
-
-
Multiple or single choice – Configure the element:
- Name the element – Worst thing about the Coffee House
- Label text – What do you not like at the Coffee House?
- Select the Required checkbox.
- Under Choices, select Use manual input and add the following items by clicking + (set Value to the same as Choice):
- Choice – Staff
- Choice – Food
- Choice – Drink
- Choice – Nothing, everything is perfect
-
Text area – Configure the element:
-
Name the element – Food complaints
-
Label text – You said you did not like our food, why?
-
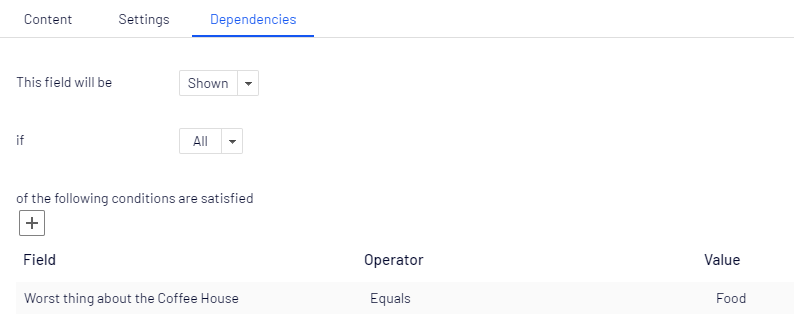
In the Dependencies tab, set:
-
This field will be to Shown
-
If to All
-
Add a condition:
-
-
-
Form step – Label the form element Competition.
-
Multiple or single choice – Configure the element:
- Name the element – Photo challenge
- Label text – Do you want to participate in our photo challenge and win a dinner for two? (optional)
- Under Choices, select Use manual input and add the following items by clicking + (set Value to the same as Choice):
- Choice – Yes
- Choice – No
-
File upload – Configure the element:
-
Label the form element Upload your photo here and set allowed file extensions and a maximum upload size.
-
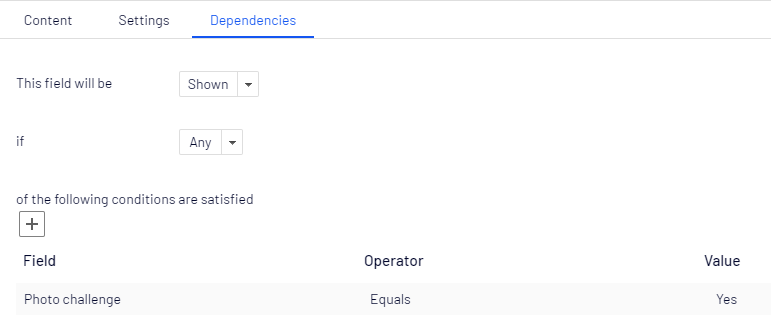
In the Dependencies tab, set:
-
This field will be to Shown
-
If to All
-
Add a condition:
-
-
-
Submit button – Label Submit your opinions.
-
-
Publish the form container.
-
Drag the Customer satisfaction survey form onto a web page and publish the page.
Test your form
Verify that the form works correctly by entering data in View mode on the published page.
- Enter a name and an email address in the first step. Click Next Step.
- Select Food and note the additional question Which food do you like in particular? Select one of the options.
- Select Food under What do you not like at the Coffee House? and note the free-text field. Enter a comment and click Next Step.
- Select Yes to participate in the photo challenge and upload a photo. Click Submit. Optimizely stores the submitted data.
View form submissions
Review the submitted data to verify the form captured all responses correctly.
Go to the Customer satisfaction survey form in the assets panel and select Form submissions from the context menu. The Form submissions view displays data submitted from the form.
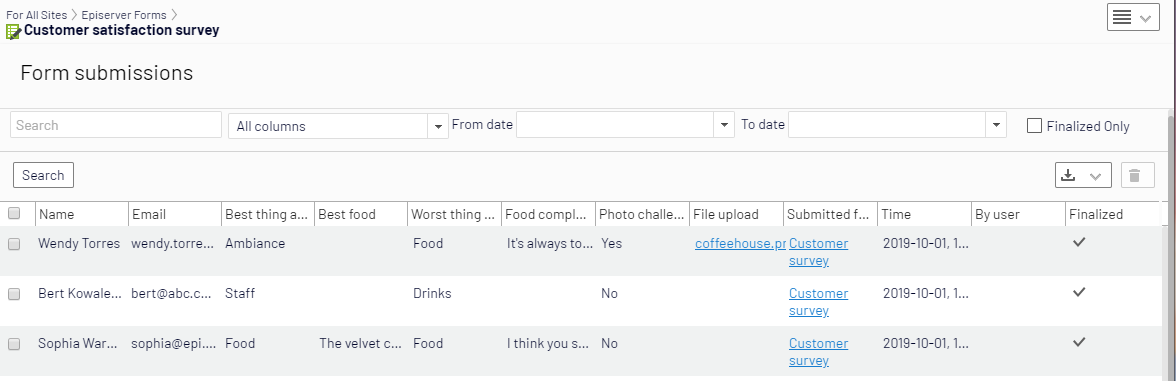
To find visitors who want to participate in the photo challenge, sort the form submissions by clicking the Photo challenge column or search for Yes in that column:

Updated 2 months ago