Translate content
Translate existing content in Optimizely CMS 13. Switch languages, view language versions, and translate pages and blocks for a multi-language website.
Translate existing content or create content in a specific language after an administrator enables that language. Content includes pages or blocks on an Optimizely Content Management System (CMS) website or product-related content on an ecommerce site.
NoteAn administrator enables languages. Go to Languages for details.
When a language is enabled in CMS, content properties that are not global are available for translation. Administrators set access rights for each language to prevent editors from creating content in the wrong language. Editors create and edit content only in languages they have access to.
The Optimizely Languages gadget extends the translation functionality in CMS.
Translate existing content
The Sites tab displays the languages available for content creation, with the default language at the top. Languages enabled on the website but not enabled for editing display in italics.
Translate a page
Pages in the tree structure display in the Pages tab, including untranslated pages shown in italics. Select Show Content in Current Language Only to see pages for the chosen language only.
To translate a page:
-
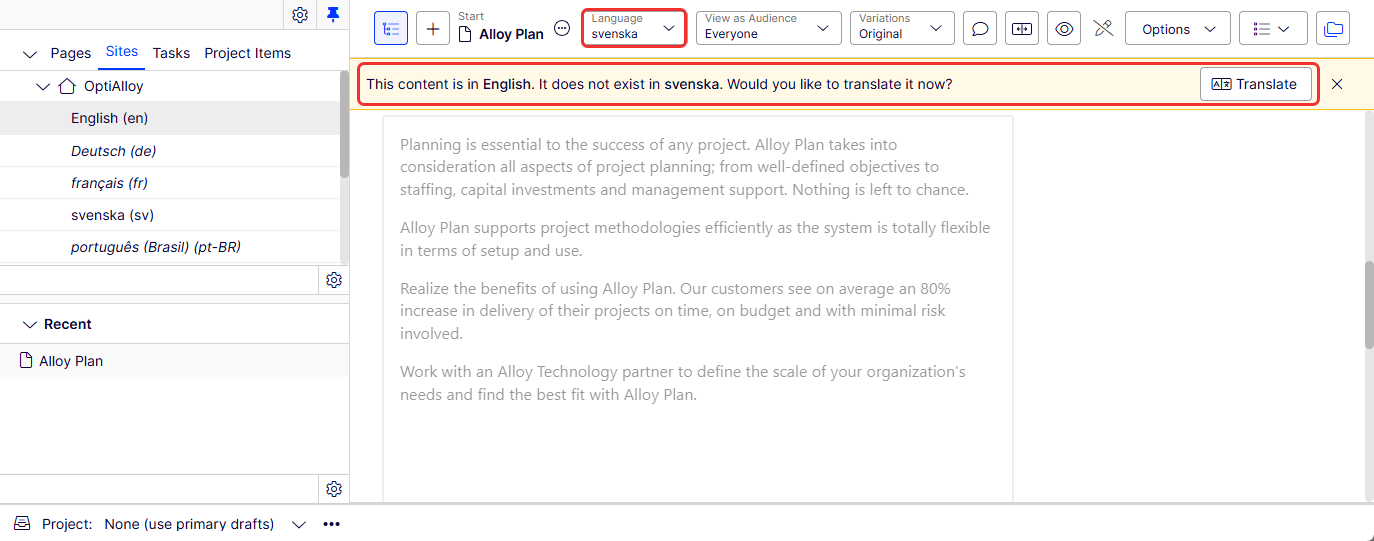
Select the target language for translation under the Sites tab in the navigation panel, such as svenska.
 Note
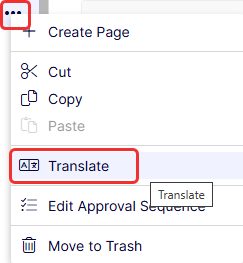
NoteSelect More > Translate from the page tree as an alternative.
-
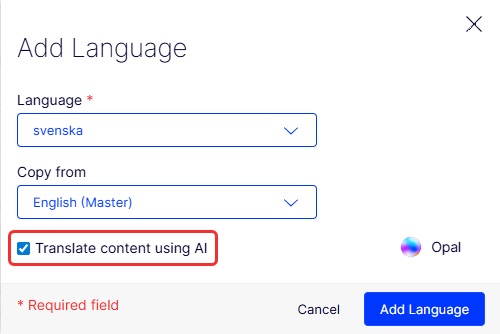
Click Translate when CMS indicates the content does not exist in the selected language. The add language page displays.
-
Select Translate content using UI and click Add Language. CMS translates the content automatically.
-
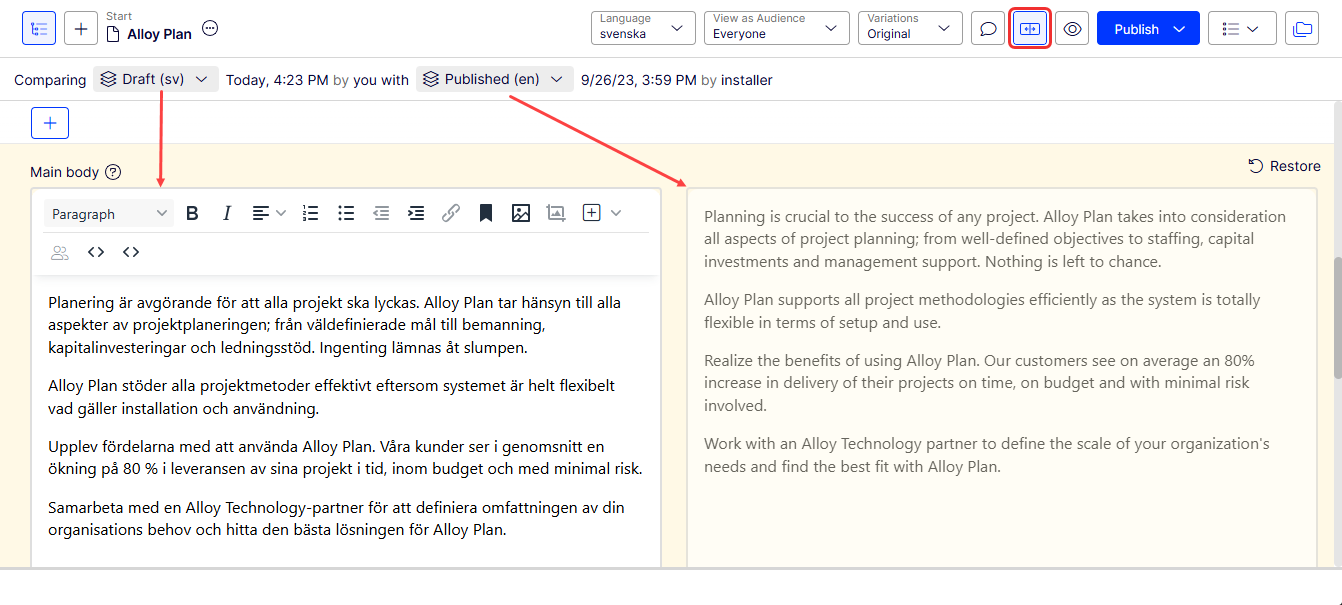
Click Compare view to translate in one panel while viewing the original version in the other panel.
-
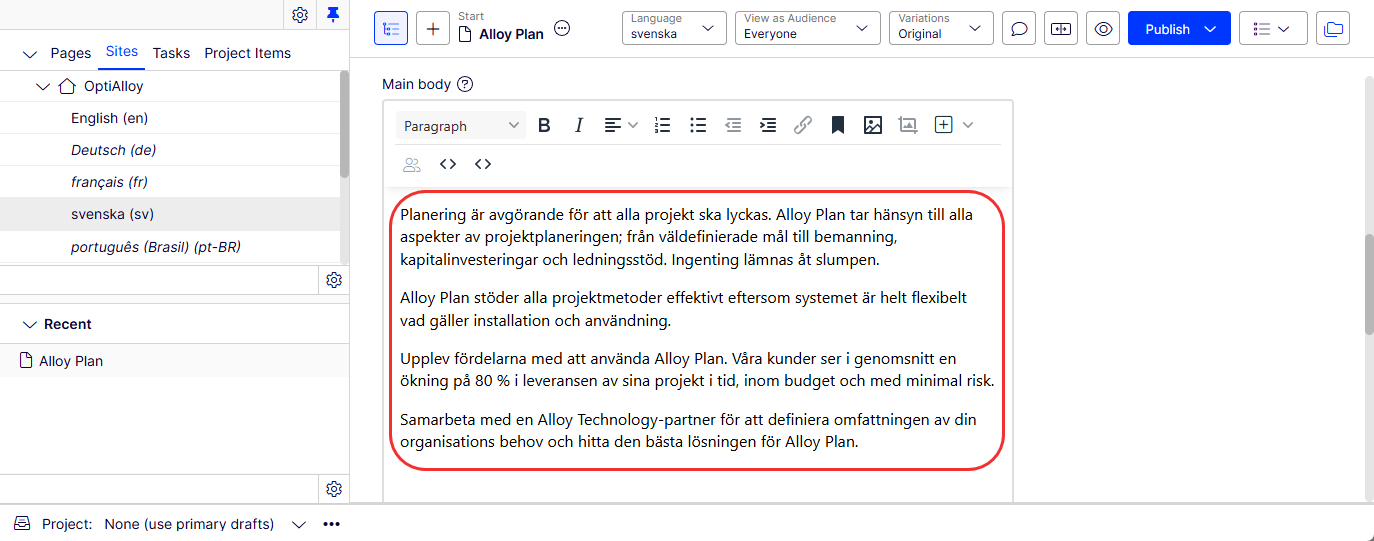
Edit the content and follow the content publishing flow to save and publish the translated page.
Translate a block
Access language versions for blocks from Blocks in the assets panel. Untranslated blocks display in italics. Select Show Content in Current Language Only to see blocks for the chosen language only.
To translate a block:
-
Select the target language for translation under the Sites tab in the navigation panel. The UI reloads.
-
Expand the assets panel and select Blocks.
-
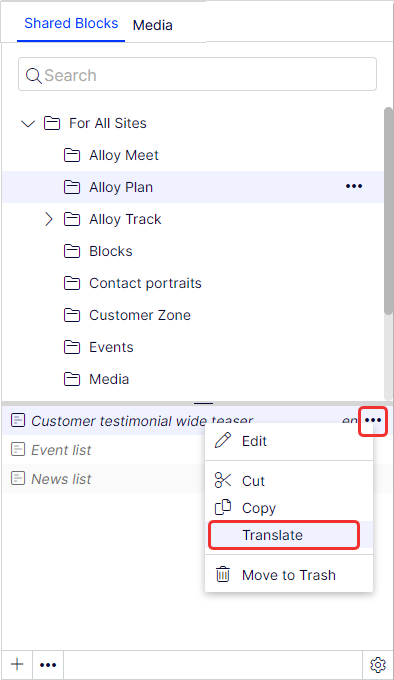
Select the block to translate in the block structure, then select Translate from the context menu.
-
Click Compare view to translate in one panel while viewing the original version in the other panel.
-
Edit the content and follow the content publishing flow to save and publish the translated block.
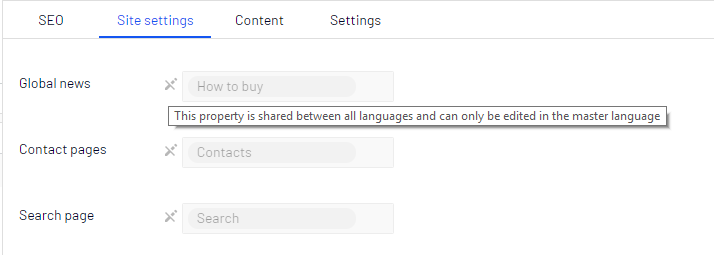
Global properties
CMS shares some properties globally across all language versions, depending on your implementation. Edit these properties in the master language only. These properties are marked as non-editable when editing content in another language. Switch to the default language to edit global properties. When editing in the All Properties view, the default language is the first language listed next to Languages in the header.