Manage languages
Add, activate, and manage multiple content languages in Optimizely CMS. Control editor access, URL slugs, and language settings for your website.
Optimizely Content Management System (CMS) supports multi-language content management. Translate content into multiple languages, define fallback languages for untranslated content, and switch languages for the editorial UI. The Optimizely Languages gadget provides additional translation features.
NoteAn administrator enables languages. For details, go to Manage website languages.
CMS uses the URL path or domain to determine the display language. When a visitor selects a language, CMS displays content in that language. CMS also detects the browser language preference to display matching content. A fallback language displays when content does not exist in the selected language.
Each website has a default content language configured at installation. Administrators add and configure additional languages as required.
- Administrators configure access rights for each language. For example, an editor with English and French access cannot create or edit German or Spanish content.
- Editors create content in a language after an administrator adds, activates, and assigns access rights for that language. This prevents unauthorized editors from creating or editing content in that language. When an editor copies a page, CMS copies all language versions regardless of the editor's language rights.
View site languages
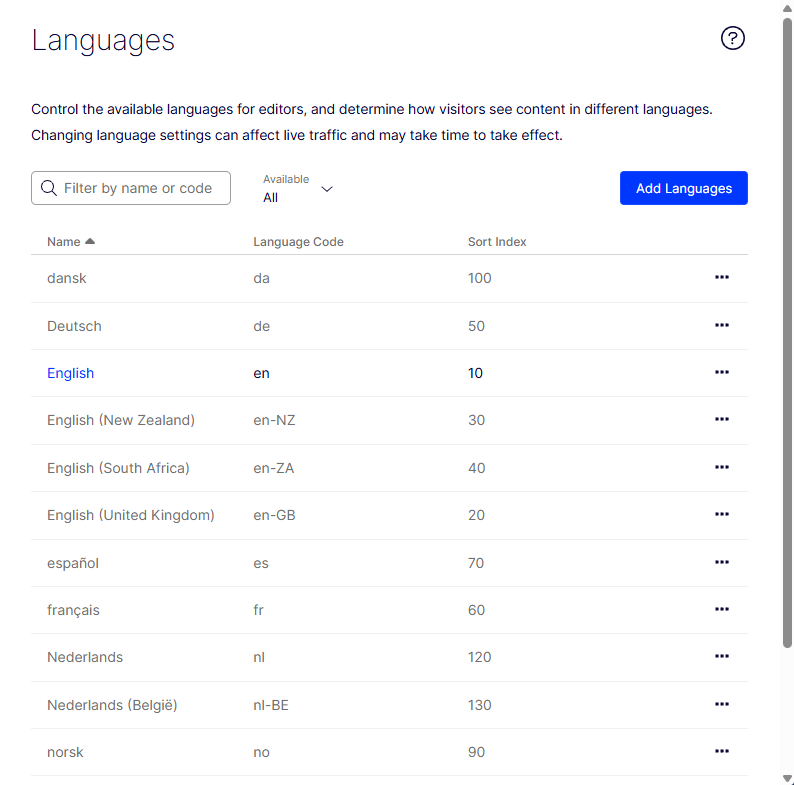
Review the language configuration for your website to verify which languages are active and adjust their display order.
Go to Settings > Languages. The installed website languages display on this page. Active languages are marked as available for editing. Adjust the language order with the arrow controls. Click a language name to change its settings.
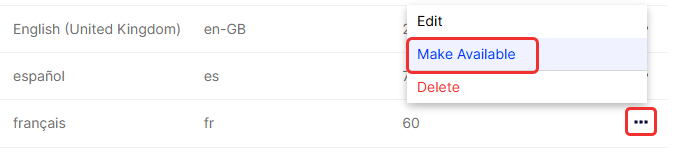
To activate an existing language, select More > Make Available.
Add and activate languages
Add and activate languages in the admin view before editors create content in those languages.
-
Go to Settings > Languages.
-
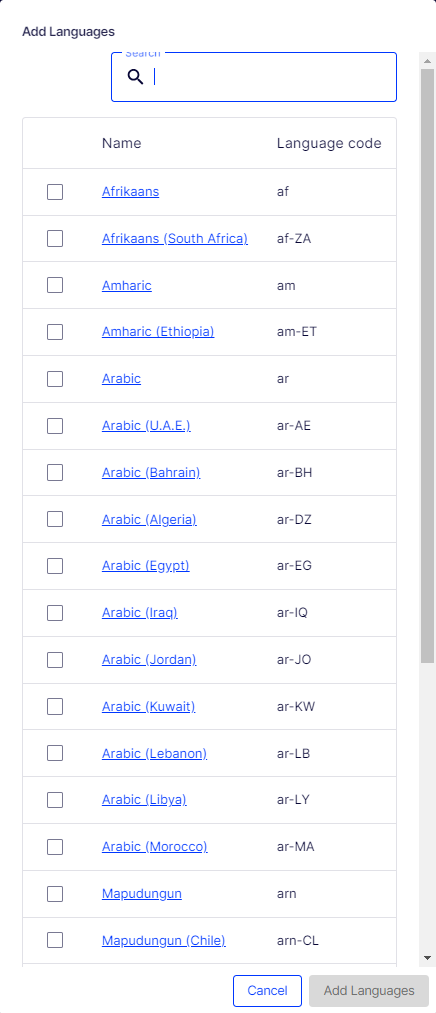
Click Add Languages.
-
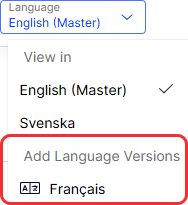
Click a language to edit its settings. A list of available language codes displays.
-
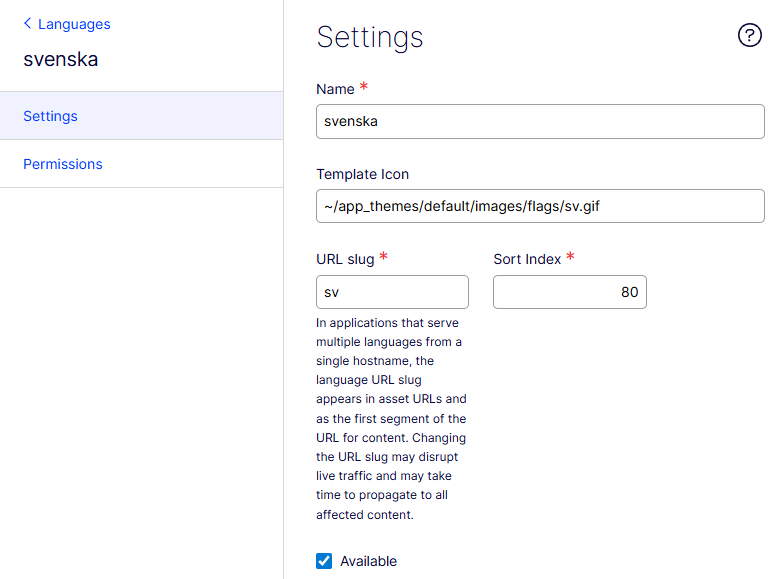
Select a language code by clicking the name, such as svenska. Set the fields on the Settings tab.
-
Name – Enter the language name that displays in the edit view. The field defaults to the language encoding name.
-
Template icon – Enter the relative path to a language icon. Flag icons are in the
modules_protected\CMS.zip\App_Themes\Default\Imagesfolder. Create custom icons at 15x15 pixels to fit the edit view. -
URL slug – Enter a URL prefix for the language. CMS uses the language code when no prefix is defined, such as
www.company.com/nl. -
Available – Select to activate the language for editing in the edit view. When selected, the language displays in the Language drop-down list in the edit view. Activated languages are available for content translation.
This option also affects whether the language is available to website visitors. A disabled language is not visible in the edit view. Existing content in that language is still accessible but cannot be edited.
-
-
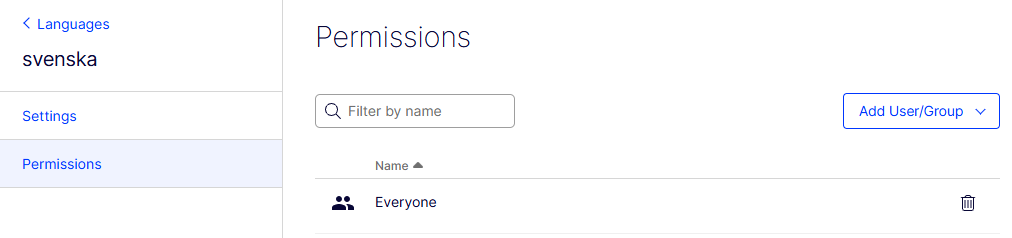
Set the fields on the Permissions tab.
-
Add Users/Groups – Define which editor groups have access to create and edit content in this language. When you add a language, the Everyone group has access by default. Only users with access rights for a language see it on the Sites tab and create and edit content in that language.
An editor's content access rights and language access rights together determine the available editing actions. An editor needs edit access for both the language and the content item to edit content in that language.
When a language has Everyone as access rights, content access rights apply to all languages. An editor with delete access rights deletes an entire node with all language versions. This includes languages the editor does not have access to.
NoteRemoving the Everyone group from a language removes editing access for editors without explicit language access rights.
-
-
Click Save.
Remove a language from the website
Deactivate a language to remove it from the website without deleting existing content.
Open the language for editing and clear the Available option.
Select a language to work with
Switch the editing language to create or modify content in a specific language version.
Go to the Sites tab in the navigation panel and select the language to work with. Select the language from the Language drop-down list. The UI reloads and displays the page tree in the selected language.
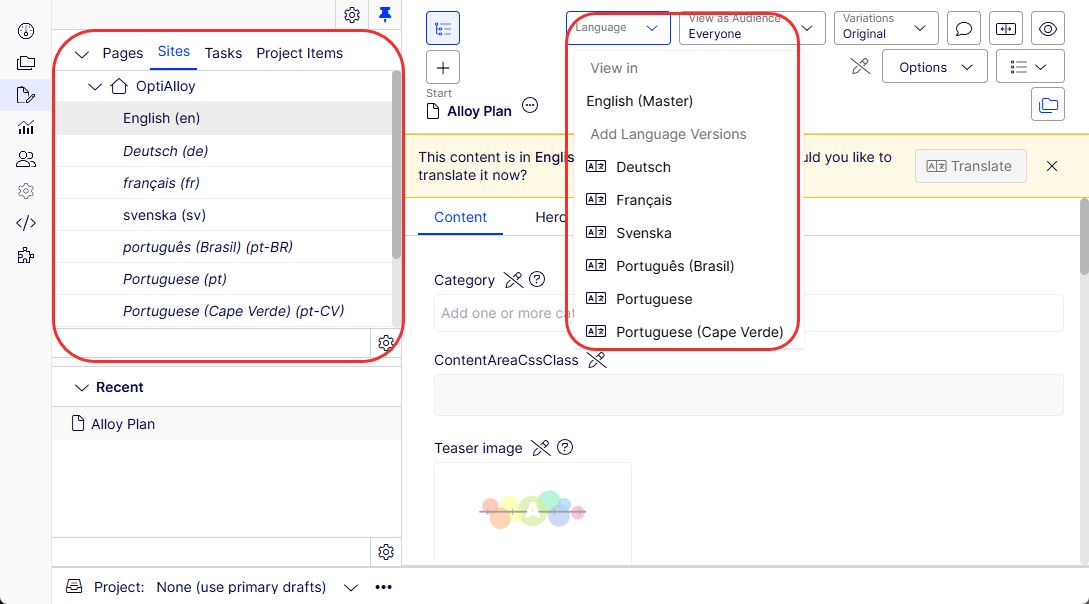
If your master language is English and you switch to Swedish, pages not yet translated into Swedish display in italics in the page tree with the language code (en for English, de for German). Pages that exist in Swedish display in normal font.
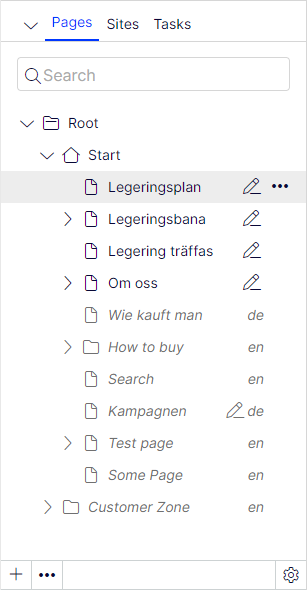
To view only translated pages, select Show Content in Current Language Only from the page tree Settings. This filters out other language versions. This option is also available in the assets panel and the Versions gadget. Click Show All Languages to see the entire content tree again.

Single-language view lets you move pages by drag and drop or copy and paste. Sorting is disabled because sorting in one language, where not all pages are visible, causes unexpected results in other languages.
Each panel or gadget instance has its own Show Content in Current Language Only setting. For example, add the Versions gadget twice and display the current language in one instance and all languages in the other. Go to Publish versions of content for details.
Select the language in the Header when editing translated content in the All Properties view to switch languages. The UI reloads and displays the content in the selected language.
View versions of content in another language
Compare language versions of a page or block to track translation progress and switch between languages during editing.
The Versions gadget displays different language versions when you translate content. Select a language in the version list and use the switch option in the notification bar to edit in another language.
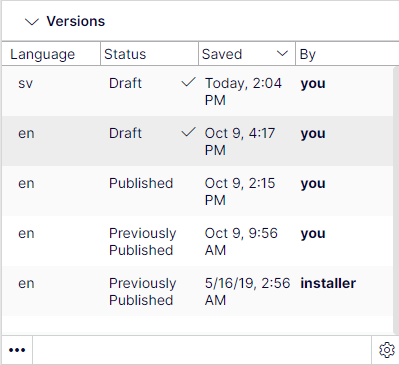
Search for language versions by typing a keyword in the search field for Pages or Blocks in the assets panel.
Delete versions of content by specific language
Remove unwanted language versions of content to keep the version history clean.
Select More > Delete Version or More > Delete All [language] Versions in the Versions gadget to delete one or more language versions.
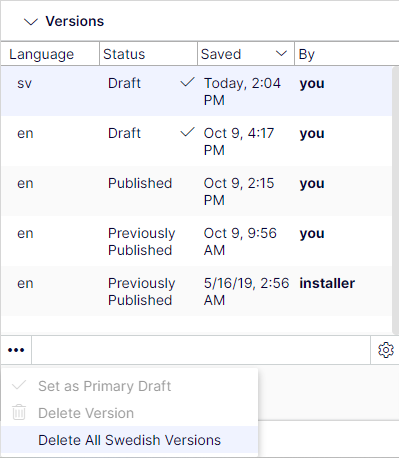
WarningDeleting one or more language versions cannot be undone.
User interface languages
Customize the CMS editorial UI to display in your preferred language. The content languages for your website are configured separately.
The Optimizely CMS UI is available in 12 languages. English is the master language, and the others are translated. The following languages are supported:
- DA – Danish
- DE – German
- EN – English
- ES – Spanish
- FI – Finnish
- FR – French
- IT – Italian
- JA – Japanese
- NL – Dutch
- NO – Norwegian
- SV – Swedish
- ZH – Simplified Chinese
To set the UI language, follow these steps:
- Click your user profile name.
- Select My Settings > Display Options tab.
- Select your language from the Personal Language drop-down list.
- Click Save.
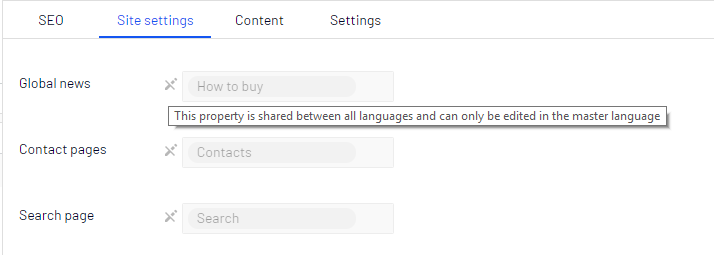
Global properties
CMS shares some properties globally across all language versions, depending on your implementation. Edit these properties in the master language only. These properties are marked as non-editable when editing content in another language. Switch to the default language to edit these properties. When editing in the All Properties view, the default language is the first language listed next to Languages in the header.
Optimizely Commerce Connect and multiple languages
If you have Optimizely Commerce Connect installed, go to Manage languages for catalogs in the Optimizely Commerce Connect section for information about working with multiple languages.