Approve sequences
Define and manage approval sequences in Optimizely CMS 13 for content and change approvals. Configure steps, reviewers, and notifications for multi-language sites.
Approval sequences control how content and changes are reviewed in Optimizely Content Management System (CMS). They are used with both the content approvals feature and the Approve changes add-on.
- Content approvals – Ensures that content is reviewed and approved before publication. If content approvals are defined for an item, the editor cannot publish it but must set it as Ready for Review. For a description from an editor perspective, see Approve content.
- Change approvals let you ensure that certain actions affecting the website structure or content are reviewed and approved before they are applied. See Approve changes for information on which actions are affected.
When an item or a change is in review, one or more appointed reviewers must approve it before it can be published or the change is applied. The reviewers are defined by an administrator in an approval sequence.
Define an approval sequence for a specific page in the page tree or a global or site-specific assets folder in the assets panel. The children of the item or folder can inherit the approval sequence, have their own approval sequence, or have approval sequences disabled. See the following Content approvals on assets section for information on how approval sequences work on assets.
Add individual users and user groups. User groups and individual reviewers must have Read access rights and at least one other access right to the content item to review and approve it. Use Read and Create because Create has the least capabilities and prevents other actions on the content item. Alternatively, use Read and Change because Change alone cannot affect the visitor, unlike Delete and Publish. See Access rights, Administer groups, and Administer users.
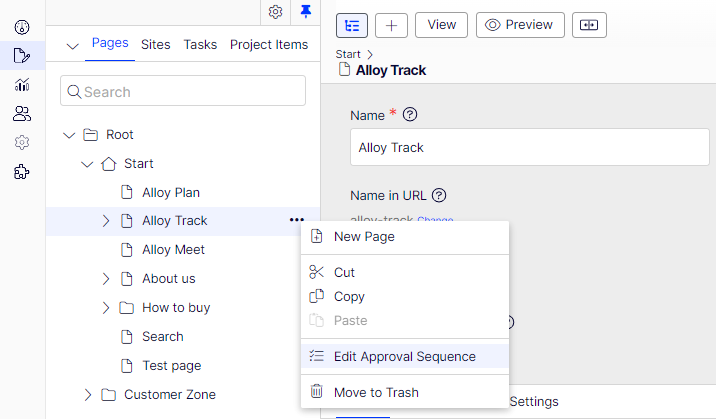
Open the approval sequence overview from a page or assets folder context menu.
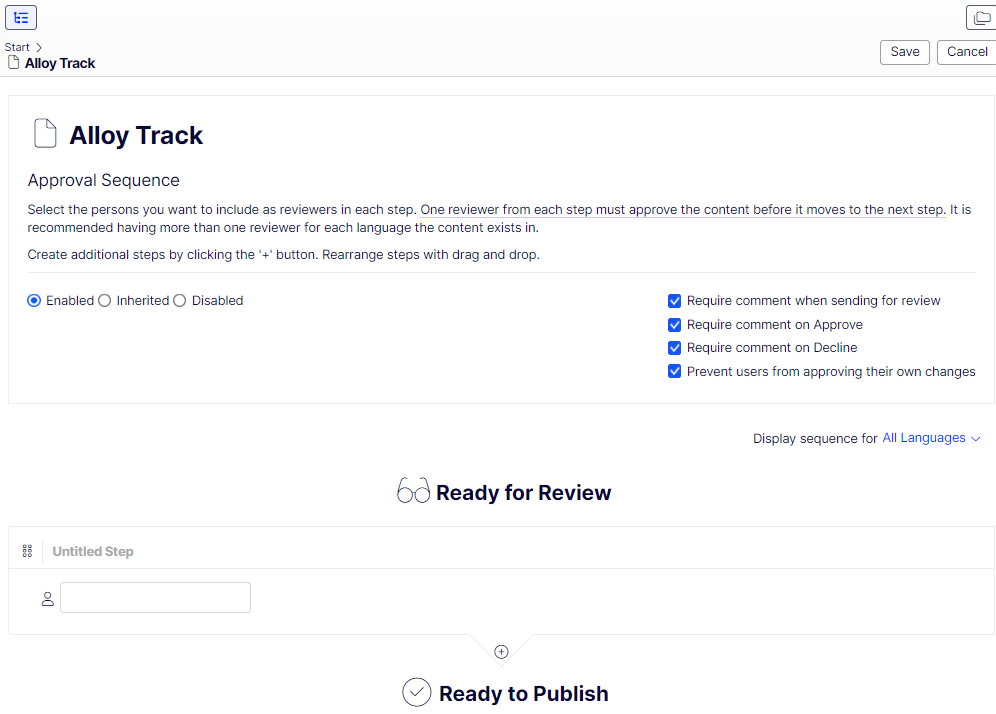
In the approval sequence overview, define the number of approval steps and the persons responsible for review and approval in each step.
Content approvals on assets
Each page in Optimizely can have its own approval sequence. Assets, such as blocks and media (and also forms and catalogs if you have Optimizely Forms and Optimizely Commerce Connect installed), cannot have individual approval sequences. Instead, the approval sequence is set on each asset folder, and the assets in the folder have the same approval sequence. Global and site-specific asset folders can inherit their approval sequence from a parent folder (up to the site root). Alternatively, you can define a unique sequence for it (or turn it off completely so that assets in the folder do not have to be approved). If no sequence is set on a parent item, children inherit the disabled state.
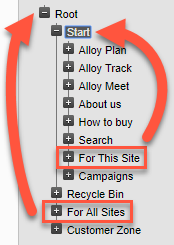
Shared Blocks and Media in global (For All Sites) and site-specific (For This Site) folders inherit the approval sequence from the parent node by default. The content inherits from the site root, which is different for global and site-specific folders. The global assets folders inherit from Root, while site-specific assets folders inherit from the site's root, that is Start in the following example image.
Local assets folders inherit their approval sequence from the page they are associated with. See Folders for a description of global, site-specific, and local folders.
The following describes what happens when you move folders or assets that have content approval sequences configured.
NoteThe following description assumes you are using Content approvals but not Change approvals. If you are using Change approvals, moving folders and assets triggers an approval sequence that must be approved before the folders or files are moved.
Moving folders and assets with content approval sequences works as described in the following sections.
Folders
- If you move a folder to another global or site-specific folder, it keeps its original approval sequence. You can move the folder even if items are in review.
- If you move a folder to a local assets folder, the folder's approval sequence is changed to the local assets folder's sequence. You cannot move the folder if items are in review.
Assets
- If you move an asset to a global or site-specific folder, its approval sequence is changed to the new folder's approval sequence. You can move an item even if it is in review. However, in that case, it continues its original content approval sequence until it is approved or rejected. After that, it has the same approval sequence as the new folder.
- If you move an asset to a local asset folder, its approval sequence is changed to the new folder's approval sequence. You cannot move an asset that is in review.
The Shared Blocks and Media folders in the assets panel are the same folders in the software and share the same approval sequences. The Shared Blocks and Media tabs in the assets panel are a way of filtering out blocks if you are in the Media tab and vice versa. This means that if Adam is set as a reviewer on the shared block folder Bunnies, Adam is also a reviewer of media in the media folder Bunnies.
As a result, if you edit a block in the Bunnies folder, which links to images in the media folder Bunnies, and set the block to Ready for Review, the same content approval sequence is also triggered for the images.
Forms and catalogs have their structures, so even if you have an Optimizely Commerce catalog named Bunnies, it does not get the same content approval sequence as the Bunnies folders for blocks and media.
Content approvals on multi-language sites
If you are working with a multi-language site, you can define different reviewers for the different languages in each step. Each language must have at least one reviewer, but it is recommended to have at least two reviewers per language. This is especially important if you select the Prevent users from approving their changes checkbox because an item could otherwise get stuck in the review process if the review request is started by a user who is the only reviewer.
Items, such as images that do not have a language set, can be approved by any reviewer (even by reviewers who only have access to a specific language).
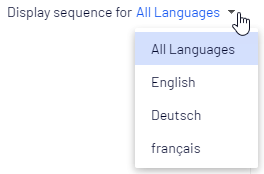
Using the Display sequence for[language] drop-down list, you can view how the approval sequence is defined for all languages or each language individually.
Configure an approval sequence (single language website)
This section describes how to configure an approval sequence for one language. If your website uses multiple languages, see the following Configure an approval sequence on a multiple languages website section.
-
Open the approval sequence overview from an item's context menu (in the navigation panel or assets panel).
-
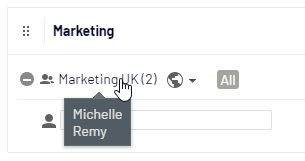
In the first step, type the first letter of the reviewer's name. Select the reviewer from the list of suggestions. You can also add a user group. Groups have a special group icon in the list of suggestions, and you can also see how many users are included in the user group.
User groups and individual reviewers must have Read and at least one other access right, such as Create or Change to the item, to review and approve it.
Avoid adding large groups. Users tend to assume someone else will review, and many notifications are sent. A setting in the
appSettings.jsonfile triggers a validation warning when you add a group with members exceeding the threshold. The setting also limits the number of notifications sent. For example, if set to 100, only 100 users receive email notifications even if the group contains 150 users.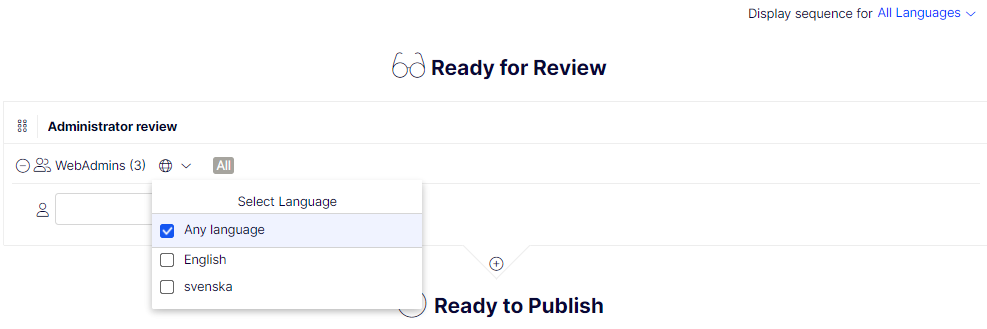
-
If you added an individual reviewer, add at least one more reviewer to the step. You should have at least two reviewers in each step in case one of the reviewers cannot review and approve it.
-
(Optional) Select Untitled Step to rename the step to something more descriptive, for example, Product marketing or ISO compliance review.
-
(Optional) To add more steps to the approval sequence, select Add. You can rearrange the steps by drag and drop.
-
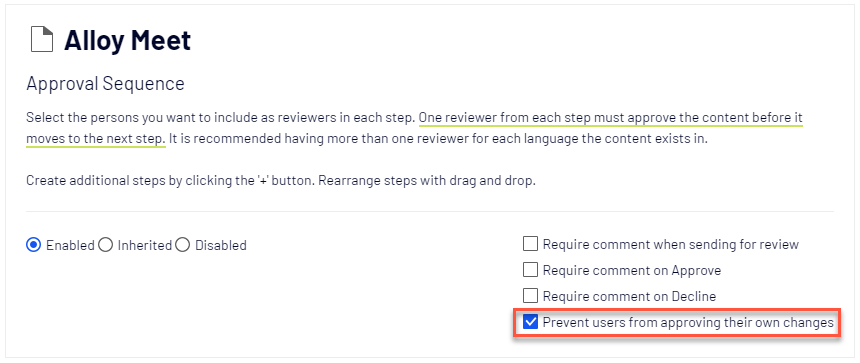
(Optional) Select the Require comment when sending for review checkbox to require a review requester to enter a comment on the review request.
-
(Optional) To require a reviewer to enter a reason for approving or declining the content, select the Require comment on Approve or Require comment on Decline (or both).
-
(Optional) Select Prevent users from approving their own changes if the user who sends a review request should not be allowed to approve the changes even if the review requester is one of the appointed reviewers.
-
Select Save.
Configure an approval sequence for child items
When you define an approval sequence for an item, you can define whether its children require approval.
- Open the approval sequence overview from a child item's context menu.
- Select one of the three radio buttons depending on how you want to configure the approval sequence:
- Enabled – Lets you edit and define the approval sequence independently. The approval sequence is not connected to the parent item. Configure the sequence as described in the previous section.
- Inherited – Locks the approval sequence for the current item. It inherits the parent settings. If the parent approval sequence changes, the current item changes with it.
- Disabled – Deactivates the approval sequence for the item. The item does not require approval.
NoteInherited is set by default, so if you do not define an approval sequence for an item's children, they automatically get the same approval sequence as the parent. If inheritance is set on children and the approval sequence is disabled on the parent item, the children inherit the disabled state. Local assets folders inherit the approval sequence on the associated page or block.
Configure an approval sequence on a multiple languages website
The language setting applies only to content approvals. Change approvals do not consider this setting. Appointed reviewers can approve changes in all languages.
-
Open the approval sequence overview from an item's context menu.
-
In the first step, type the first letter of the reviewer's name. Select the reviewer from the list of suggestions. You can also add a user group. Groups have a special group icon in the list of suggestions, and you can also see how many users are included in the user group.
-
Select Select Language and choose the languages the reviewer or group of reviewers can approve in the Select Language drop-down list. A reviewer or group of reviewers can approve content in one, several, or all languages.
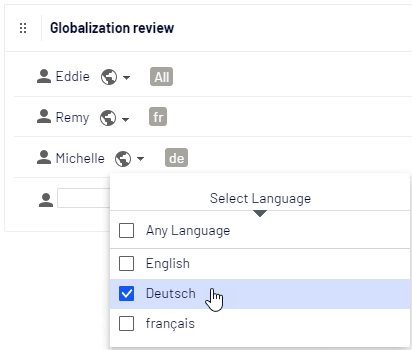
Selecting Any language and selecting all languages individually produce different results. If you select Any language, the reviewer can approve an item in any language in which it exists, including any languages added later. If you select available languages individually, the reviewer can approve content only in those selected languages. Adding a language later does not grant the reviewer the right to approve in that language.
-
Add at least one more reviewer to the step if you added an individual reviewer. You should have at least two reviewers per language in each step in case one of the reviewers is unable (or not allowed as the review requester) to review and approve.
-
(Optional) Select Untitled Step to rename the step to something more descriptive, such as Product marketing or ISO compliance review.
-
(Optional) To add more steps to the approval sequence, select Add. You can rearrange the steps by drag and drop.
-
(Optional) Select the Require comment when sending for review checkbox to require a review requester to enter a comment on the review request.
-
(Optional) To require a reviewer to enter a reason for approving or declining the content, select the Require comment on Approve or Require comment on Decline (or both).
-
(Optional) Select Prevent users from approving their own changes if the user who sends a review request should not be allowed to approve the changes even if the review requester is one of the appointed reviewers.
-
Select Save.
Edit an approval sequence
Open the approval sequence from the content item context menu and verify that the Enabled radio button is selected. Edit and save the approval sequence as described in the previous Configure an approval sequence section. Rearrange the approval steps by drag and drop. Hover over a group name to see the users included in the group.
If the selected content item has children set as Inherited, they inherit all changes.
Approve and cancel approval sequences
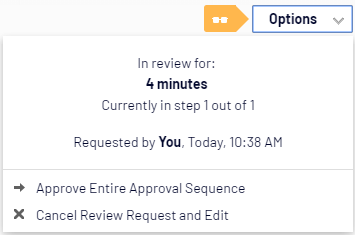
As an administrator, approve the entire approval sequence at once and cancel a review request from Options. When you approve an entire approval sequence, you must explain why you are skipping the approval sequence and approving all steps. As an administrator, you can approve the entire approval sequence even if you sent the review request and Prevent users from approving their own changes is selected.
Delete an approval sequence
Approval sequences cannot be deleted, but they can be deactivated. Open the approval sequence from the item's context menu and select Disabled. The item can now be published immediately and does not have to be approved. If the selected content item has children set as Inherited, these children do not have to be approved.
Comment on content approvals
As an administrator, you decide whether review requesters have to add a comment on the review request and if reviewers have to add a reason when they approve or decline content. An exception to this is when you approve an entire sequence, in which case you are required to add a comment. For information on commenting, see the Collaborate with comments.
The comments are visible in the notification list in the UI and email notifications. Comments are also displayed in the project overview if the content item in review is associated with a project.
Comments are stored in the database as part of the change log and can be used later for auditing purposes without using projects.
Two-person approval of content
Certain businesses require at least two persons to approve content or changes to a website before the content is published or changes applied. To achieve this, you must configure an approval sequence with at least two steps and at least two reviewers in each step.
To avoid one of the reviewers in a step happens to be the user who starts the review and thereby can evade the four-eyes principle by approving their changes, you also need to select Prevent users from approving their own changes in the approval sequence.
Use notifications
Appointed reviewers can get notifications in the UI (bell icon) shows the number of unread notifications ) and by email. These notifications let the reviewers know that they have a review request waiting. The editor who started the review request is also notified when the reviewers approve or decline the request.
Which actions trigger a notification?
The following list shows which actions generate notifications for the different roles in the content approval workflow.
- The user who sets the item to Ready for Review
- A reviewer approves a review request.
- A reviewer declines a review request.
- An administrator force approves all steps in an approval sequence.
- An administrator cancels the review request.
- Reviewer
- An item is ready to be reviewed by the user.
- A review request is declined in the current (the same step as the user was defined in) or later in the approval sequence.
- A review request is canceled in the approval sequence's current or later step.
User interface notifications
For the notifications in the UI to be instantly displayed, your web server must have WebSocket support enabled. See WebSocket support. If WebSocket support is not enabled, editors must refresh the UI to see the notifications.
Email notifications
You need to configure your SMTP server with a from address for the email notifications to work. See Configure email server.
A scheduled job, Notification Dispatcher, determines how often email notifications are sent to users. The job gathers notifications into one summary email containing the user's content approval notifications generated since the last email. The scheduled job is set to run every 30 minutes by default. See Scheduled jobs for information on how to configure this scheduled job.
If you want emails to be sent out immediately, a developer can configure this through code; see Email notifications in the Optimizely CMS Developer Guide.