Content types in the UI
Administrators and developers manage content types in Optimizely CMS 13. Create, edit, and configure page, block, and media types, including properties and permissions.
Content types define the structure of every page, block, and media item in Optimizely CMS 13. Administrators configure them to control what editors create, which properties they fill in, and how content renders on the site. This article covers page types, block types, and media types. For experience, section, and other advanced types, go to Advanced content types.
Content in Optimizely includes page types, block types, folders, and media files such as images and documents. Content also includes products in a product catalog in Commerce Connect. Developers can also create content types through code.
Content types and properties
Content types contain properties where editors enter information, such as a link to an image on a web page.
The Type column identifies the foundational type each content type inherits from, such as Page, Block, Media, Experience, or Section. Content types whose base type cannot be determined (for example, those registered from a package that has since been removed) display an Undefined label in the Base type column.
The content model in CMS uses inheritance from a generic content type to create specific types, such as a page type or a media folder. Developers use this model to create custom content types when they configure new websites.
The following rules apply to page types and block types in the admin view:
- Define page types and block types in code or from Settings.
- For content types defined in code, define non-breaking property changes in the admin view.
- CMS notifies you when a setting defined in code cannot be changed from the admin view.
- To undo changes to a page type defined in code, reset it to the original code-defined values.
Page types
WarningChanging page type settings can break the website. Create page types from code rather than from the admin view.
Edit a page type
To edit settings for an existing page type:
-
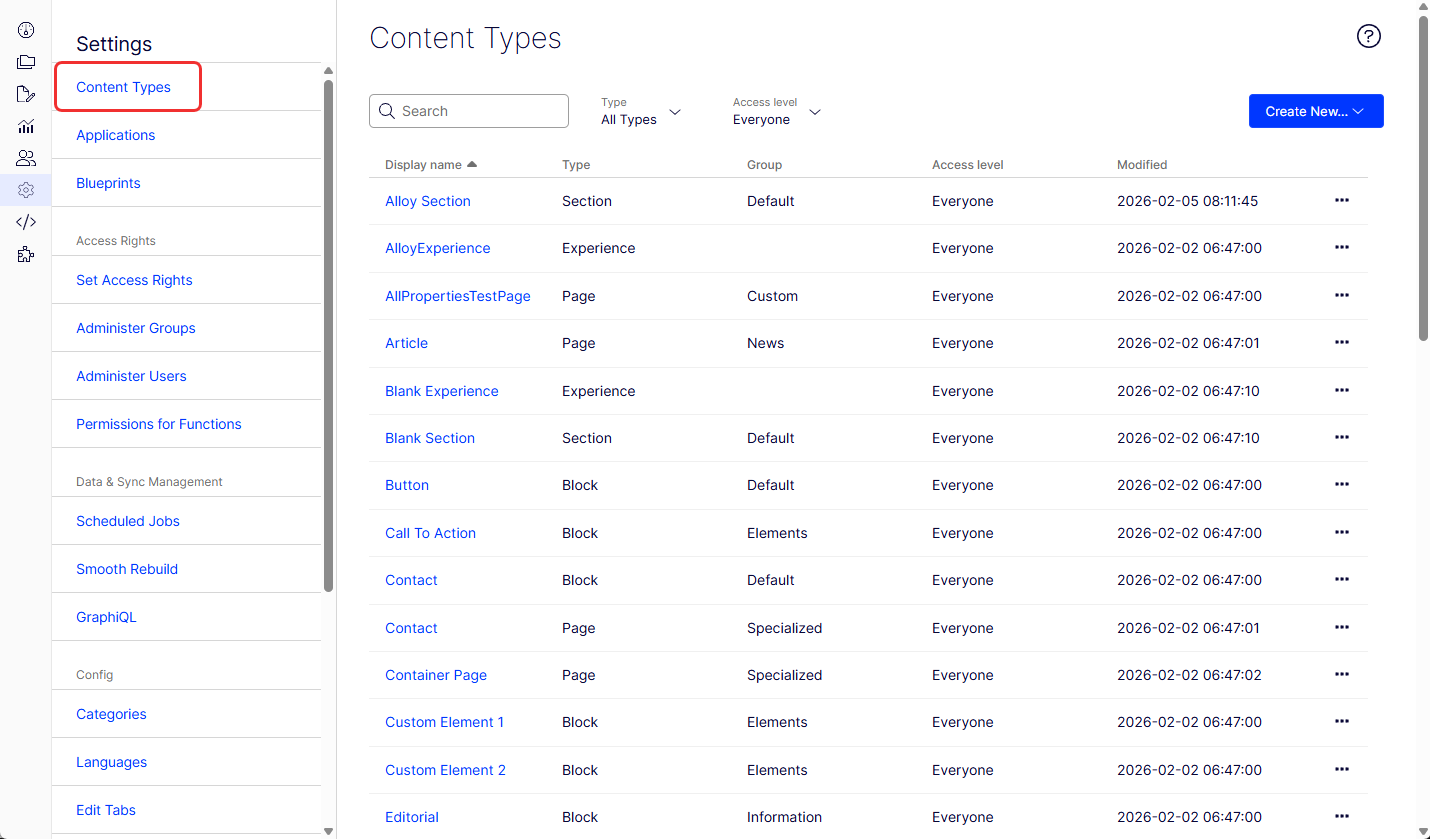
Go to Settings > Content Types.
-
Select the page type from the list, such as Article. The Properties view displays for the page type.
-
Click Settings and modify the form.
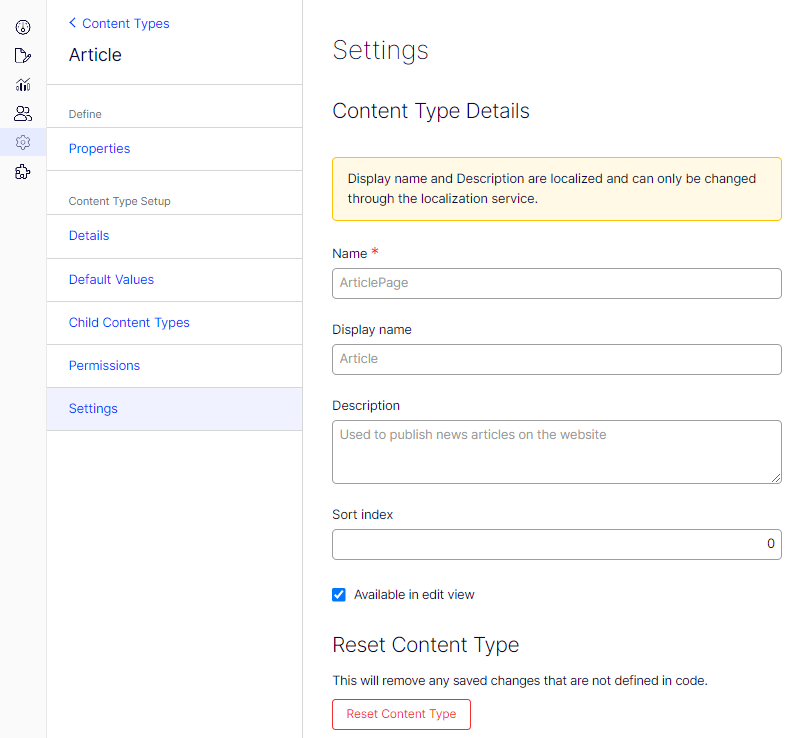
- Name – Enter an internal, programmatic identifier for the content type, often used in development and system configurations. In the image, the name is ArticlePage.
- Display name – Enter a user-friendly name of the content type shown in the UI. In the image, the display name is Article.
- Description – Enter a brief explanation of the content type's purpose or intended use. The description in the image is Used to publish news articles on the website.
- Sort index – Enter a number for the order in which the content type displays in lists or menus. The image shows a value of 0.
- Available in edit view – Select to control whether content editors can create and edit content of this type.
- Reset Content Type – Click to discard changes to the content type that were not defined in the underlying code, reverting to the default code-based configuration.
-
Click Save.
Because page types and their properties can be defined in code or from the Settings view, some settings are editable from Settings. When a page type is created from code, CMS displays this on the page type information page under General.
NoteYou cannot delete certain page types defined in code. These are typically page types upon which other page types are based, such as the standard or default page and the start page.
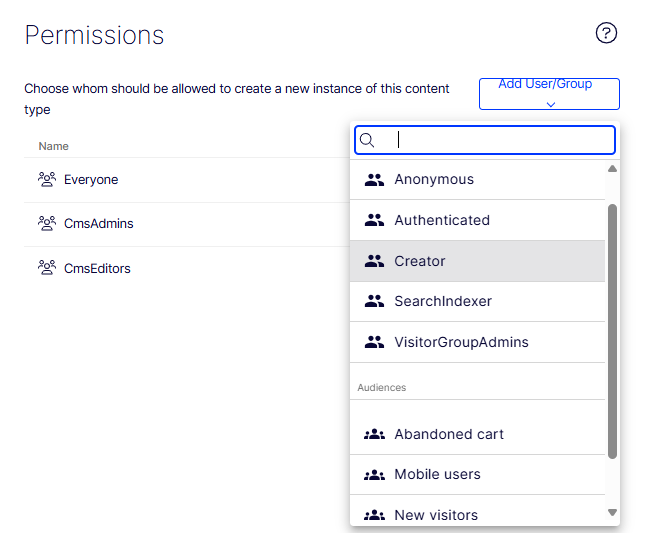
Use the Access level area to define which users or user groups have access to the page type.
Create a page type from the Settings view
-
Go to Settings > Content Types, and select Create New > Page Type.
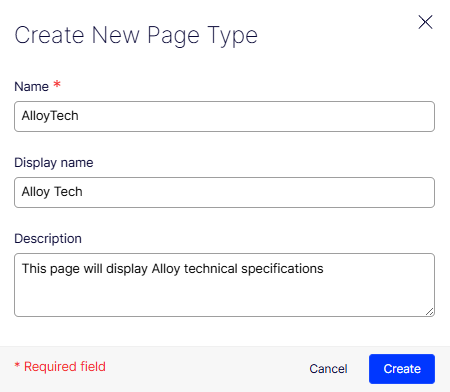
- Name – Enter an internal, programmatic identifier for the content type, often used in development and system configurations. In the image, the name is AlloyTech.
- Display name – Enter a user-friendly name of the content type shown in the UI. In the image, the display name is Alloy Tech.
- Description – Enter a brief explanation of the content type's purpose or intended use. The description in the image is This page will display Alloy technical specifications.
-
Click Create.
-
Set values in the new page Settings tab.
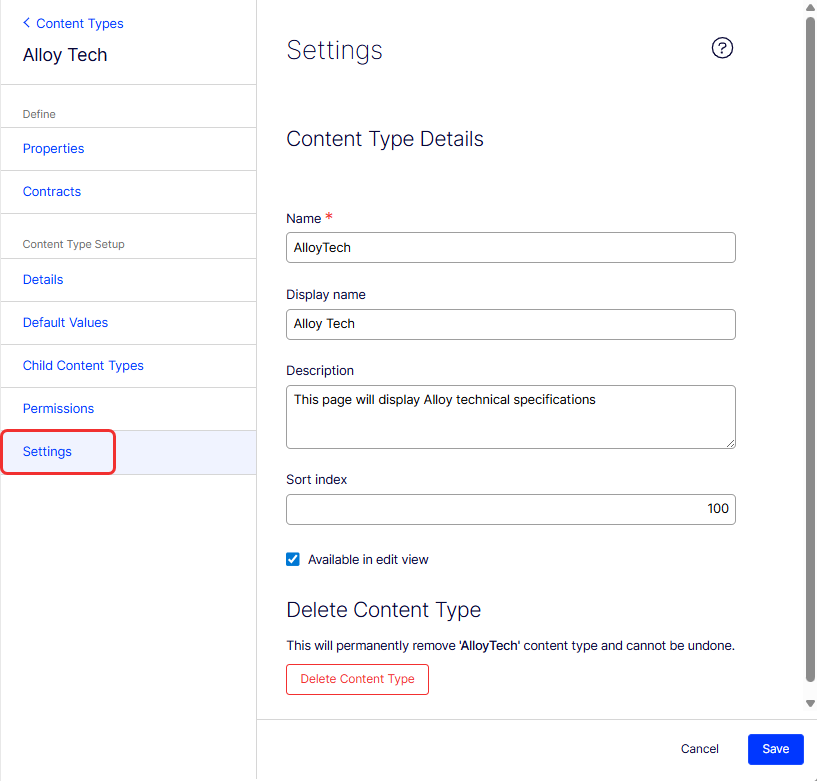
- Name – Review the pre-filled value and edit if needed.
- Display name – Review the pre-filled value and edit if needed.
- Description – Review the pre-filled value and edit if needed.
- Sort index – A number determining the ascending sort order in the list of available page types. The default is 0.
- Available in edit view – Select to make the page type available for selection when creating pages in the editorial interface. Hide rarely used page types, such as the start page type. Make them available when needed, then hide them again.
-
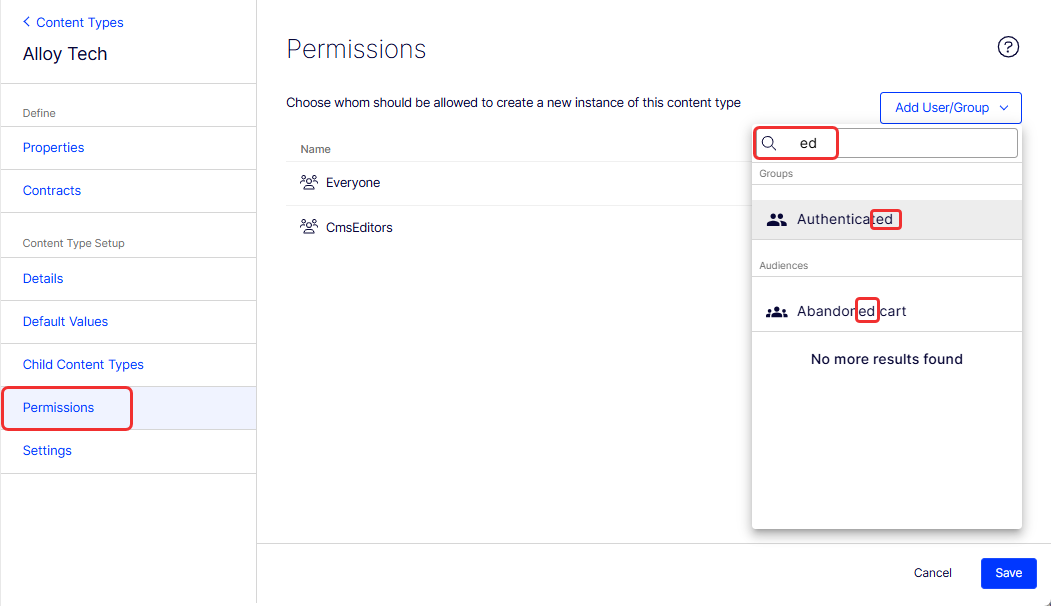
Set the values on the Permissions tab.
Use the Search box to filter users and groups by partial text.
-
Set values on the Default Values tab.
Set default values for built-in properties from the admin view. For properties defined in code that are not visible in the admin view, set default values in code.
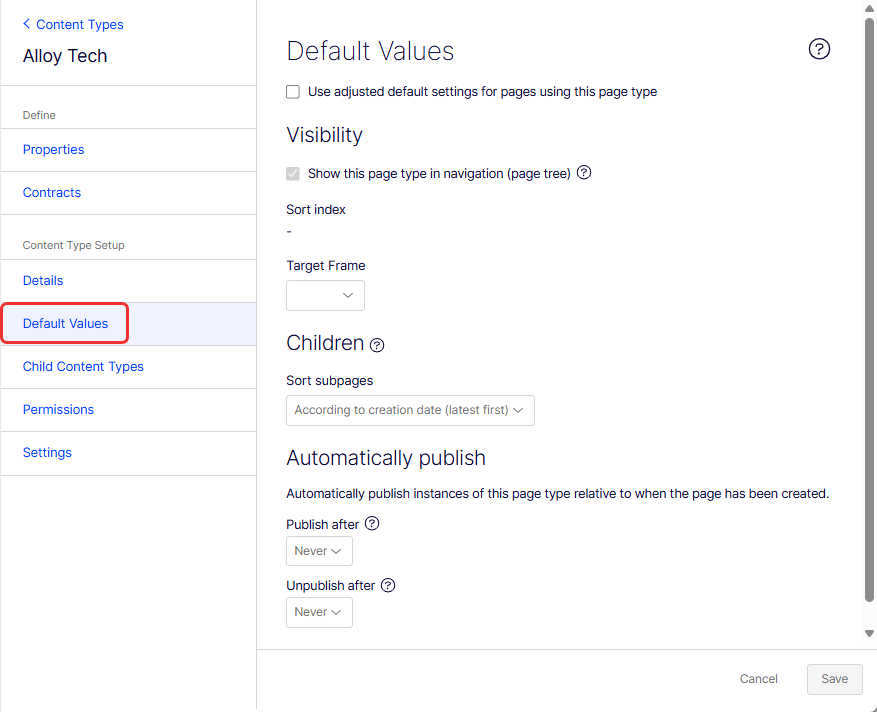
- Use adjusted default settings for pages using this page type – Select to apply adjusted default settings to pages created with this page type.
- Visibility – A section for configuring how pages of this type display.
- Show this page type in navigation (page tree) – Select to control whether pages of this type appear in the navigation tree.
- Sort index – A field to specify the sorting order.
- Target Frame – Select the target frame for pages of this type.
- Children – A section for configuring child pages.
- Sort subpages – Select to determine how subpages are sorted; default is According to creation date (latest first).
- Automatically publish – A section for setting automatic publishing rules.
- Publish after – Select to set a rule for when to automatically publish; default is Never.
- Unpublish after – Select to set a rule for when to automatically unpublish; default is Never.
-
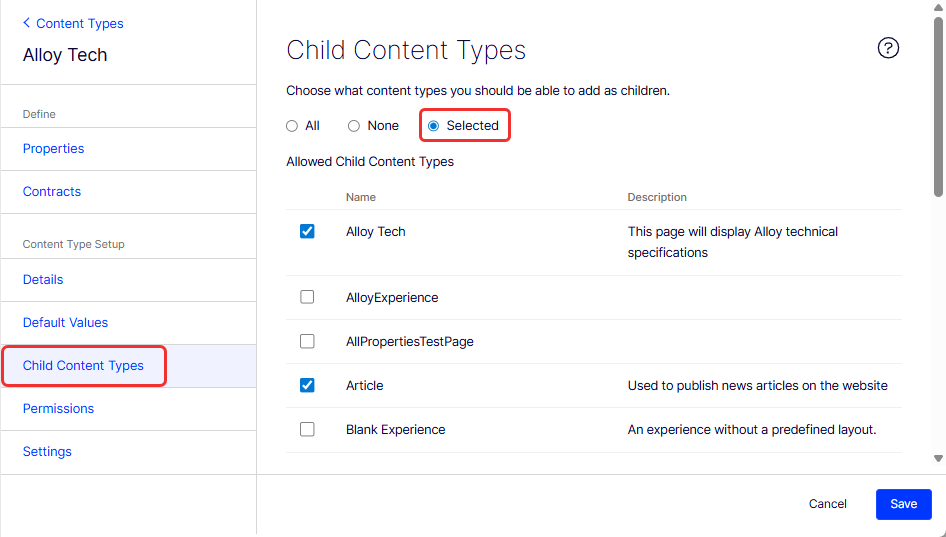
Set values on the Child Content Types tab.
When creating pages, limit the available page types in the page type list to make it easier for editors to choose the correct page type. For example, for an Alloy Tech parent page, select Selected and then specify that the only available page type is Alloy Tech or Article.
-
Click Save.
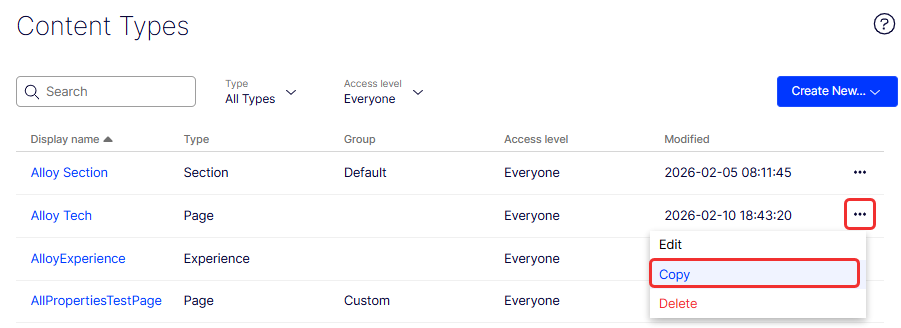
Copy a page type
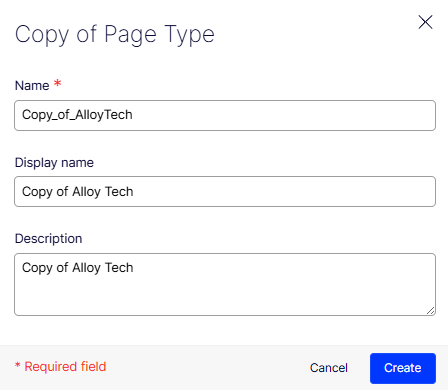
When you copy a page type, its properties are also copied. Edit the information for the page type and its properties after copying. To copy a page type:
-
Select More (...) > Copy on the page type you want to copy.
-
Enter a name in the Copy of Page Type dialog box and click Create.
-
Edit the page type information to suit your requirements and click Save.
NoteCopied page types are untyped. Add the path to the display template; otherwise, pages based on the page type do not have a preview.
Block types
A block type is a reusable component that makes up a portion of a web page. Display it with a template. Block types have no URL and can consist of other block types, content, and media types. The following are some examples of block types:
- A carousel container, used for holding multiple slides.
- A slide used in a carousel.
- A button.
- A navigation menu.
- SEO settings for a page.
- Label dictionary for the application.
- An interactive map.
ImportantDefining a custom block type in CMS is only the first step. For a newly created custom block to render and appear on a webpage in a PaaS environment, a developer must implement a corresponding MVC view in the website's codebase. This view translates block data into visible HTML. Without it, the block does not display on the front end, even if content editors can create instances of it in CMS.
Block types are similar to page types. Modify some settings from the Settings page.
NoteSections and elements do not support blocks containing complex types such as nested block types. If you try, the following message displays: Cannot set Enable as Element because this content type contains property type that elements cannot have. (See property 'SiteLogoType')
Create a block type
-
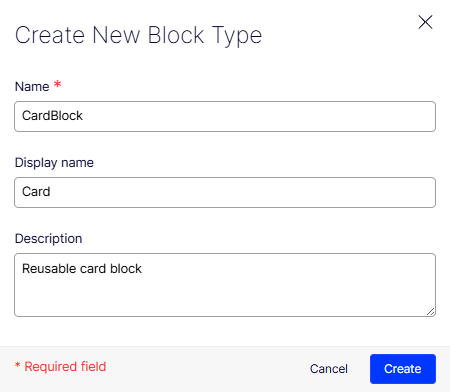
Go to Settings > Content Types and click Create New > Block Type. The Create New Block Type window displays.
-
Click Settings in the new block type.
-
Name (required) – Enter a name for the block type.
-
Display name – Enter the name to display in the list of available block types.
-
Description – Enter text describing the block type. This text also displays in the list of available block types.
-
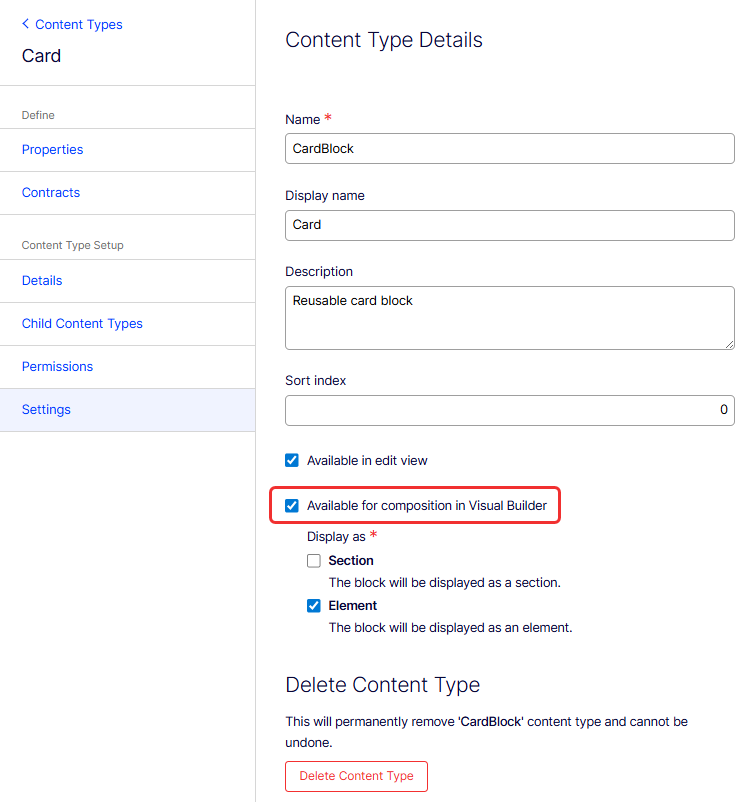
Sort index – Enter a number to determine the ascending sort order for content types listed on the Content Types page.
-
Available in edit view – Select to make the block type available when creating content in the editorial interface. Hide rarely used block types, such as the start block type. Make them available when needed, then hide them again.
-
Available for composition in Visual Builder – Select to make this block available in Visual Builder. Without this selection, the block does not display in the element or section picker.
- Section – Select to display this block as a section in Visual Builder.
- Element – Select to display this block as an element in Visual Builder. Selecting Element affects the available options for adding properties to the block.
-
-
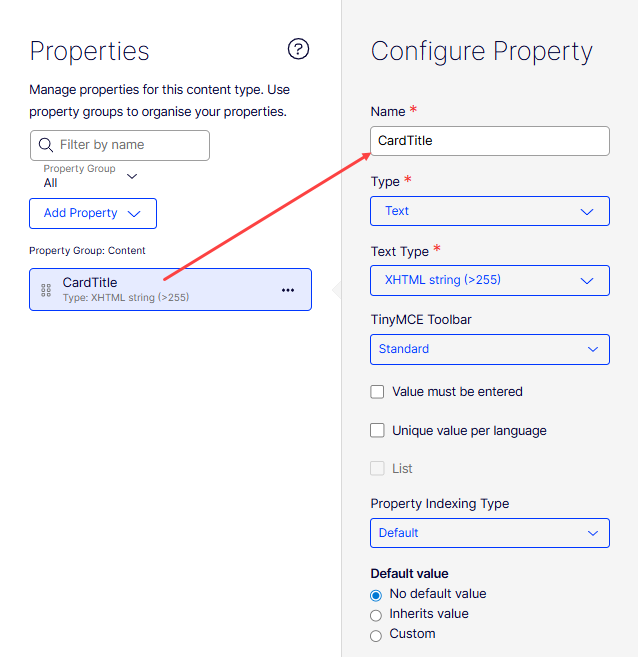
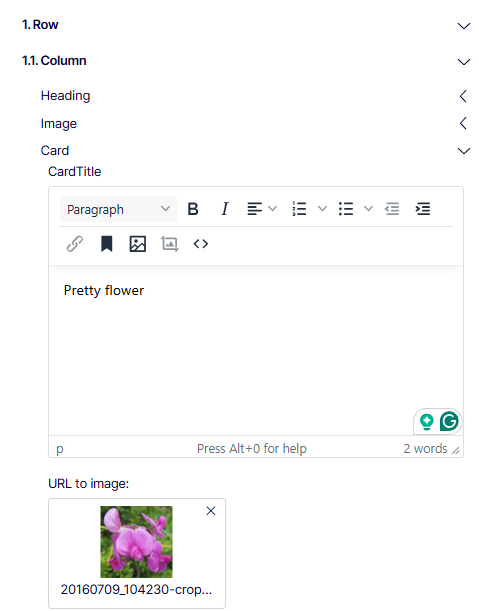
Select Properties and specify the components of your block type. For example, the CardTitle content type has a Text property, which is further defined as an XHTML string (>255) in the Configure Property panel.
-
Modify Permissions and other properties as needed.
-
Click Save to define the block type.
Block as an element
When Available for composition in Visual Builder is selected in the content type settings, the block type (for example, Card) appears in the Add Element selections in a Visual Builder outline.
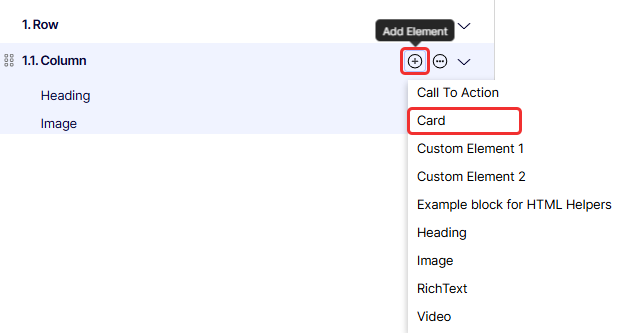
The following image shows a view of Card when added as an element of a section:
Block as a section
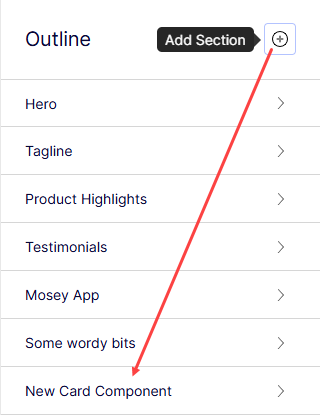
When a block such as Card Component is configured to display in Visual Builder as a section, Card Component appears among the selections when you click Add Section in a Visual Builder outline.
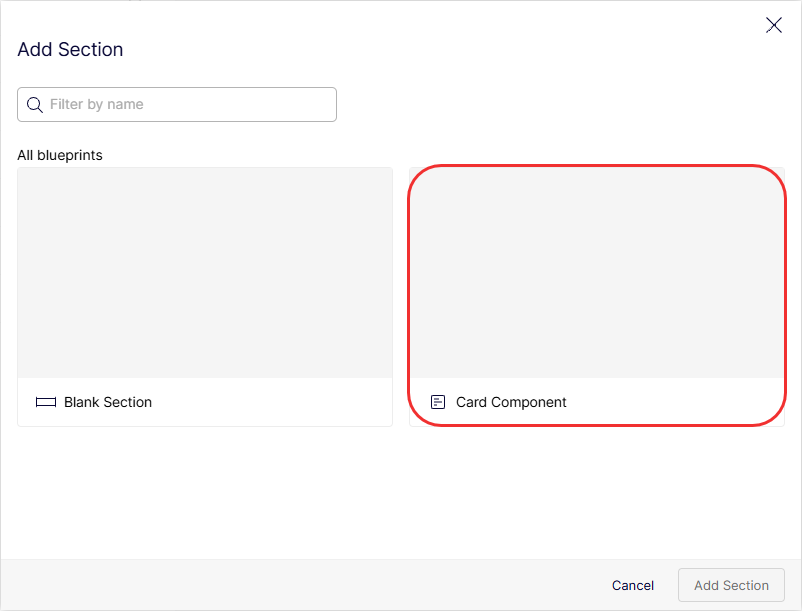
Selecting it creates a New Card Component section in the outline.
Media types
Media types are similar to page types. From the Settings view, add properties, modify permissions, and configure some Settings.
Edit a media type
To edit the settings for an existing media type:
-
Go to Settings > Content Types, and select a media type (Image, Video, or Media).
-
Click Settings.
-
Enter the following information.
-
Name – Enter a name for the media type.
-
Display name – Enter the name to display in the list of available media types.
-
Description – Enter text describing the media type. This text also displays in the list of available media types.
-
Sort index – Enter a number determining the ascending sort order in the list of available media types. The default is 100.
-
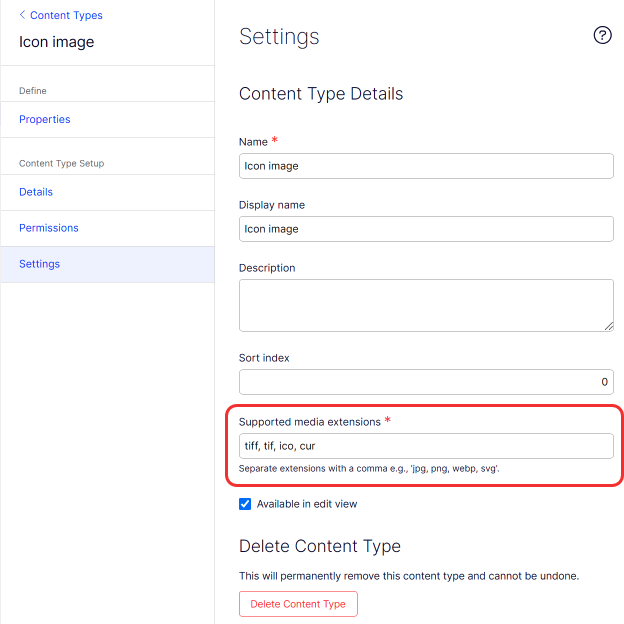
Supported media extensions – Enter a comma-separated list of file extensions the media type supports.
-
-
Click Save.
Create a media type from the Settings view
-
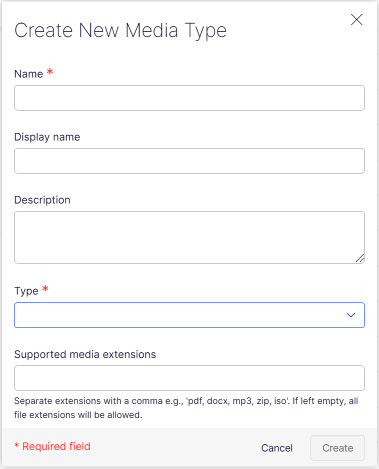
Go to Settings > Content Types, and select Create New > Media Type.
-
Enter the following information.
-
Name – Enter a name for the media type.
-
Display name – Enter the name to display in the list of available media types.
-
Description – Enter text describing the media type. This text also displays in the list of available media types.
-
Sort index – Enter a number determining the ascending sort order in the list of available media types. The default is 100.
-
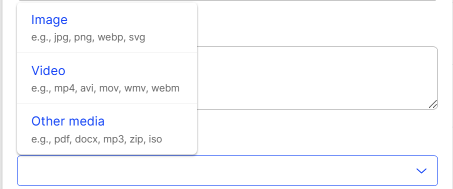
Type – Required for image and video types. Select the media type.
-
Supported media extensions – Enter a comma-separated list of file extensions the media type supports.
-
-
Click Save.
Other content types
Generic content types exist for folders and media files by default. Developers can create custom content types based on these existing types. For example, a folder content type can include properties such as Copyright or Photographer.
Advanced content types
For experience, section, Connect from Graph, contract, and orphaned types (and for typed content references in code), see Advanced content types.
Updated about 1 month ago