Administer users
Administer user credentials and access rights in Optimizely CMS 13. Learn about Opti ID integration for user and group management.
Use Administer Users to create, edit, and delete user accounts and assign them to groups. These accounts authenticate locally in CMS rather than through Opti ID, and the two authentication paths can coexist. Base access rights on user groups rather than individual users for easier, safer maintenance.
NoteIf your organization migrated to Opti ID, you must manage users in Opti ID. See the Opti ID user documentation.
- To add users with Opti ID, see Users in the Opti ID documentation.
- To add groups with Opti ID, see Groups in the Opti ID documentation.
Roles managed inside CMS 13 (PaaS) are not available to Opti ID users. CMS (PaaS) roles are typically used for end users (site visitors and customers), not for users who access the CMS UI.
Administer user credentials in the following ways:
- Administer Users from the Optimizely Content Management System (CMS) Settings view.
- Manage users and user groups in Windows – Users created in the CMS Settings view are available from the Settings view only; they are not accessible from Windows. You cannot add users created in Windows to groups created in Optimizely. See Virtual roles for information about working with membership and role providers.
- Develop a customized role and membership provider.
Smaller organizations with few editors tend to use the CMS administration view, whereas larger organizations with many editors tend to use the other options. Combine these options as needed.
Create a user
Create a CMS-local user account to give a contributor sign-in credentials and group memberships. Local users suit smaller teams that do not authenticate through Opti ID or an external provider.
-
Go to Settings > Administer Users.
-
Click Create User. The Create User window displays.
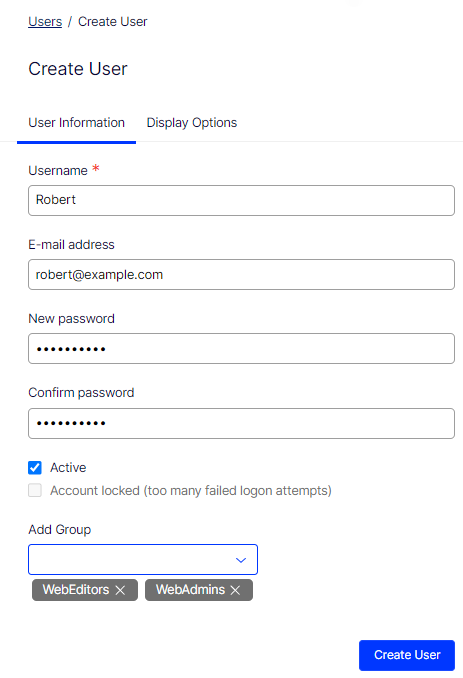
- Specify a username, email address, and password (and confirm password).
- Set the account to Active.
- Select any user groups the user should belong to.
-
Specify the following options on the Display Options tab.
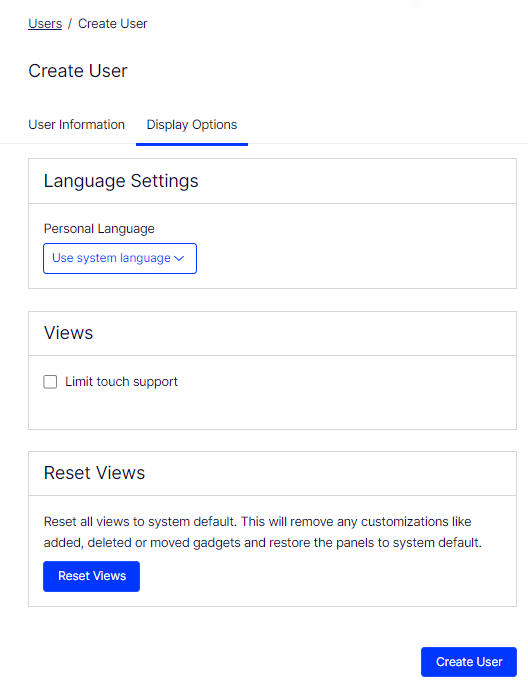
- Personal Language – Select the preferred language from the drop-down list.
- Limit touch support – Select to restrict or modify touch-related functionalities for the user's interface.
- Reset Views – Click to revert all view customizations to the default settings. Personalized gadgets are removed and panels return to the default system configuration.
-
Click Create User.
Edit a user
To edit user settings, click a username in the Administer Users window. Modify properties only for users created through self-registration or with Create User in CMS.
Delete a user
Delete a user account to revoke CMS access when a contributor leaves the team or no longer needs to sign in. Removing the account also clears the access rights and function permissions tied to it.
-
Search for the username in the Administer Users window.
-
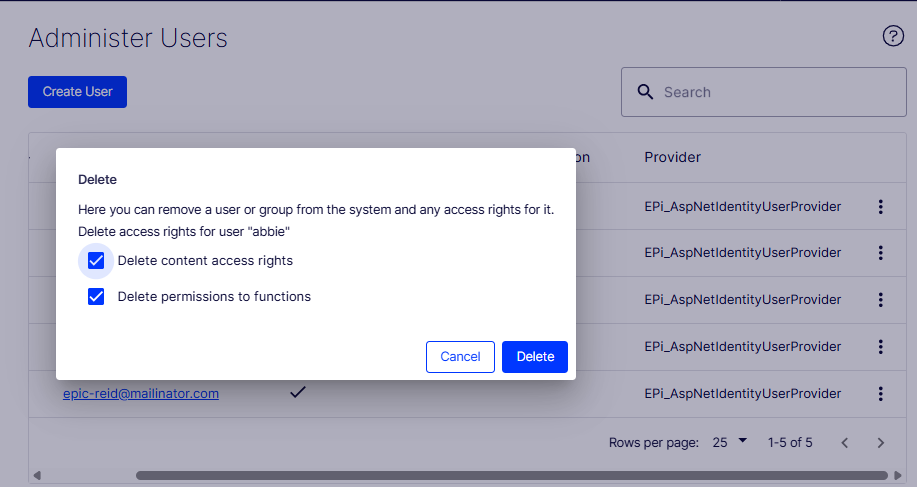
Select More (...) > Delete. The Delete window displays options for removing the user and managing associated access rights.
- Delete content access rights – Select to remove the content access rights from the user (abbie).
- Delete permissions to functions – Select to remove the permissions-to-functions assignments for the user.
-
Select the appropriate options and confirm the deletion.
WarningDeleted user accounts cannot be recovered.