Define page properties
Learn to define page properties in Optimizely CMS 13. Structure your content, manage metadata, and optimize pages for better search and user experience.
Page properties control the structure, behavior, and editorial experience for each content type. Use the Content Types admin view to define properties, set defaults, manage permissions, and configure child types.
This topic is for CMS 13 administrators and developers with administrative access rights.
In Optimizely Content Management System (CMS) 13, property types are the building blocks of content types. Content types are the building blocks of web content.
CMS 13 uses the following types of properties:
- Built-in properties – Set by the system and are available for pages and blocks regardless of type. See the following topics for property details:
- User-defined properties – Added to the page, block, and experience type definitions (in code or from the admin view). See:
Create content type
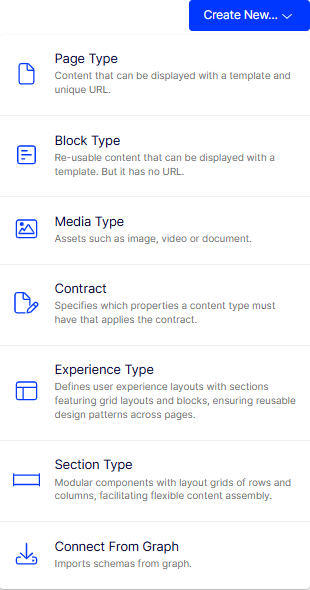
Create different content types (Page, Block, Media, Experience, Element) by defining combinations of properties. To work with content types, go to Settings > Content Types > [select content type] > Properties.
-
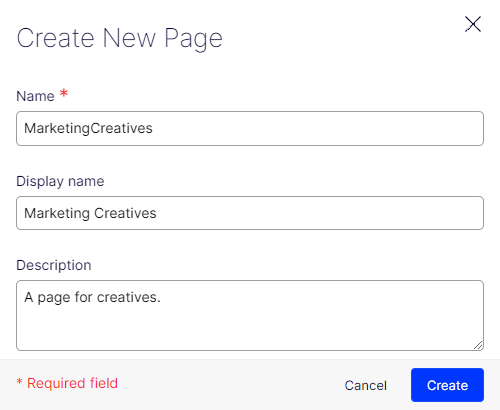
Go to Settings > Content Type and click Create New > Page Type (or other type).
-
Enter the page information.
-
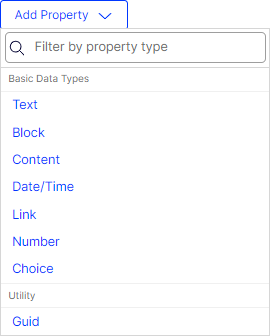
Click Add Property to define the properties for the page type.
-
Fill in the fields in the Configure Property view.
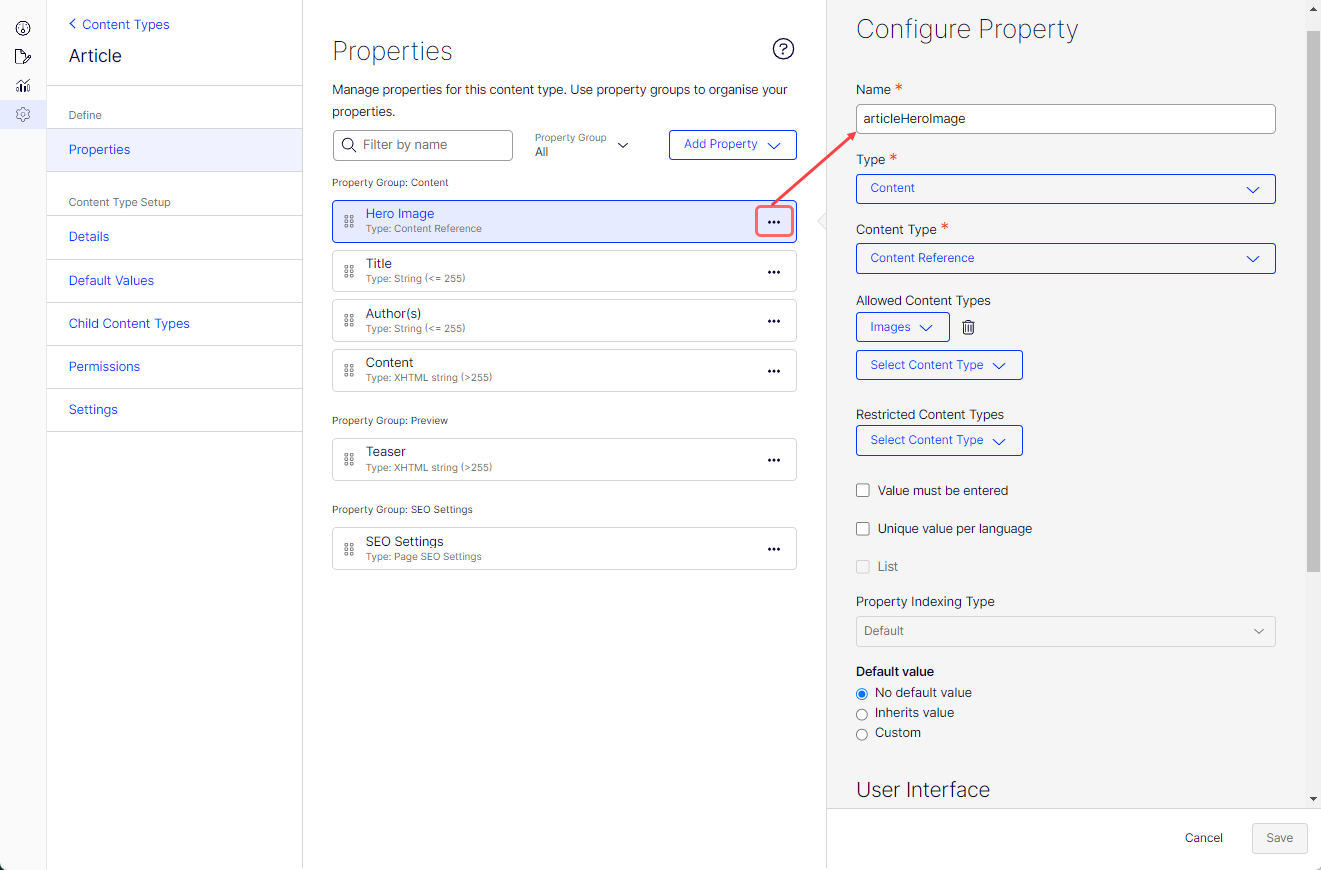
Each type has different validations.
-
Click Save.
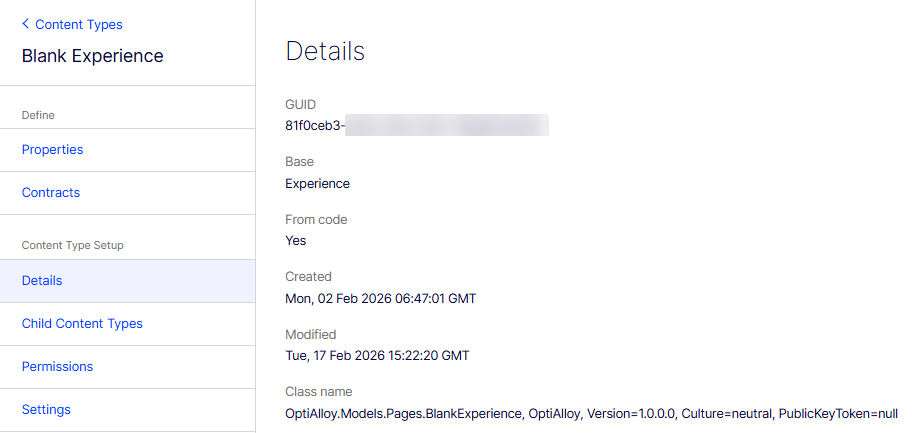
View content type details
The Details page displays the following information:
- GUID – The content type's GUID.
- Base – The content type's base type.
- From code – Not applicable to CMS 13.
- Created – When the content type was created.
- Modified – When the content type was changed.
- Class Name – Displays the API class to which the content type belongs, with additional information.
Set default values
NoteThe Default values page appears only for page types; not for block, media, experience, or element types.
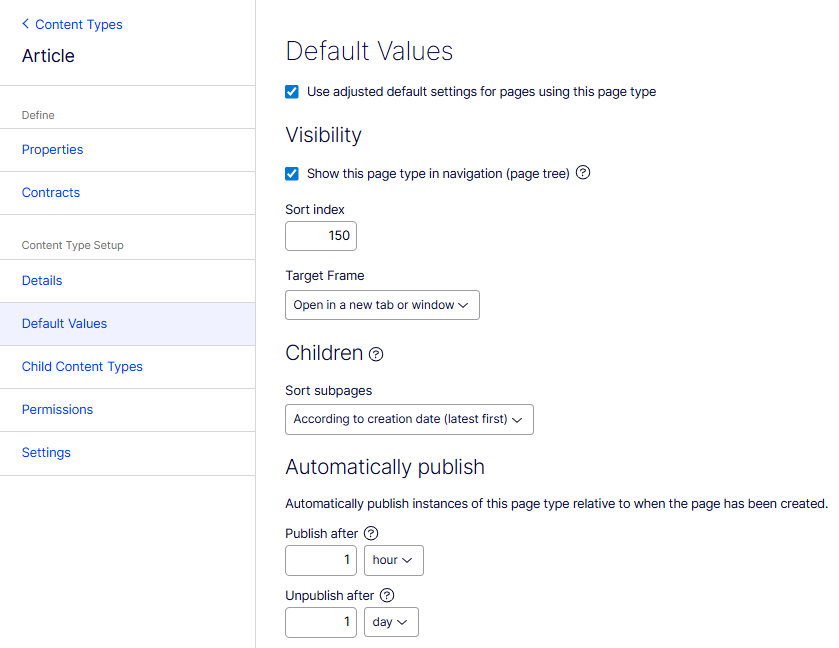
- Use adjusted default settings for pages using this page type –
- Select to define the publishing options for this page type.
- Clear to let the system set the publishing options (Never is the default for Publish after and Unpublish after) for this page type.
- Show this page type in navigation (page tree) – Select to display the page in the site navigation. If not selected, the page is displayed only in listings.
- Sort index – Not applicable to CMS 13.
- Target Frame – Select Open in a new tab or window or Open in the full body of the window.
- Sort subpages – Select one of the following options:
- According to creation date (latest first)
- According to creation date (oldest first)
- Alphabetical
- According to sort index
- According to change date (latest first)
- According to Start Publish date (oldest first)
- According to Start Publish date (latest first)
- Publish after – Enter a number and select minute, hour, or day. In the following example, content of this page type is automatically published to the application 30 minutes after you publish the page after editing.
- Unpublish after – Enter a number and select minute, hour, or day. In the following example, the content of this page type is unpublished after 1 day. Use this for time-sensitive data that should display for a limited period.
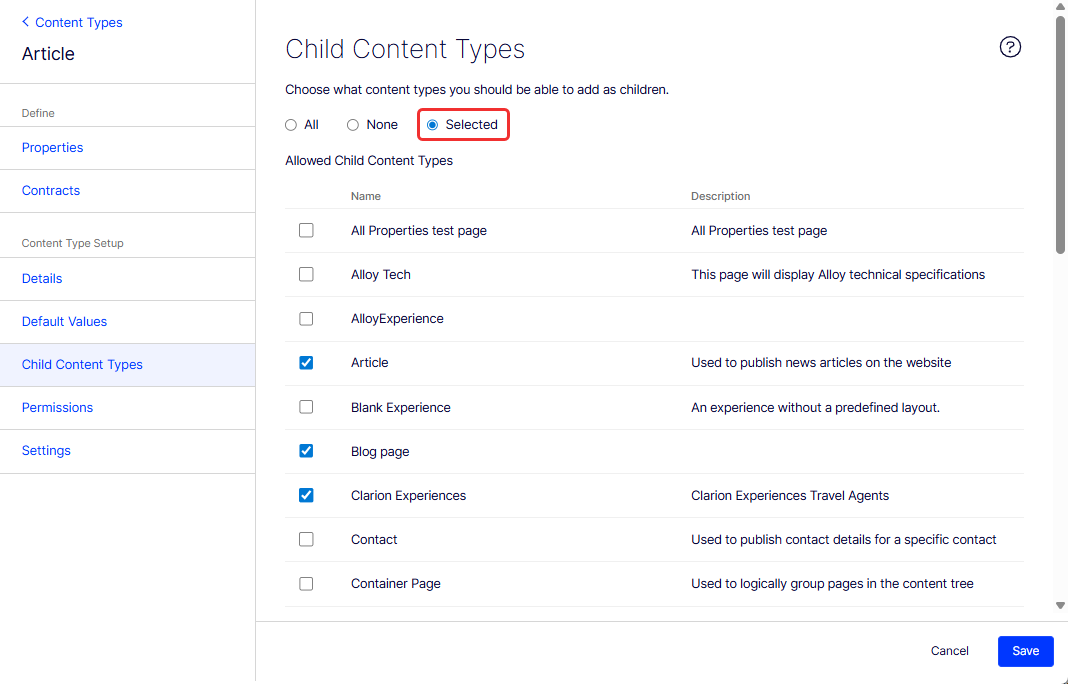
Set child content types
Limit the content types that others add as associated children of the content type. None is the default (for no child types), but select All (any child type), or Selected and select the ones you want as shown in the following image. For example, limit the Article content type's children types to Corporate Office and Article Group Page.
Set permissions for content type
To make the content type available only to specific groups, open the Permissions tab.
-
Click Delete to remove the Everyone group.
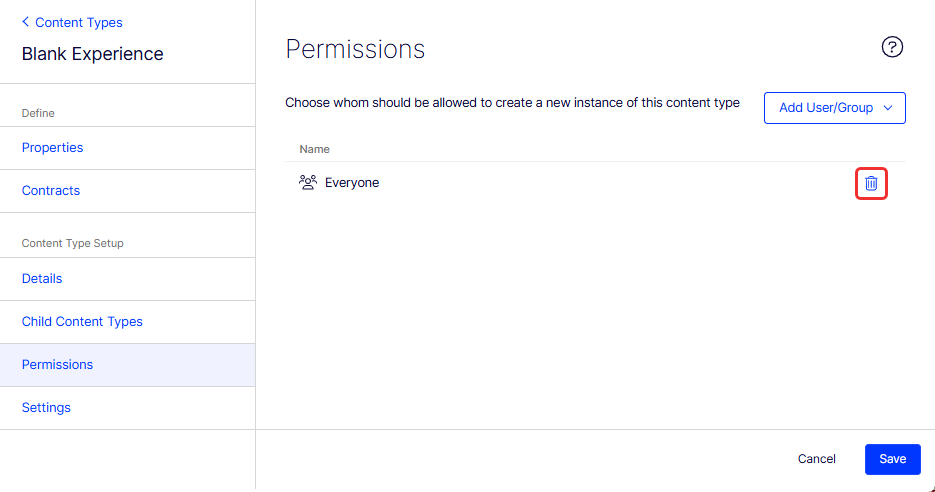
-
Select Add User/Group > CmsEditors (or another group or user).
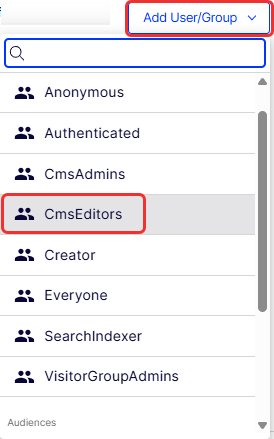
NoteAdministrators manage users and groups through Opti ID.
-
Click Save. The updated content type shows CmsEditors in the Access Level column of the Content Types list.
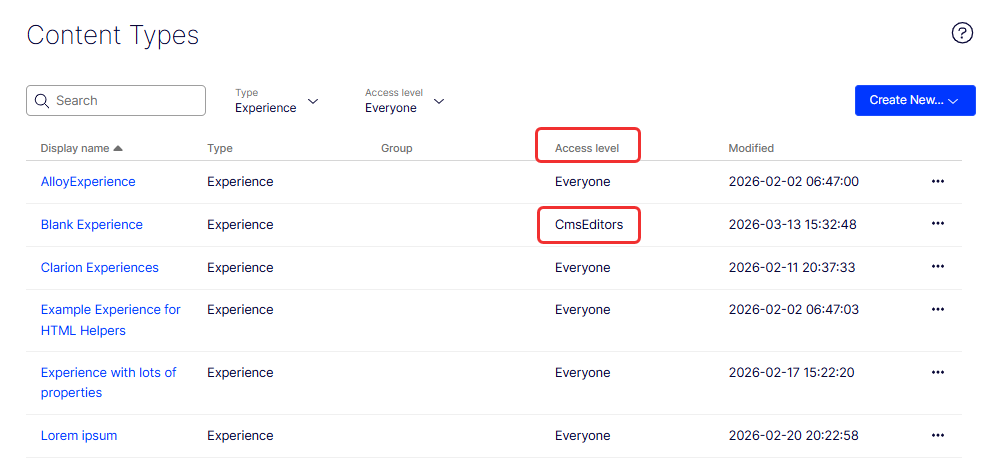
When a user tries to Create an Experience, the Blank experience content type will be visible and available only to users in the Content Editors group.
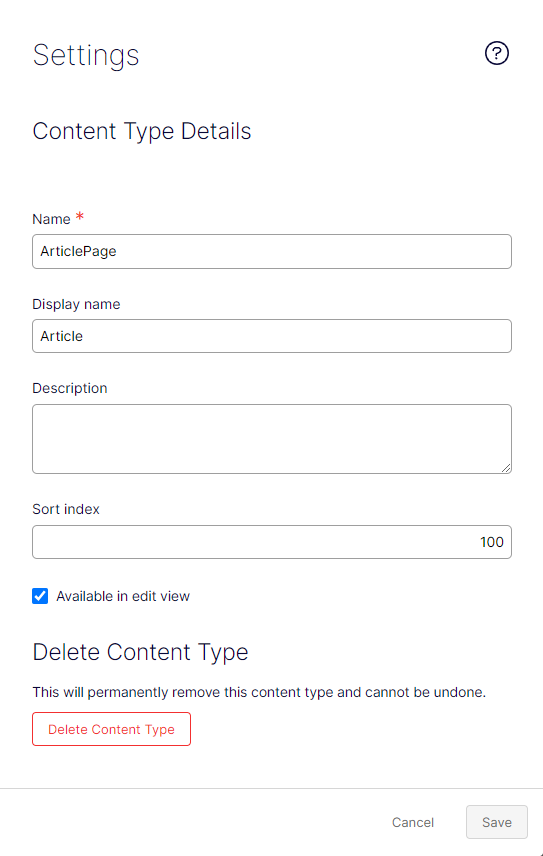
Set content type details (Settings)
The Settings tab displays the basic settings of the content type, as described in the following list.
-
Name – (Required) Enter the internal name for this content type, using only alphanumeric characters and the underscore (_); no spaces.
-
Display name – Enter the name that displays in the Content Types list.
-
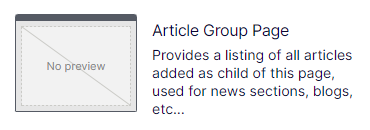
Description – Enter a description for the content type, which displays when you are selecting a content type. The following example shows the Article Group Page page content type with its description.
-
Sort index – Manually set the Sort index value for this page type. The sort index for a content type controls the order in which content types are listed on the Content Types page.
-
Available in edit view – Select to make the content type available in edit view. Clear to make it inaccessible from edit view.
-
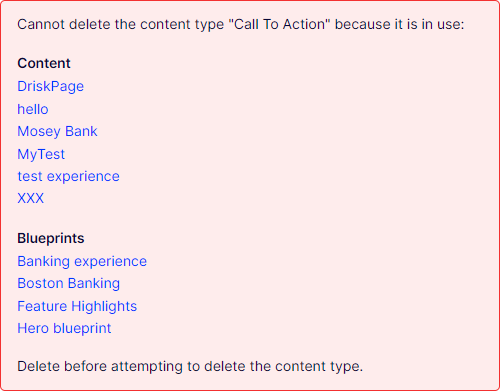
Delete Content Type – Delete the content type after confirmation. If the content type is in use, a message lists the items to delete first.