Create Visual Builder content from a blueprint
Create and customize Optimizely Visual Builder experiences with blueprints. Add, rename, reorder, and remove sections, rows, columns, and elements.
Blueprints let you start with a predefined layout so you can build pages faster and maintain consistent design across your site. Select a blueprint when creating a page to get a preconfigured outline that you customize for your needs.
NoteCreate experiences in any part of the page tree, but only the Mosey Bank example branch has a configured preview in the sample site. Create your experience under that structure. To create, find, rename, or delete a blueprint, see Manage blueprints.
-
Go to Root > More (...) > Create Page in the page tree.
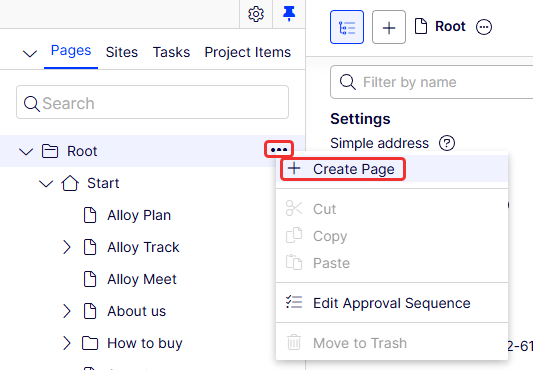
The Create Page window displays with saved blueprints.
-
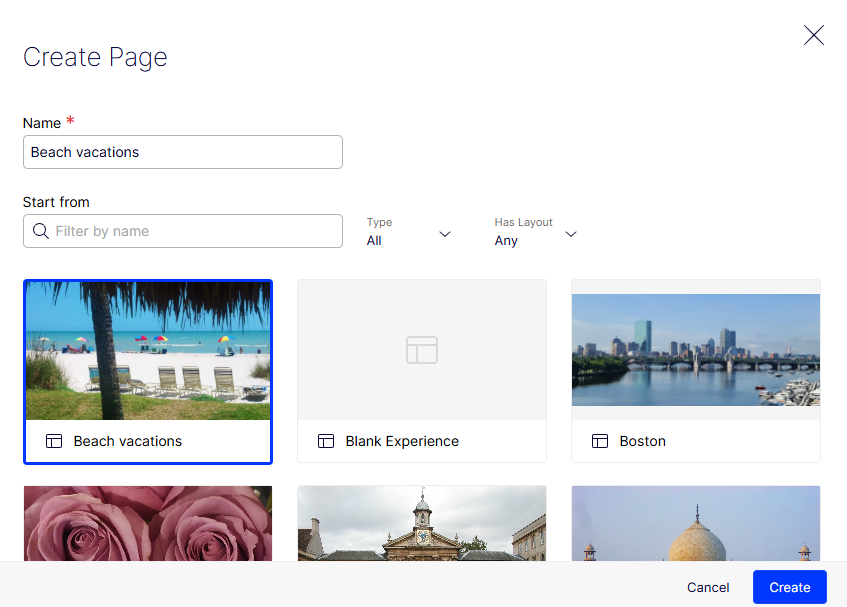
Enter a Name for the experience and then select one of the available blueprints. Filter blueprints by name, type, and layout to find the blueprint you want.
-
Click Create.
Visual Builder displays the new page with the blueprint you selected, starting with the same outline, which you can customize by changing section names, reordering sections, and so on.
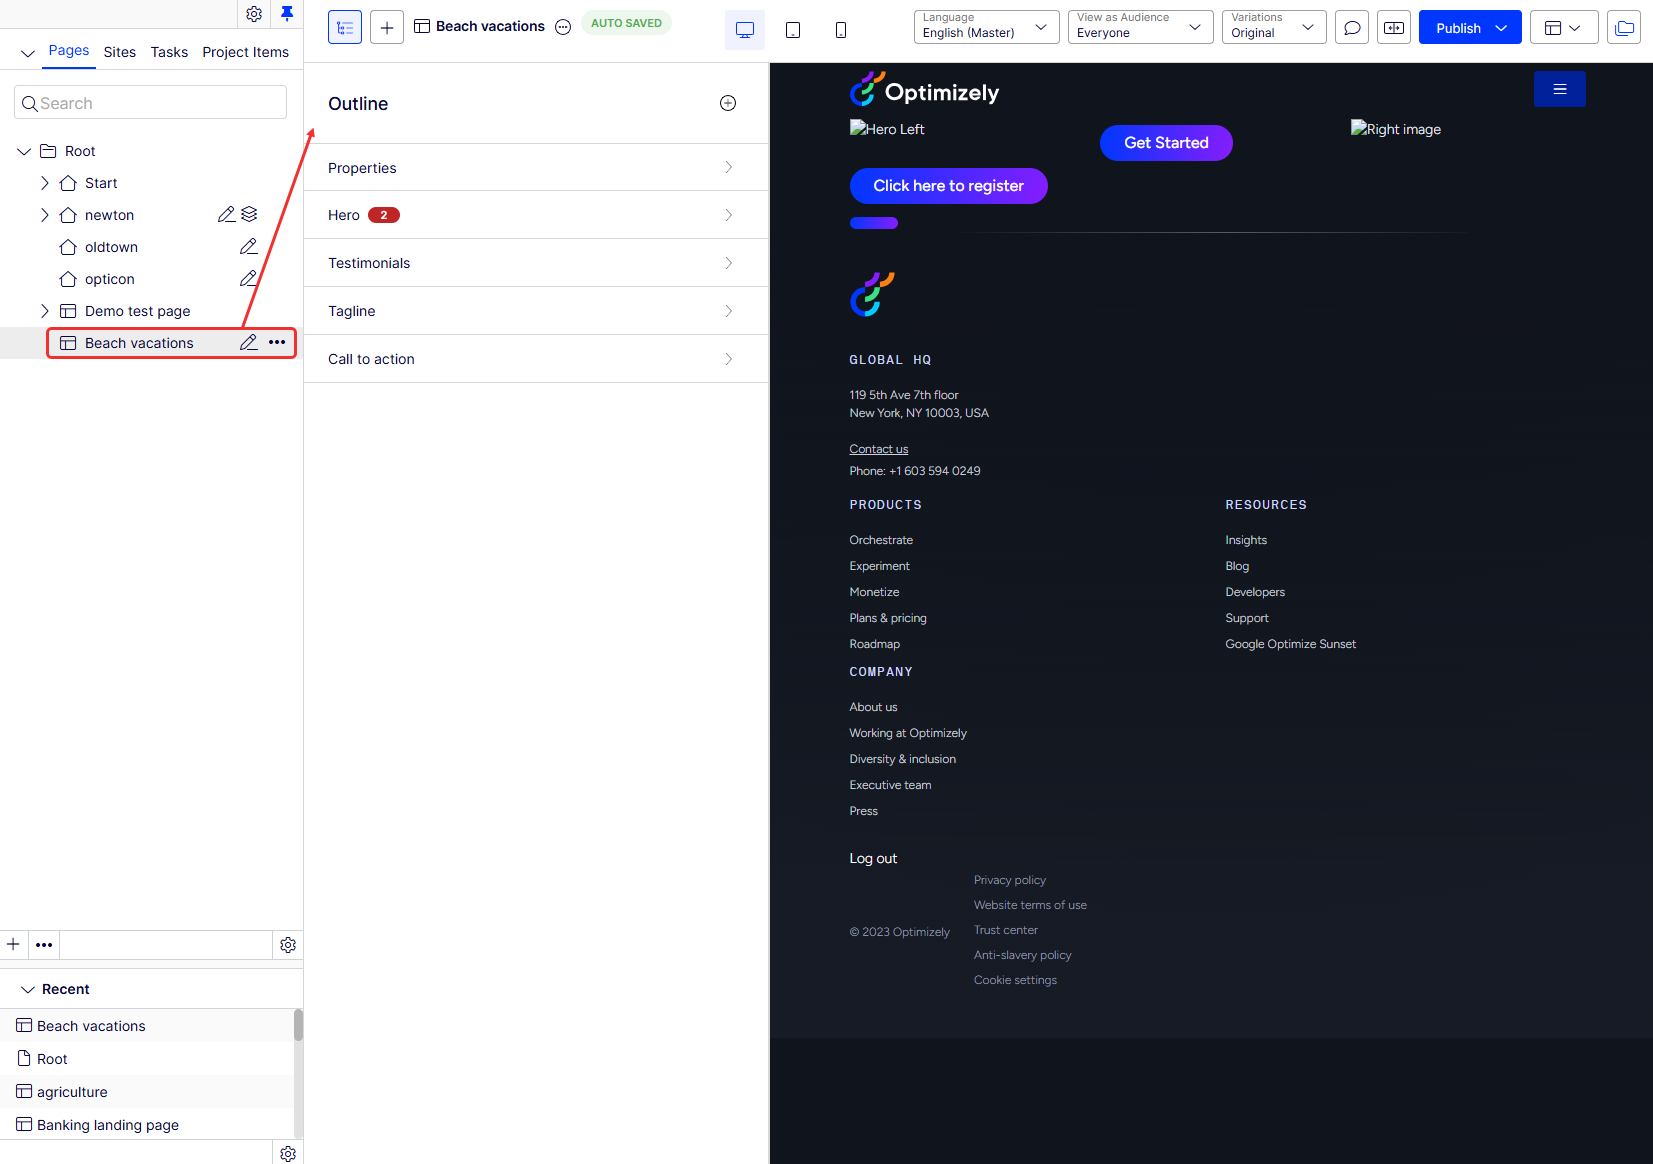
The left side displays the page tree and outline; the right side displays the preview. You can select desktop (shown), tablet, or mobile views. See Preview Visual Builder content for more information.
Rename a section
-
Select the section you want to rename in the outline.
-
Click the name or select More (...) > Rename and enter another name.

Add a section
-
Click Add Section (+) > Add Section in the outline.
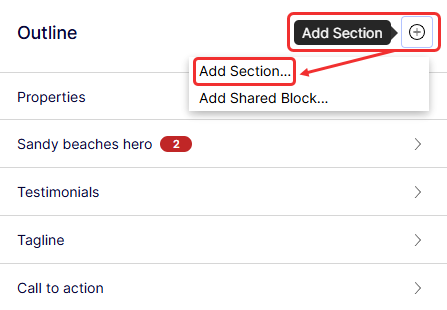
The Add Section window displays.
-
Select Blank Section to create one from scratch, or select a blueprint to use a section that is already defined for you.
-
Click Add Section.
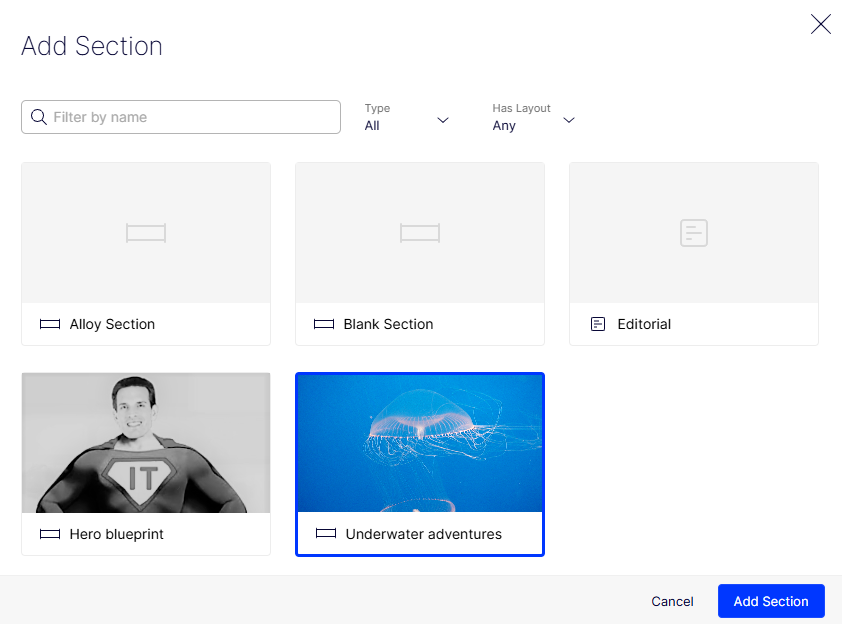
The section is added to the bottom of the outline. Elements within an outline are collapsed by default. You can click to expand one element at a time.
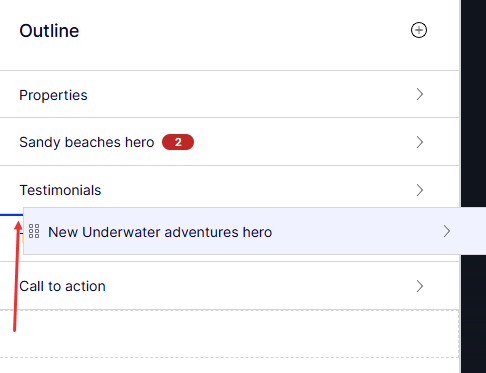
Reorder sections, rows, columns, and elements
Drag and drop a section to reorder it. Reorder rows, columns, and elements to customize your experience. Visual Builder numbers rows and columns. The result displays in the Preview pane when you reorder them.
NoteYou cannot drag an element from one column to another.
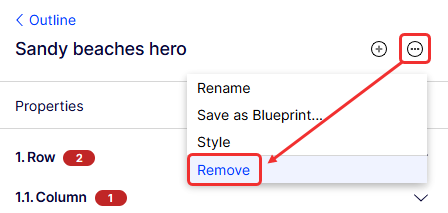
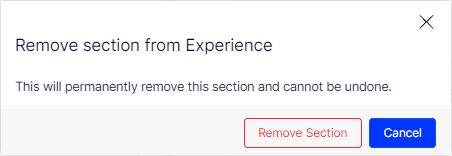
Remove a section
-
Select the section that you want to remove from the outline.
-
Click More (...) > Remove.
-
Click Remove Section to confirm.
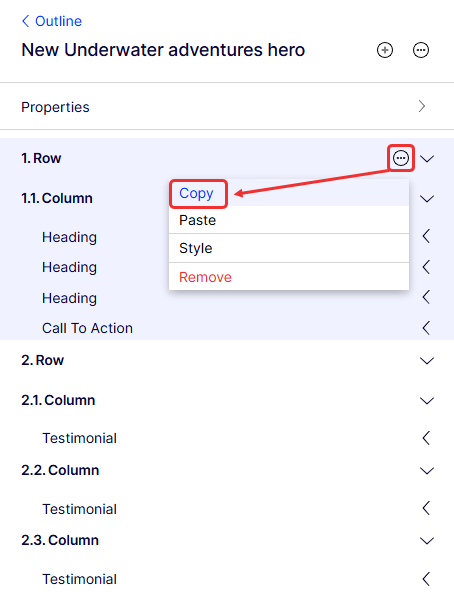
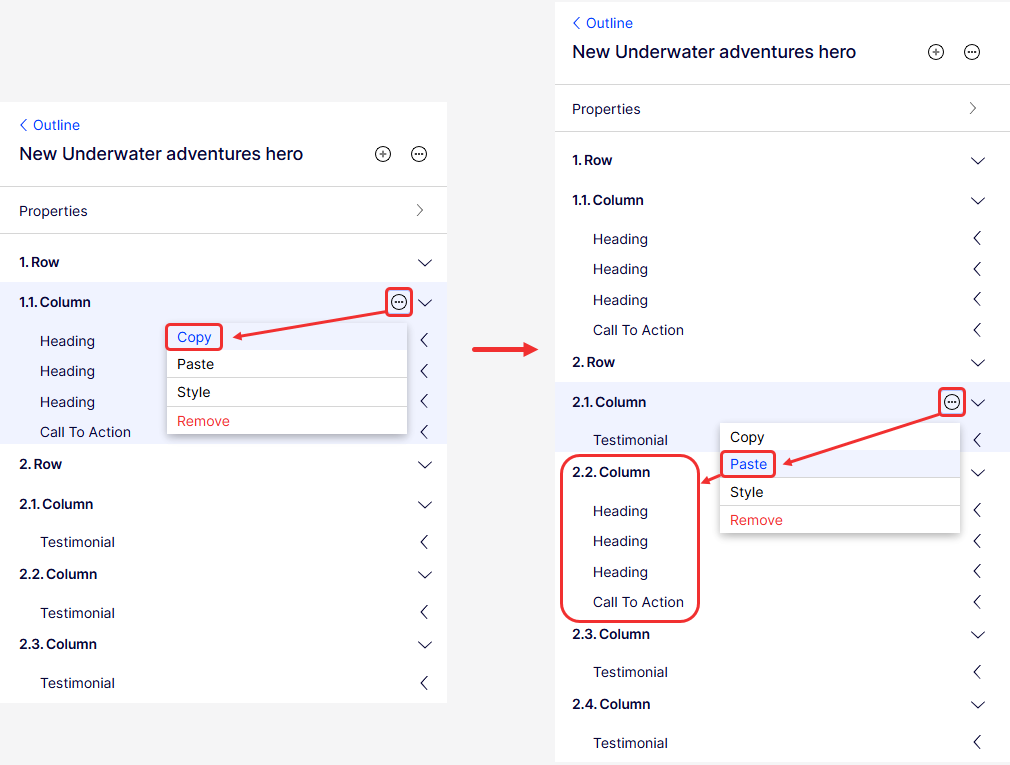
Copy and paste a row or column
Copy a row or a column within a section by clicking More (...) > Copy for the row or column you want to copy. Then select More (...) > Paste on the row or column where you want to paste.
Paste rows under other rows only. If you copy a row, then click More (...) on a column, the paste option is not clickable.
Unlike rows, you can paste columns under rows or columns. If you copy a column, then click More (...) > Paste on a row, the Visual Builder adds the column to the bottom of that row's hierarchy.

Drag and drop to reorder the pasted column, or select More (...) > Paste directly on the column where you want to paste. Visual Builder adds the column directly below that column instead of at the bottom of the entire row hierarchy.
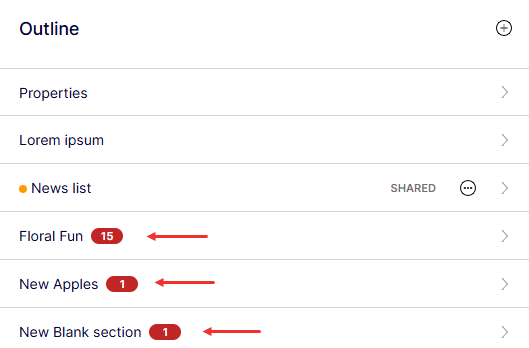
Validation errors
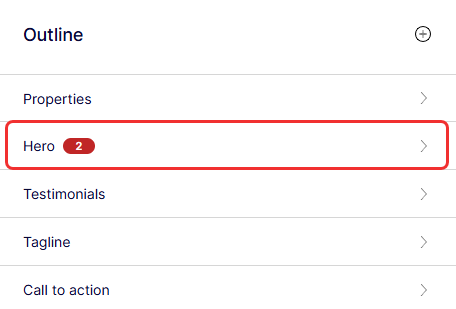
The total number of validation errors displays next to each section that has required fields that you have not completed. You can go to the outline within a section to view the breakdown of validation errors on each row, column, and element within that section.
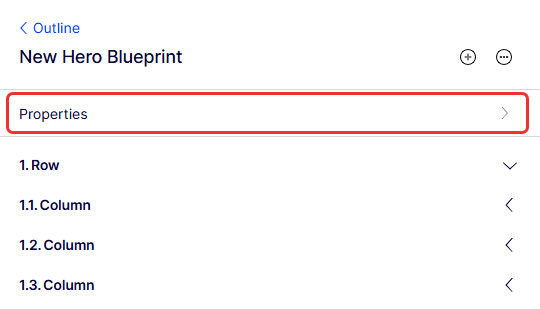
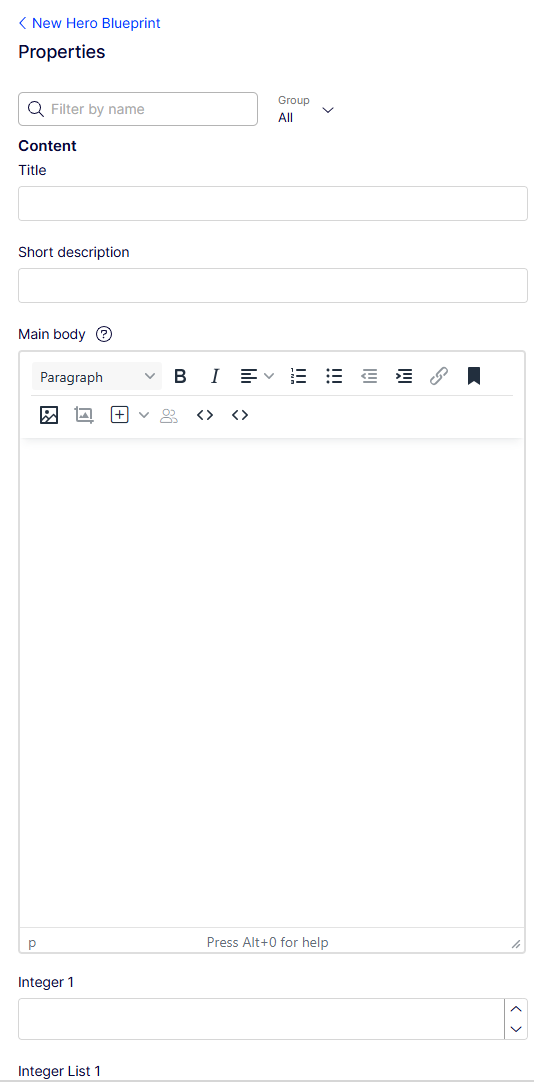
Edit section properties
Edit the properties for a section directly in Visual Builder to control layout and display settings.
-
Select a section from the outline.
-
Click Properties.
-
Edit the section's properties as desired.
For information about customizing the elements of your experience, see Elements in Visual Builder and Select Visual Builder styles.