Languages
Enable and manage multiple content languages in Optimizely CMS 13 for editors.
Use Settings > Languages to add, enable, and configure languages for content editing. Editors create content only in languages that are added and set to Available.
To set the CMS 13 UI language, see Get started with CMS 13.
Editors can create content in a language after you activate it and set an access level to authorize them to create or edit pages in that language.
When an editor copies a page, all language versions copy regardless of the editor's language rights. For example, an editor with access rights only to English who copies a page in English and French will paste both language versions.
NoteCMS 13 no longer auto-creates language branches (a language branch is the set of translated content for a specific language under a given page node) when you create content in a locale that does not exist.
In earlier versions, attempting to create content in a locale that was not explicitly added and enabled silently created a language branch. CMS 13 does not do this.
Creating content in a locale that does not exist, or that exists but is not enabled (Available selected), returns an error. Ensure every language for content creation is added and set to Available before editors create or edit content in it. See Add languages.
View languages
The Languages page lists every language installed for the site, along with its activation state and sort order. Use this view to audit which languages editors can author in and how they appear in the UI.
Go to Settings > Languages. The installed website languages display.
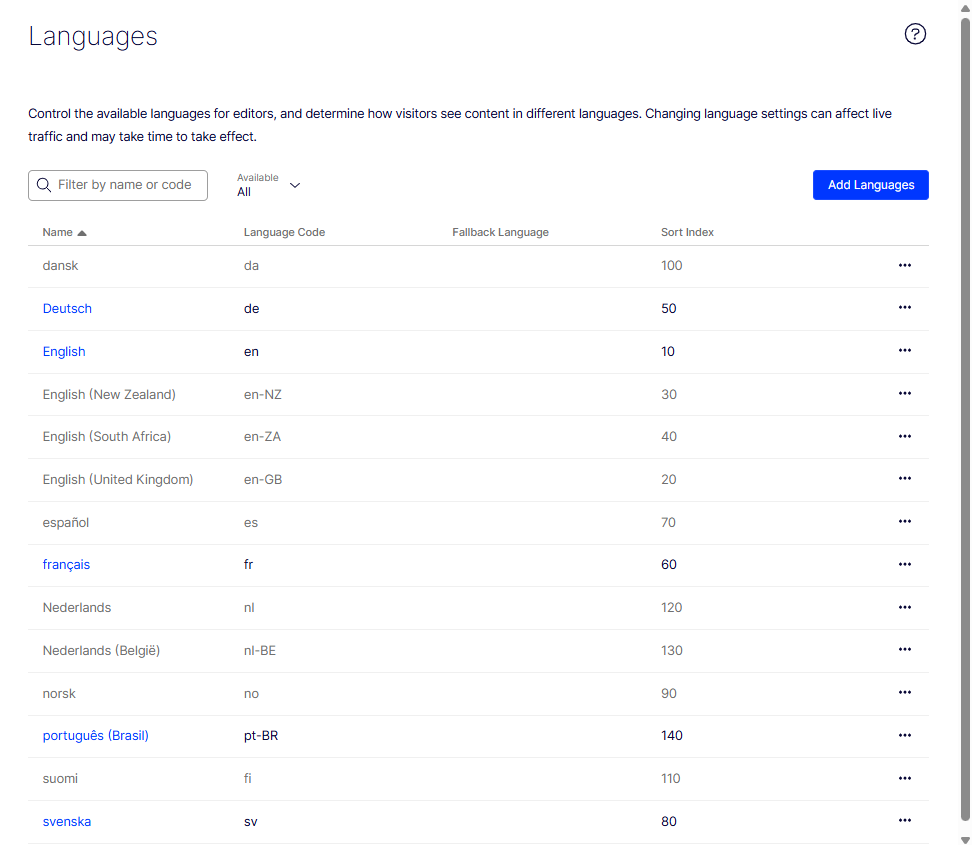
On the Languages page, do the following:
- Select Available > True to show activated languages, Available > False to show deactivated languages, or Available > All to show both.
- Sort the list by clicking Name, Language Code, or Sort Index.
- Check the Available column for a checkmark to confirm which languages are active.
- Adjust language order by changing the sort index in the language settings.
Activate or deactivate a language
Activate a language to let editors author and publish content in it. Deactivate a language to stop new edits while preserving existing content for later reactivation.
- Click the language name.
- Select Available.
- Click Save. To deactivate, clear Available and click Save.
NoteClearing Available does not delete existing content in that language. Existing content remains accessible but cannot be edited until the language is re-enabled. Editors cannot create content in a deactivated language. Attempting to do so returns an error.
Add languages
Add a language to expand the site's authoring options and reach new audiences. Configure name, URL slug, fallback, and permissions so editors with the right access can publish localized content.
Add and enable a language in Settings before editors can create or edit content in it.
-
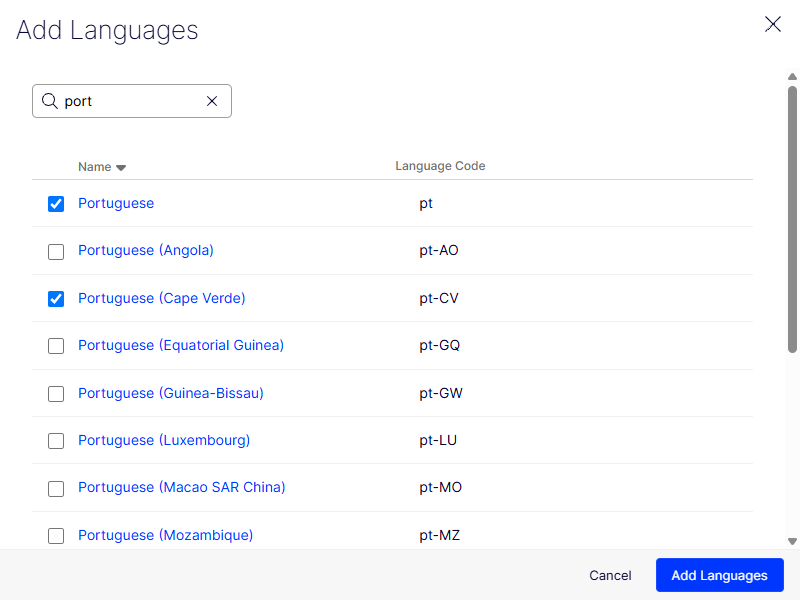
Go to Settings > Languages.
-
Select the languages to add. Type in the Search box to filter the list.
-
Click Add Languages.
-
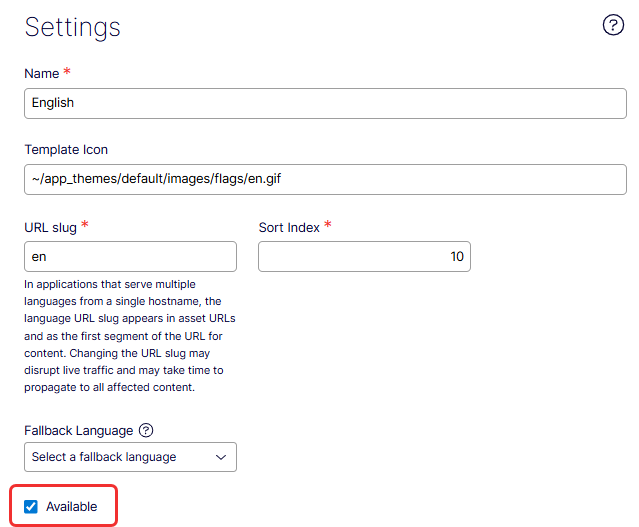
Click a language to edit its settings. The Settings window displays.
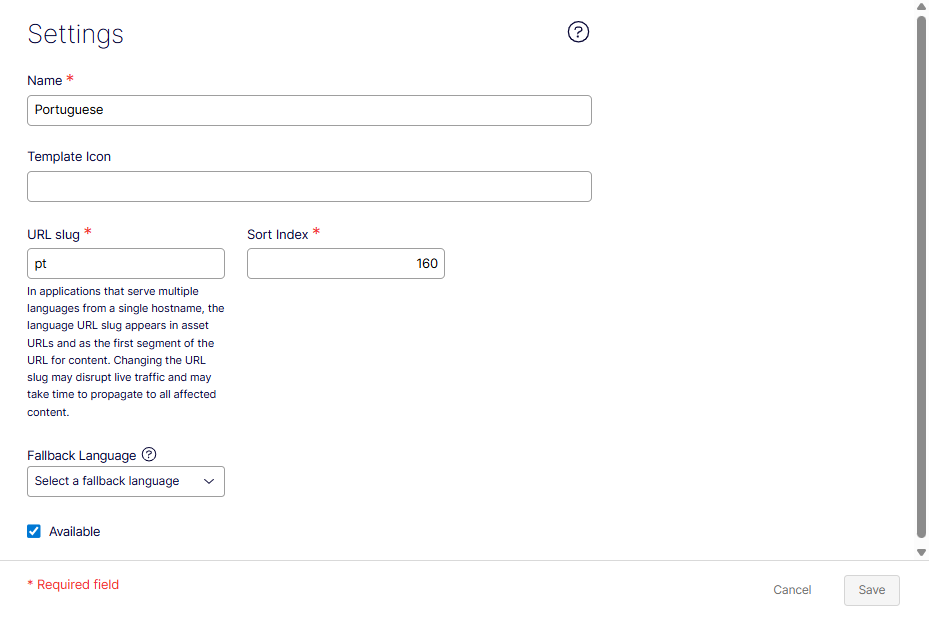
- Name – Enter a display name for the language. The field defaults to the language encoding name.
- Template icon – Enter the relative path to an icon symbolizing the language.
- URL slug – Provide a specific prefix to show the content of the relevant language. If you do not provide a prefix, the language code is used, such as
www.company.com/nl. - Sort Index – Enter a number to set the display order for this language.
- Fallback language – Select a language to use when a page does not have a translation for this language.
Note
Changes to the fallback language require an index rebuild to take effect.
- Available – Select to activate the language for editing. This setting also controls whether the language is visible to website visitors. A deactivated language does not display in the edit view. Existing content in that language remains accessible but cannot be edited.
-
Select the Permissions tab.

-
Add User/Group – Select to define which editor groups have access to create and edit content in this language. When you add a language, the Everyone group has access by default.
An editor's access rights to both content and language determine which actions the editor can perform. An editor must have edit access for a specific language and a specific item to edit the content in that language.
When a language has Everyone as access rights, access rights for an item apply to all languages. An editor with delete access rights can delete an entire node with content in all languages, including languages the editor does not have access to.
NoteRemoving the Everyone group in a certain language may cause some editors to lose their access rights to create and edit content in that language.
-
-
Click Save.
Graph search results in different languages
Graph language analyzers deliver accurate, locale-aware search results across translated content. Knowing which locales have analyzers helps administrators set realistic expectations for multilingual search quality.
CMS works with Optimizely Graph to deliver search results for up to 33 supported language locales. For the full list, go to Supported locales with language analysis. See also GraphiQL under Settings.
NoteEditors can create content in any of the 790 possible languages in CMS Settings by making those languages Available in their instance. Many languages are regional variations of a single language. For example, English exists in more than 100 variants.
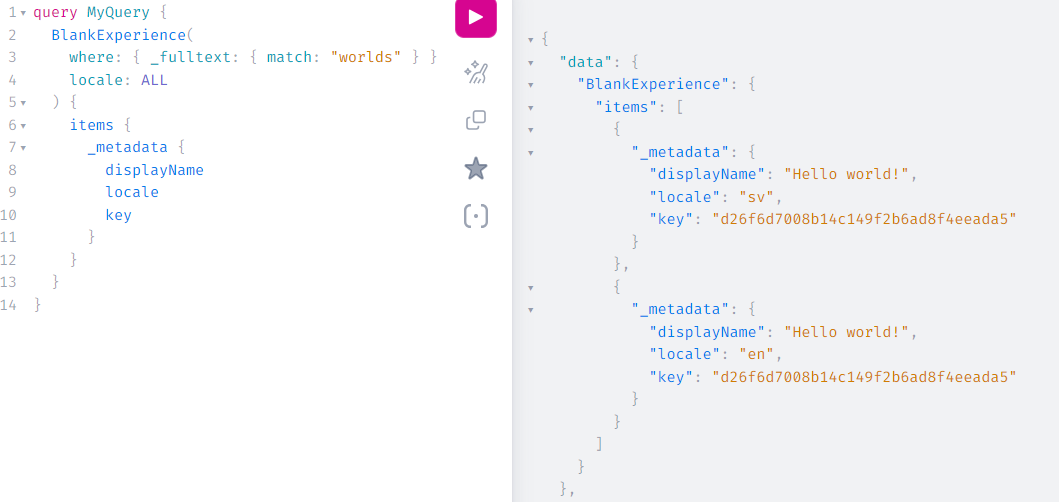
Consider a search for "world" on a page translated into Swedish, English, and Akan. Optimizely Graph searches all three translated pages and finds "world" in each.
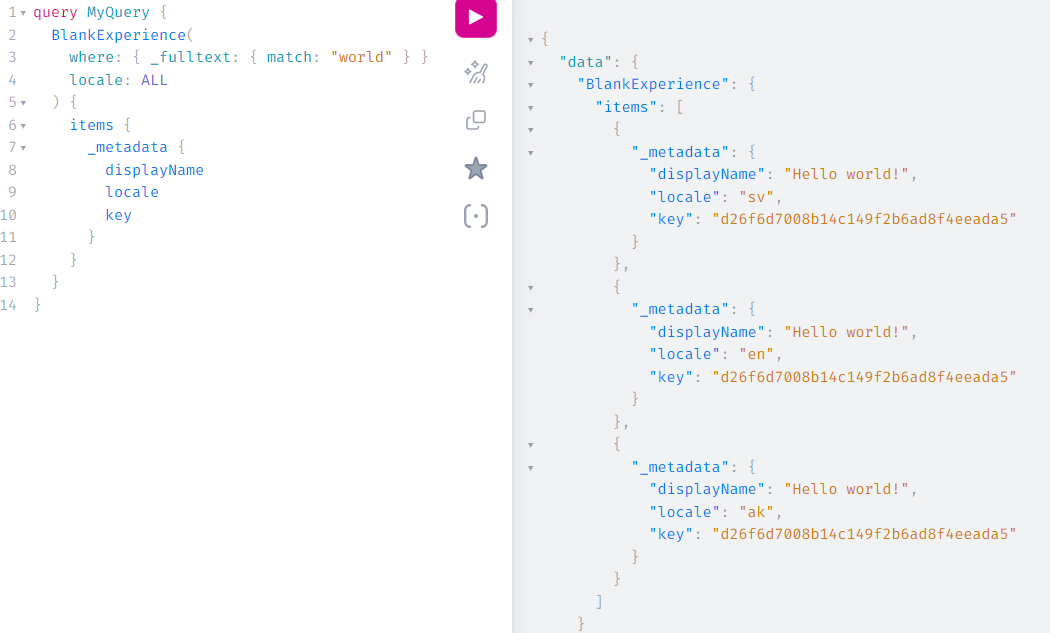
Because Optimizely Graph does not have a language analyzer for Akan, it cannot find the plural "worlds" in the Akan page. It can find "worlds" in the Swedish and English pages, which have language analyzers.
Remove an existing language
Remove a language to retire it from active editing while keeping the option to reactivate later. Use this to phase out languages that are no longer needed without deleting existing translations.
- Go to Settings > Languages.
- Click the language name.
- Clear Available.
- Click Save.