Manually enable live preview
Optimizely CMS 13 provides a user-friendly WYSIWYG authoring interface.
Live preview provides editors with a WYSIWYG (what you see is what you get) authoring interface that renders content changes in real time. Use live preview to verify layout, styling, and content accuracy before publishing. The preview functionality is framework-agnostic and works with plain JavaScript.
The CMS JavaScript SDK provides a streamlined way to enable live preview. This article covers the manual approach, which offers full control over the implementation.
Prerequisites
Create the following before starting:
Configure the application
CMS 13 requires information about your application, particularly its URL.
- Go to Settings > Applications.
- Click Create Application.
- Enter an Application Name. The API ID generates automatically.
- Update the API ID by clicking Change.
Note
The API ID must have 2 to 255 characters and start with a lowercase or uppercase letter followed by any combination of letters, digits, or underscores.
- Select Headless as the Type.
- Select From Existing and click an existing page to use as your start page. Or, select New to create an Experience or Page as your start page.
- Click Create Application.
- Click the Application Name or click More > Edit.
- Click the Hostnames tab.
- Click Add Hostname and add a Hostname where Optimizely locates your application.
Note
A local hostname such as
localhost:5000is valid for development. See Get started with a demo site to get started quickly. - (Optional) Select or deselect Use a secure connection (HTTPS).
- Click Add.
Enable communication between CMS and your application
CMS notifies your application when editors change content. The system identifies which properties your view renders and how to display overlays. Embed the communication script to connect CMS to your application.
Embed the https://CMS_DOMAIN/util/javascript/communicationinjector.js script (available from your instance) in your application to preview content in CMS.
ImportantIf your application uses Content Security Policies (CSP), verify that the policies allow embedding your application in an iframe and loading the communication script from the CMS URL.
Content preview
Use the preview URL to determine when content is in preview mode. CMS uses the following URL format:
https://APP_DOMAIN/preview?key=KEY&ver=VERSION&loc=LOCALE&ctx=CONTEXT_MODE&preview_token=TOKEN
/preview– The preview path.key– The unique identifier of the content being previewed.ver– The version of the content being previewed.loc– The locale of the content.ctx– The context mode:editorpreview. See Context modes.preview_token– The authorization token for fetching unpublished content.
Authorization
The preview feature loads unpublished content, such as drafts. To retrieve unpublished content from Optimizely Graph, authenticate the request with the preview token from the preview URL. Extract the preview token from the URL and add it to the Authorization header:
curl --location 'https://cg.optimizely.com/content/v2' \
--header 'Content-Type: application/json' \
--header 'Authorization: Bearer {the preview token}' \
--data '{ your GraphQL query }'
NoteThe preview token is valid for five minutes.
Required HTML markup for property overlays
Property overlays highlight editable content properties on the page, letting editors click a property to edit it. In Visual Builder, the preview scrolls to the property being edited.
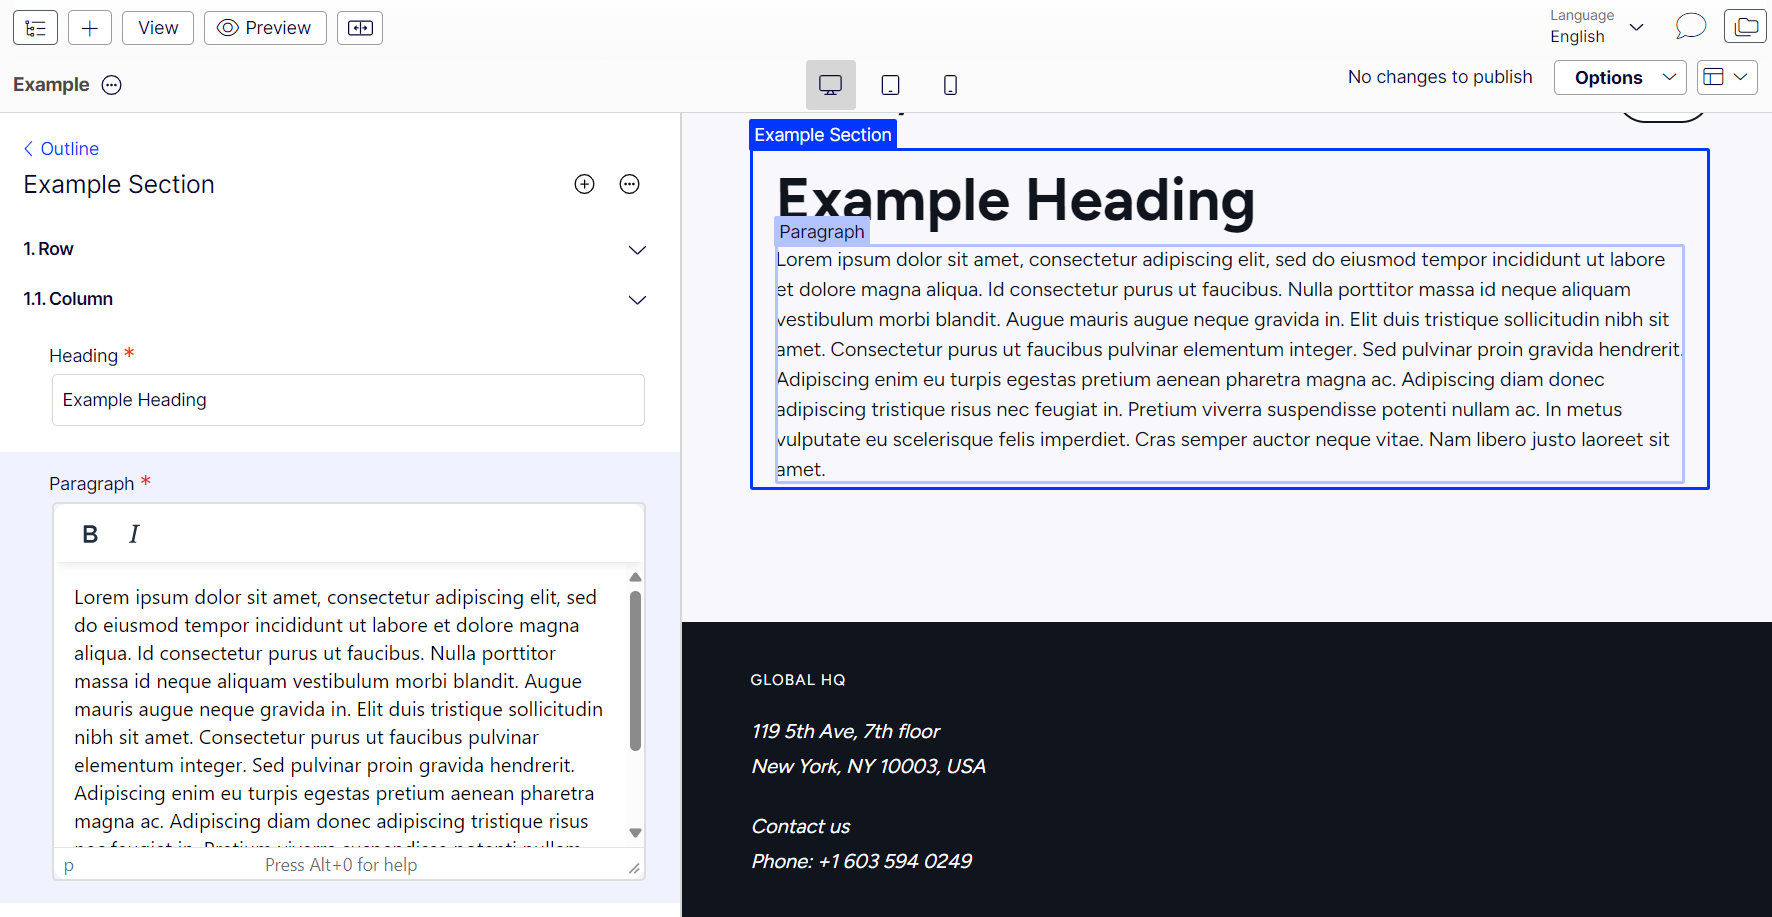
Example of property overlays in Visual Builder.
To enable property overlays, add the data-epi-edit attribute to each editable element. For content areas and compositions, also add data-epi-block-id to the root element of each rendered block (and to sections, rows, and columns in compositions). Use the following pattern:
<!-- Simple text property example -->
<h2 data-epi-edit="heading">
  <!-- your JavaScript framework of choice decides how the property is actually rendered here -->
</h2>

<!-- Content area example -->
<section data-epi-edit="teasers">
  <div data-epi-block-id="xxx-xxx-xxx-xxx-xxx">
    <h2 data-epi-edit="heading">Welcome</h2>
    <p data-epi-edit="body">Some teaser text.</p>
  </div>
</section>
Only include the attributes when the context mode is edit. To keep your code maintainable, encapsulate this logic in a shared helper function so you can control when the attribute is applied without scattering conditional checks throughout your code. For more details, see Context modes.
Context modes
Two context modes exist for content preview: edit and preview. The ctx query parameter in the preview URL determines the context mode. Render the overlay HTML attributes only when the context mode is edit. This approach lets editors preview content without property overlays blocking the page. See Visual Builder.
Refresh the view when content changes
Subscribe to events from the communication script to update your view in real time when an editor changes content. Each event contains an updated preview URL and a preview token for fetching the latest content version from Optimizely Graph.
The optimizely:cms:contentSaved event indicates that content changes were saved and indexed by Optimizely Graph. When this event fires, refetch or rerender the data in your view application.
window.addEventListener('optimizely:cms:contentSaved', (event) => {
   const message = event.detail;
   // Re-run your GraphQL queries using the new previewToken, which is returned as part of `message` or
   // extract the new preview URL from the message and refresh your view or state with it.
});
interface ContentSavedEventArgs {
contentLink: string;
previewUrl: string;
previewToken: string;
properties: PropertySaved[];
parentId?: string;
sectionId?: string;
}
window.addEventListener('optimizely:cms:contentSaved', (event) => {
const message = event.detail as ContentSavedEventArgs;
// Re-run your GraphQL queries using the new previewToken, which is returned as part of `message` or
// extract the new preview URL from the message and refresh your view or state with it.
});Get a preview token from the contentSaved event
The preview token has a short lifetime for security. The front-end site cannot reuse the token after it expires.
Extract the preview token from the ContentSaved event message. The previewUrl field in the event message contains the token.
const newPreviewUrl = message.previewUrl
const urlParams = new URLSearchParams(newPreviewUrl);
const newPreviewToken = urlParams.get('preview_token');
Use this preview token to query Optimizely Graph and refresh the front-end page.