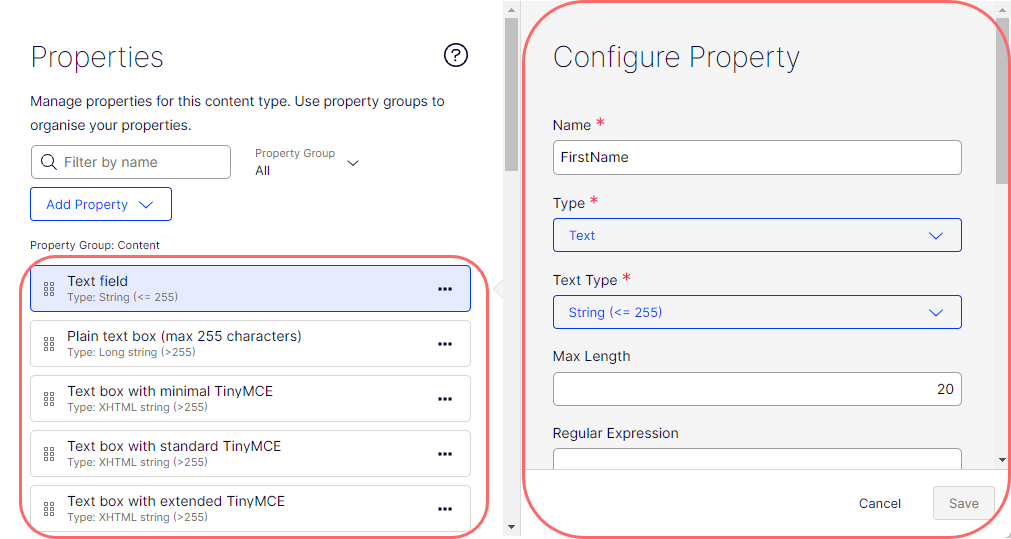
Text property
Manage text properties in Optimizely CMS 13. Learn to configure single-line, multi-line, and rich text fields for diverse content needs.
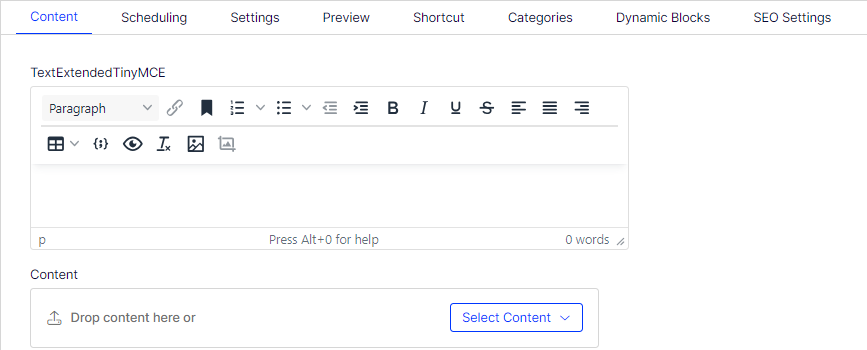
The Text property type stores string content in your content types. Use it for fields such as names, descriptions, or rich text content. The following image shows Text property type examples.
Configure Text property
The following attributes are available when you configure a Text property.
-
Name – Enter the name of this property type. This name is used for programming and language settings.
-
Type – Lets you change the content type to any other.
-
Text Type – Select one of the following:
-
String (<= 255) – Select for shorter, single-line text or basic values. String supports maximum length and Regex validation.
Use this type for short fields like First Name, Last Name, and so on. In the following example, the Display Name was set to Text field, but you can name it anything. The maximum entry was set to 20 characters.

-
Long string (>255) – Select for larger, extended, or multi-line text such as long descriptions or large content pieces. Long string supports maximum length and Regex validation.
Use this type for comments and similar needs. In the following example, the Display Name was set to Plain text box (max 255 characters), but you can name it anything.

-
XHTML string (>255) – Select for formatted text and related content that usually comes with a WYSIWYG (What You See Is What You Get) editor (see TinyMCE Toolbar options), letting content editors manipulate the text and other elements. It has built-in validation to ensure the stored XHTML is well-formed. XHTML string supports Minimal, Standard, and Extended configurations (below).
-
-
TinyMCE Toolbar – Displays only if XHTML string is selected; you can select one of the following.
-
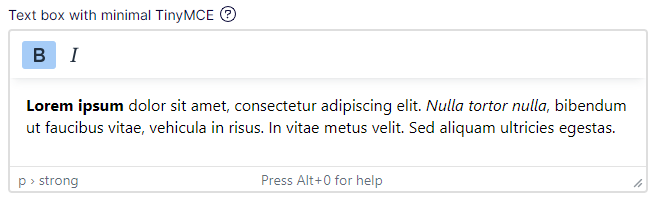
Minimal – Lets you bold and italicize text only. The following example shows the Minimal TinyMCE Toolbar.
-
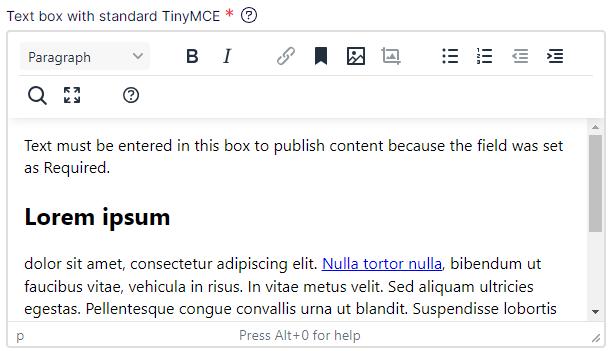
Standard – Provides several standard editing features such as text decoration, alignment, bulleted lists, links, and images. The following example shows the standard TinyMCE Toolbar, which adds basic rich-text editing.
-
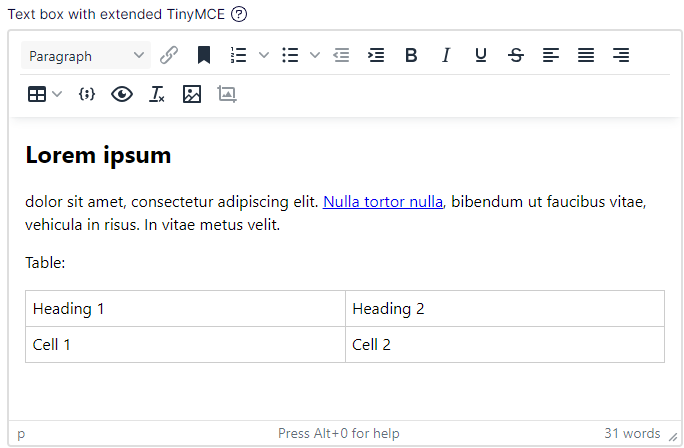
Expanded – Provides extended editing features such as tables, code blocks, and more. The following example shows the extended TinyMCE Toolbar, which adds extended rich-text editing.
-
-
Value must be entered – Select to require the user to enter a value in a Text field. Required fields display a red asterisk (*).
-
Unique value per language – See Define language-specific properties.
-
List – Select to make the property a list property. It is available in Experience and Element content types and unavailable in Page, Block, and Media content types.
-
Property Indexing Type – Select one of the following to determine how the property is indexed for search. The correct setting depends on the nature of the data in the property and how you intend users to search and query data.
- Default – Lets the system decide automatically how to index a property based on its type and context. For instance, string properties are indexed in a default way to allow for full-text search, while date or number values are indexed differently to allow for ranged queries.
- Queryable – Indexes in a way to be part of search queries. For example, this indexing type lets you run a search query such as Find all pages where PropertyName equals Value.
- Searchable – Search data inside the property through the search function. For example, use it as part of a free text search where the system looks through searchable fields to find a match. This is useful when you want a content editor or end user to search a body of text, like a product description. It is beneficial to avoid undesired property values in the search index. By default, all properties are searchable.
- Disabled – The property is not indexed for searching purposes. It is not used in search queries, and its content is not searched. This is often used for properties that contain data irrelevant to search results, and disabling the index enhances system performance.
-
Default value – Select the options to define what value the Text element displays:
-
No default value – The field is empty (no pre-populated content).
-
Inherits value – The field value is derived from another source. This is often used in hierarchical systems where child elements inherit values from their parent elements. For example, a sub-page inherits some property values from its parent page.
-
Custom – Enter the field's default value. For example, you can set the default value for the Company Name field to Optimizely.

-
-
Display in edit view – Select to display this text element on your page. Clear it to hide the text element while keeping all the property information.
-
Display name – Enter the text you want to display above the text element on the page in the All Properties view.
-
Help text – Enter text to display next to the Display Name. The following image shows how help text displays.

-
Sort index – Specify a value to determine the order in which data is displayed or processed.
-
Property Group – Select a property group (Categories, Content, Dynamic Blocks, Preview, Scheduling, SEO Settings, Shortcut) to organize your content on tabs in the All Properties edit view of the content type. The following image shows the text field on the Content tab (property group).