Administer groups
Administer groups for access rights in Optimizely CMS 13. Learn about Opti ID integration for user and group management.
Use Administer Groups to create and manage user groups, assign members, and delete groups. Groups created here are managed locally in CMS, and Opti ID roles can coexist with them. Group-based access rights are easier and safer to maintain than per-user assignments, especially as the editor team grows.
NoteIf your organization migrated to Opti ID, you must manage users in Opti ID. See the Opti ID user documentation.
- To add users with Opti ID, see Users in the Opti ID documentation.
- To add groups with Opti ID, see Groups in the Opti ID documentation.
Roles managed inside CMS 13 (PaaS) are not available to Opti ID users. CMS (PaaS) roles are typically used for end users (site visitors and customers), not for users who access the CMS UI.
Administer user credentials in the following ways:
- Administer Groups from the CMS Settings view. Use when managing a small set of CMS-local groups without an external identity provider. Groups created here exist only within CMS and are independent of Windows or Opti ID.
- Manage users and user groups in Windows. Use when your site runs Windows Server authentication and user identity is managed by the operating system. Groups created in the CMS Settings view are available from Settings only; they are not accessible from Windows. You cannot add users created in Windows to groups created in Optimizely. See Virtual roles for information about working with membership and role providers.
- Develop a customized role and membership provider. Use when your organization requires integration with an external identity system beyond what CMS or Windows provides. A developer implements this option.
Smaller organizations with few editors tend to use the CMS administration view, whereas larger organizations with many editors tend to use the other options. Combine these options as needed.
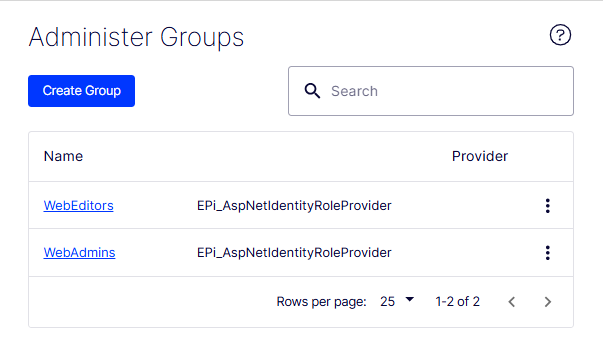
Display members of a user group
Review group membership to verify that the right users hold the access rights granted to a group. Use this view to audit assignments before changing permissions.
-
Go to Settings > Administer Groups. The Administer Groups window displays.
-
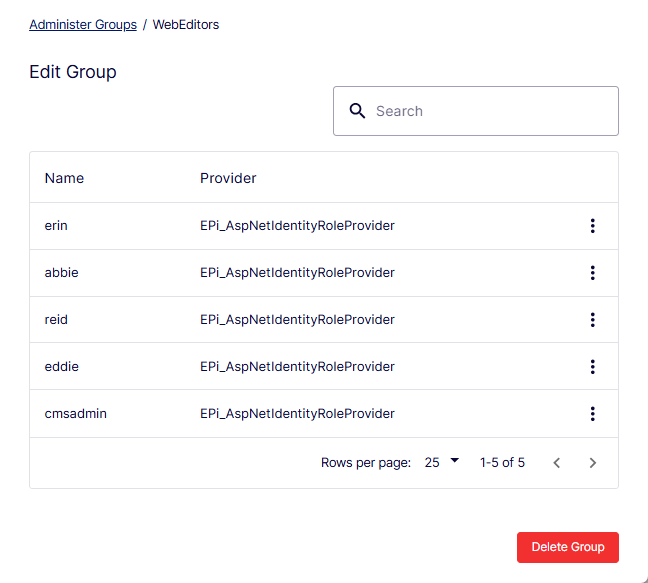
Click a group name to view its members.
- To see all users or groups, leave Search blank.
- Enter one or more letters in the Search field to see a subset of users or groups. The window displays any names that contain the string.
Create a group
Create a CMS-local group to bundle users that share the same access rights. Group-based assignment keeps permission management consistent and easier to maintain than per-user grants.
Groups display regardless of the provider used on the website. The group provider displays next to the group name.
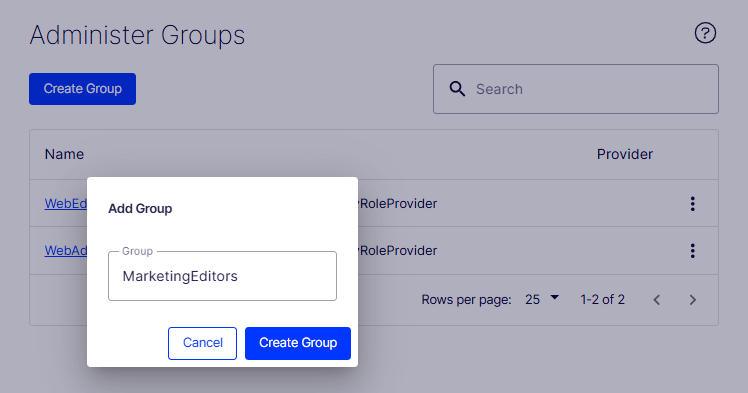
- To create a user group, click Create Group. The Add Group window displays.
- Enter a group name (for example, MarketingEditors) and click Create Group.
Delete a group
Delete a group when it is no longer needed so that obsolete access paths do not linger in the CMS. Removing unused groups reduces clutter and the risk of unintended permission grants.
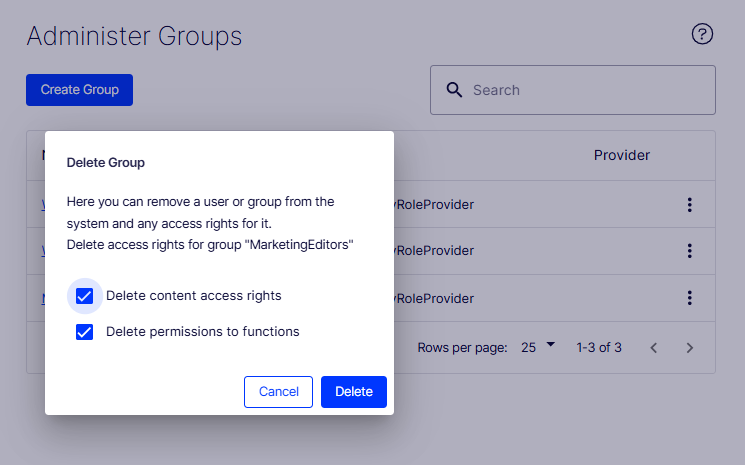
Select Delete from the group's menu. The Delete Group window displays options for removing the group and managing associated access rights.
- Delete content access rights – Select to remove the content access rights for the group MarketingEditors.
- Delete permissions to functions – Select to remove the function-permission assignments for the group.
Warning
- Only user groups created in CMS can be deleted.
- Deleted user groups cannot be recovered.
- Renaming an existing group is not supported. Delete the group and create a replacement.