Create Visual Builder content from scratch
Create Optimizely Visual Builder content from scratch. Follow step-by-step instructions to build pages, sections, rows, columns, and add elements.
Build a page from scratch when you want full control over the layout and content structure. Start with a blank experience and add sections, rows, columns, and elements to assemble your page.
-
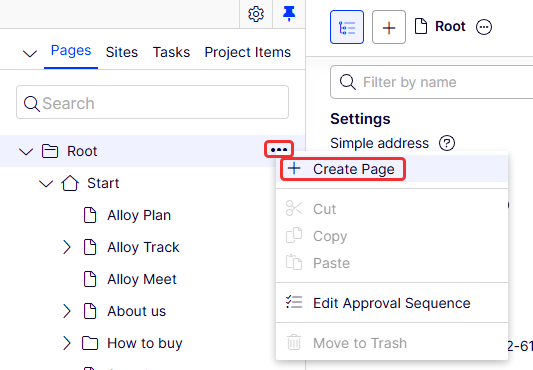
Go to Root > More (...) > Create Page in the page tree.
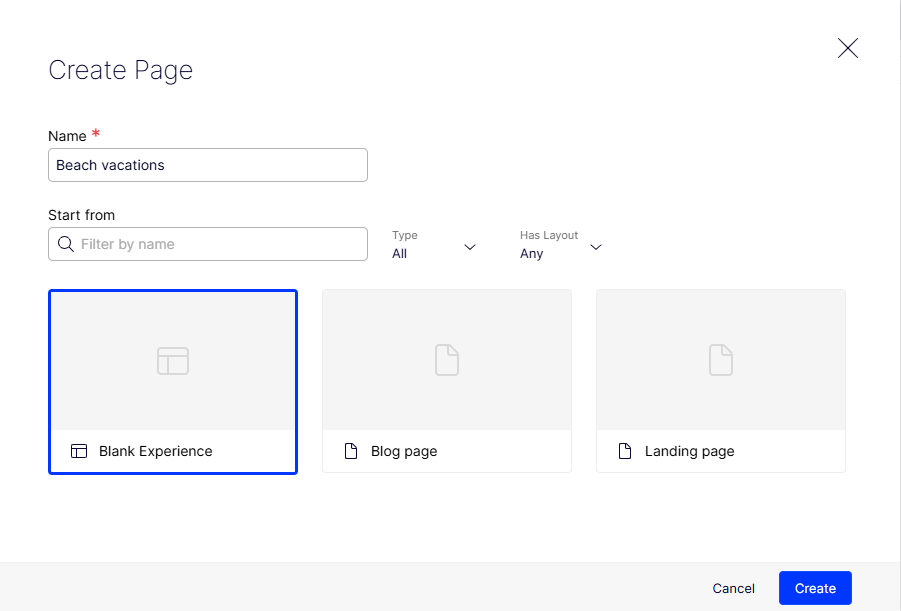
The Create Page window displays with saved blueprints.
-
Enter a Name for the experience.
-
Select Blank Experience.
-
Click Create. The page displays in the page tree.
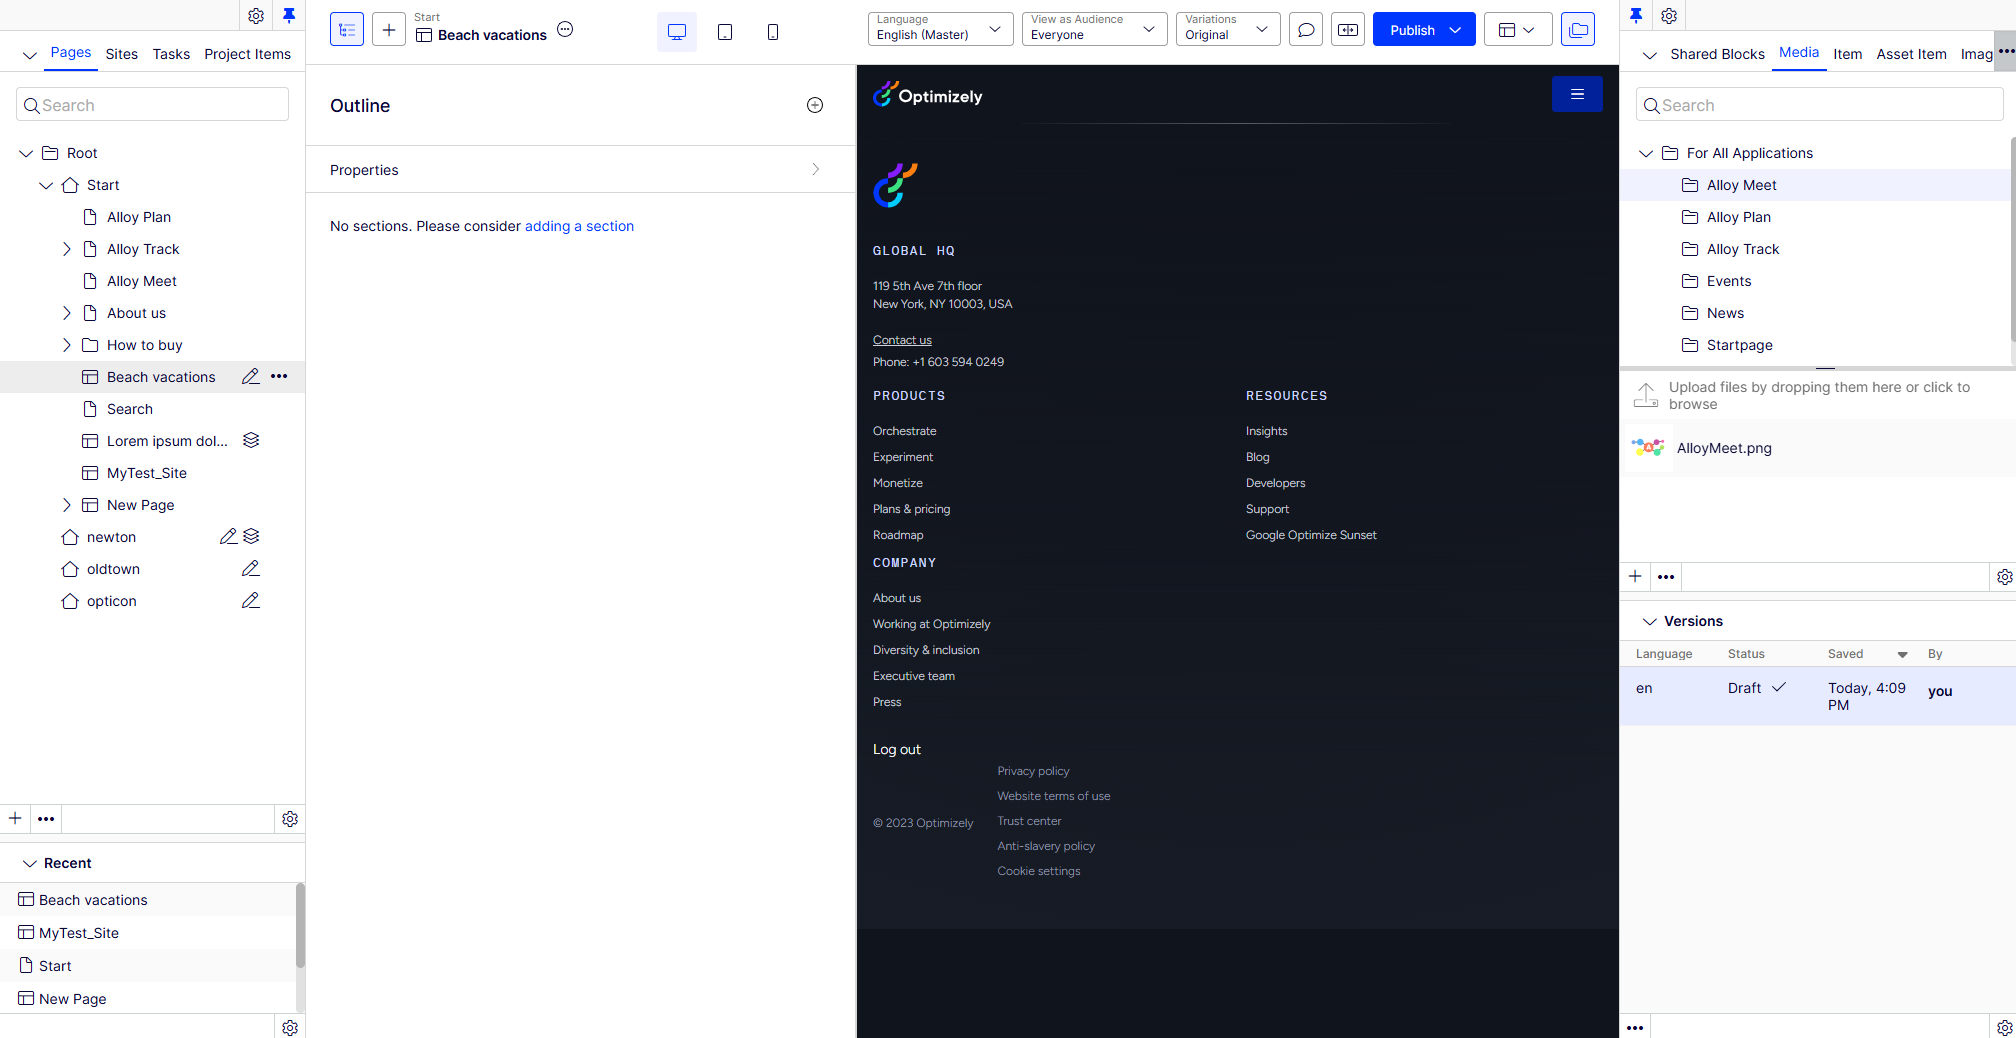
Visual Builder displays the page tree and an empty outline on the left and a blank preview on the right. The outline pane is where you create a collection of sections that build your experience. Unpin the page tree and asset panes to create more space for content editing. Your blank preview can contain site-specific settings, such as headers or footers, depending on your implementation.
-
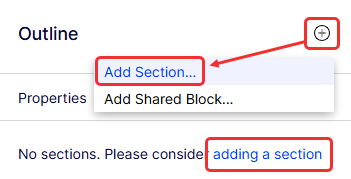
Click Add Section (+) > Add Section (or the link below it) to start a new section.
-
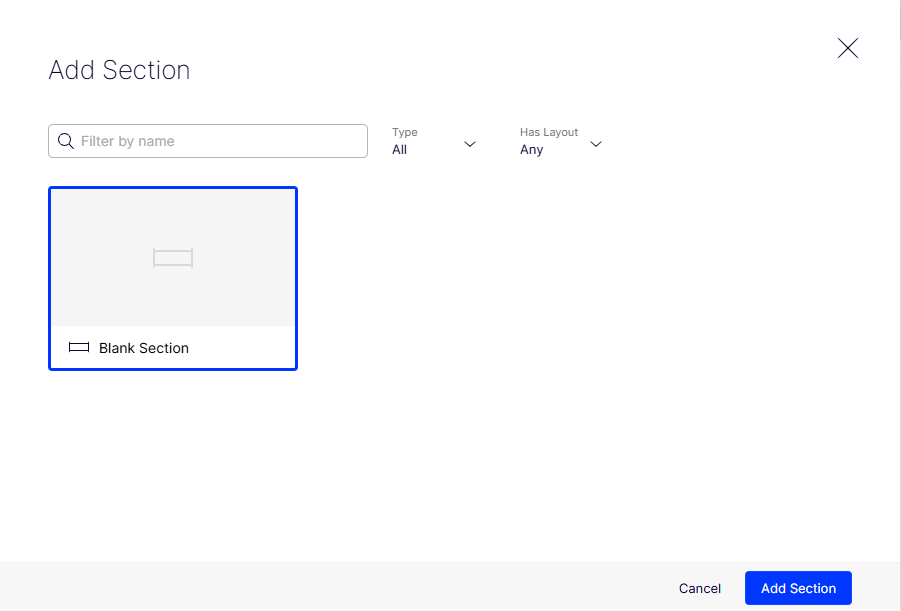
Select a blank section and click Add Section.
-
Visual Builder creates a New Blank Section, which you can rename by clicking the name or selecting More (...) > Rename and entering another name.

-
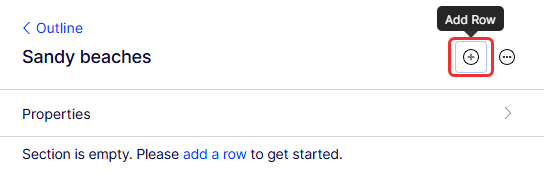
Click Add Row to start your first row.
-
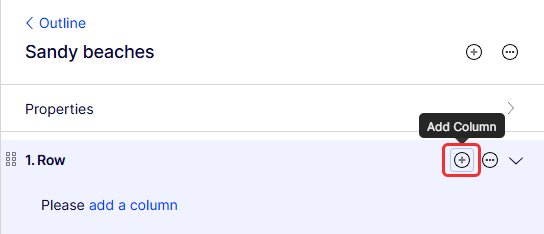
Click Add Column to start your first column in row 1.
-
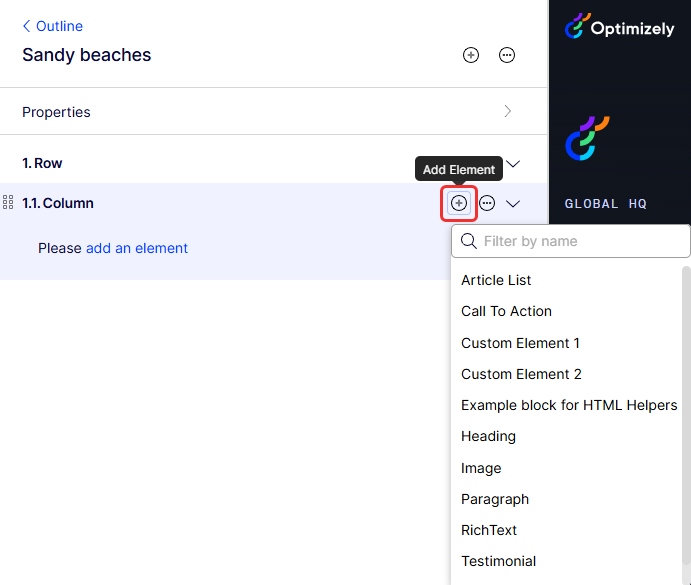
Click Add Element and select the element you want in row 1, column 1. See Elements in Visual Builder.
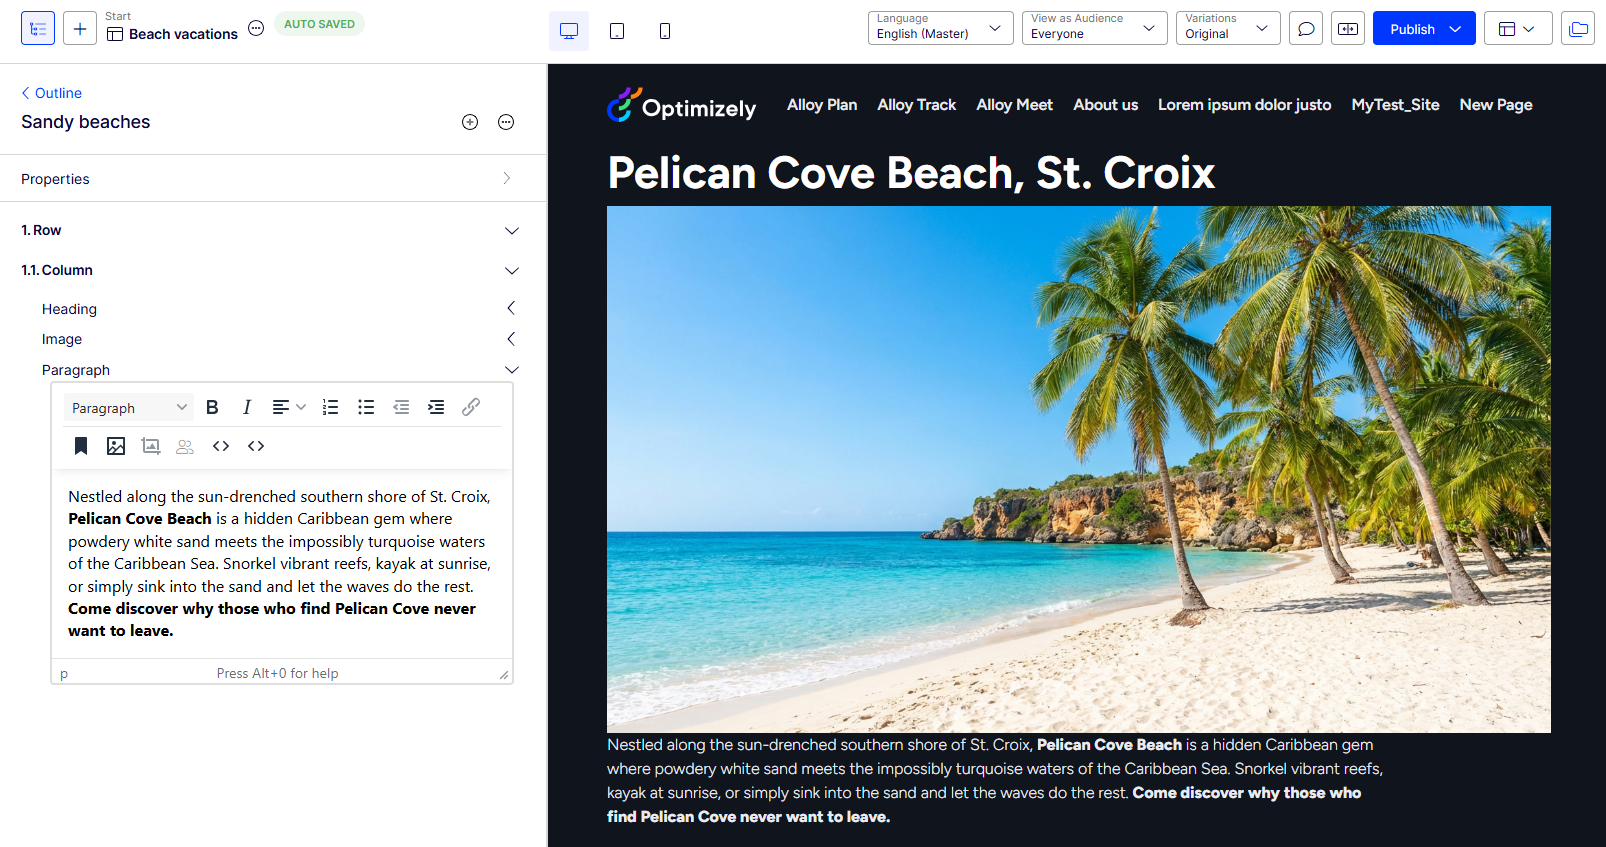
The following image shows a section with a row, column, and added elements (Heading, Image, Paragraph). Styles were applied to the Heading and Image elements. See Elements in Visual Builder and Select Visual Builder styles.
Add as many rows, columns, or elements as you need to a section. Elements within an outline are collapsed by default. Click to expand one element at a time.
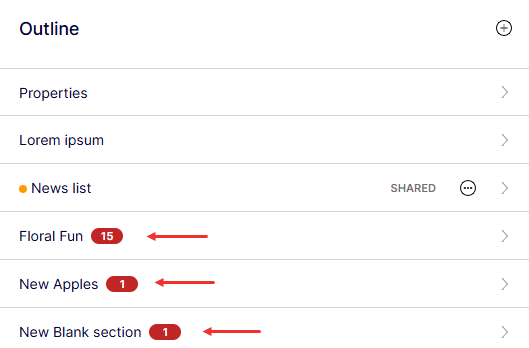
The total number of validation errors displays next to each section that has required fields that you have not completed. You can go to the outline within a section to view the breakdown of validation errors on each row, column, and element within that section.
NoteVisual Builder uses the TinyMCE editor for text fields. See Edit content using the TinyMCE rich-text editor.
To remove a section, select More (...) > Remove. Click Remove Section to confirm the removal.
See Create Visual Builder content from a blueprint for more actions you can take with Visual Builder to customize your experience.