Advanced content types
Configure advanced content types in Optimizely CMS 13. Covers experience, section, Connect from Graph, contract, and orphaned types, plus typed content references for developers.
Advanced content types extend the standard page, block, and media types for specialized patterns. Use them for Visual Builder layouts, external GraphQL sources, shared structural contracts, and typed content references. This article addresses developers and administrators with code-level access. Code-level access means the ability to add or modify C# classes in the CMS project and deploy changes to the environment.
For standard page, block, and media types, see Content types in the UI.
Contract types
Contracts define a shared structure (a set of required properties) that multiple content types can implement. When you configure a Content Reference or ContentReference<T> property and select an allowed reference type, the type picker filters contracts from the list by default. Only concrete content types appear as selectable reference targets.
To reference content by contract rather than by a concrete type, configure the property's Reference Type as a specific contract. The content picker then surfaces all content types implementing that contract.
See Create contracts.
Experience types
An Experience content type extends the page type for use with the Visual Builder, letting editors compose flexible page layouts from sections. Define experience types to give content authors reusable, structured canvases for campaigns, landing pages, and similar work.
To create an experience type from the Settings view:
-
Go to Settings > Content Types.
-
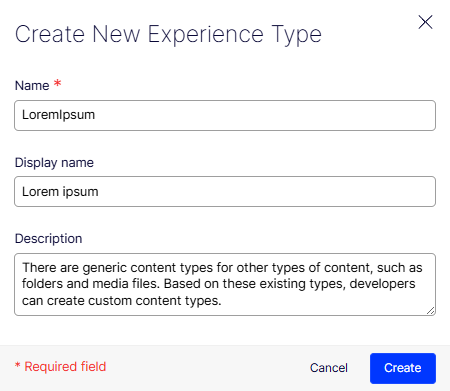
Select Create New > Experience Type. The Create New Experience Type window displays.
-
Complete the following fields:
- Name (required) – Enter a unique identifier for the content type (for example, LoremIpsum). This is the internal key used by the system.
- Display name – Enter a human-readable label that editors see in the interface (for example, Lorem ipsum).
- Description – Add a description to clarify the purpose of this content type for your team.
-
Click Create to save the Experience content type.
NoteExperience types include a built-in Blank Experience managed by Optimizely. While you cannot adjust its settings, you can modify Permissions and Properties on any custom experience type you create. After the type is created, add properties to define the data model for the experience.
Section types
Section content types organize content within an Experience type in the Visual Builder, giving editors reusable building blocks for layout regions. Define custom section types to expose domain-specific properties such as photographer or copyright.
Section types include a built-in Blank Section managed by Optimizely. To create a custom section type from the Settings view:
-
Go to Settings > Content Types.
-
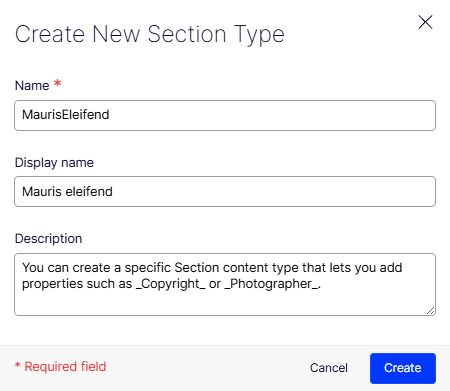
Select Create New > Section Type. The Create New Section window displays.
-
Complete the following fields:
- Name (required) – Enter a unique identifier for the content type (for example, MaurisEleifend). This is the internal key used by the system.
- Display name – Enter a human-readable label that editors see in the interface (for example, Mauris eleifend).
- Description – Add a description to clarify the purpose of this content type for your team (for example, describing the custom properties it exposes, such as Copyright or Photographer).
-
Click Create to save the Section content type.
NoteAfter creation, modify Settings, Permissions, and Properties on any custom section type. Use properties to define additional metadata that editors can populate when working within the Visual Builder.
Connect from Graph types
Connect from Graph lets you create a connected content source by pointing CMS at an external GraphQL endpoint. External data (such as products from a PIM, assets from a DAM, or records from any GraphQL-compatible API) appears as content types within Optimizely CMS without a full data sync.
To create a connected content source:
-
Go to Settings > Content Types and select Create New > Connect From Graph.
-
Configure the following in the Connect From Graph dialog:
- Name – An internal identifier for the connected content source.
- Display name – The label shown in the CMS UI.
- GraphQL endpoint URL – The URL of the external GraphQL API to connect to.
- Authentication – Any required headers or tokens needed to authenticate requests to the external endpoint.
-
Connect to the endpoint. CMS introspects the external schema and lists the available content types from the external source.
-
Select the content types you want to expose in the CMS and map their properties to CMS property types.
-
Click Save.
The following list shows the behavior of connected content types:
- Connected content types display alongside native CMS content types in the Content Types list, with a distinct Connected indicator.
- Editors can select and reference connected content in Content Reference properties, provided the connected type is included in the allowed types for that property.
- Properties populated from the external source are read-only in the CMS Edit UI.
- If the connected content type implements a global contract, only the External edit URL administration setting is editable.
For information on mapping connected content type properties, see Connect content sources using GraphQL.
Orphaned content types
When a NuGet package that registered one or more content types is removed from a project without first deleting those content types from CMS, the types become orphaned. At runtime, CMS cannot resolve the .NET type backing the content type, which causes an EPiServerException similar to the following:
EPiServer.Core.EPiServerException: No type mapped for content type ID [id].
   at EPiServer.DataAbstraction.RuntimeModel.ContentTypeModelRepository.TransformModel(ContentTypeModel model)
Orphaned content types also display an Undefined label in the Base type column of the Content Types list.
Resolution strategies
Resolution strategies fix the runtime exception caused by orphaned content types and protect existing content from data loss. Pick the option that matches the environment and the project's tolerance for downtime.
Resolve orphaned content types using one of the following approaches:
In non-production environments, delete the orphaned type from the Admin UI:
WarningDeleting a content type permanently removes all content instances based on that type. Verify that no live content depends on the type before deleting.
- Go to Settings > Content Types.
- Filter by Base type: Undefined to locate orphaned types.
- Select the orphaned content type and click Delete.
To resolve orphaned types in a production environment without data loss, add a stub class:
Create a minimal stub class in your codebase that matches the original type registration. The stub resolves the runtime exception without data loss and gives you time to migrate or remove content safely.
using EPiServer.Core;
using EPiServer.DataAnnotations;

[ContentType(GUID = "YOUR_ORIGINAL_GUID_HERE", AvailableInEditMode = false)]
public class OrphanedBlockStub : BlockData
{
    // No properties needed; stub only
}
After deploying the stub:
- Migrate any existing content instances away from the orphaned type.
- Remove the stub class and delete the content type from the Admin UI once no content instances remain.
WarningPerform this operation in a non-production environment first and take a full database backup before proceeding.
For advanced scenarios where neither option is viable, a database administrator can remove the orphaned content type record directly from the tblContentType table.
Typed content references
Typed content references restrict a Content Reference property to a specific content type using the [AllowedTypes] attribute or the Reference Type setting in the admin view. This improves type safety and enables richer Optimizely Graph responses.
When you configure a Content Reference property with a specific type other than Any, CMS:
- Limits the content picker to content matching the allowed type.
- Returns the full typed object in Optimizely Graph. For example, a property typed to
ContactBlockreturns all fields such asnameandemail, rather than onlycontentLink. - Filters content type contracts out of the type picker by default. To type a reference against a contract, explicitly select the contract as the Reference Type.
The following table shows Reference Type and Optimizely Graph behavior:
| Reference type configuration | Optimizely Graph returns |
|---|---|
Specific concrete type (for example, ContactBlock) | Full typed object with all fields |
Contract (for example, IProductContract) | Full object for all implementing types |
| Any + Allowed Content Types | contentLink only |
Configure a typed reference from the admin view
- Go to Settings > Content Types and select the content type.
- Select the property, then open its Configure Property panel.
- Set Reference Type to a specific content type (not Any) and select the target type or contract from the list.
- Save the content type. When a contract is selected as the reference type, the content picker surfaces all content types that implement that contract.
Define a typed reference in code
// Restricts selection to ContactBlock instances only
[Display(Name = "Contact", Order = 100)]
[AllowedTypes(typeof(ContactBlock))]
public virtual ContentReference Contact { get; set; }

// Restricts selection to any content type implementing IProductContract
[Display(Name = "Featured Product", Order = 110)]
[AllowedTypes(typeof(IProductContract))]
public virtual ContentReference FeaturedProduct { get; set; }