
Delivra connector
Integrate Optimizely Forms with Delivra for marketing automation. Export form data, map fields, retrieve contact data, and personalize forms for targeted audiences.
NoteThe Optimizely Digital Experience Platform (DXP) contains many features to support you in your daily work. Depending on how your solution is set up, some features described in this documentation may not be available to you.
The Delivra connector add-on automatically exports form data from your website to your Delivra account database by mapping Optimizely form fields to Delivra database fields. For information about other database connector add-ons, see Marketing Automation.
Set up Optimizely forms with Delivra
The Forms Marketing Automation Integration (MAI) connector lets you connect Optimizely form fields to a Delivra database.
The Optimizely Delivra connector is an app for the Optimizely Digital Experience Platform (DXP). It requires a specific installation and license.
A developer must install the Forms Marketing Automation connector and the Optimizely Delivra connector.
-
In the app selector, select Addons > Marketing Automation. The Delivra configuration settings screen appears.
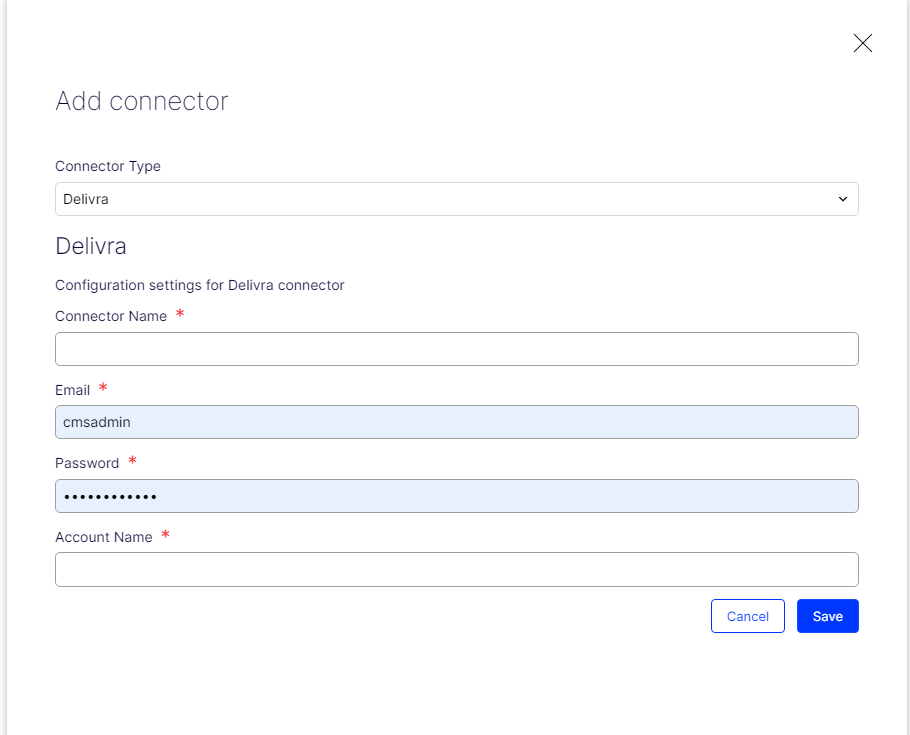
You can have multiple instances of the same connector. For example, if you have marketing teams in separate regions, you can have more than one Delivra connector, such as Delivra - Europe, Delivra - US, and Delivra - APAC.
-
Enter the connector name, email, password, and account name associated with your Delivra account and click Save.
-
Create a form on a page.
-
Click All Properties on the form.
-
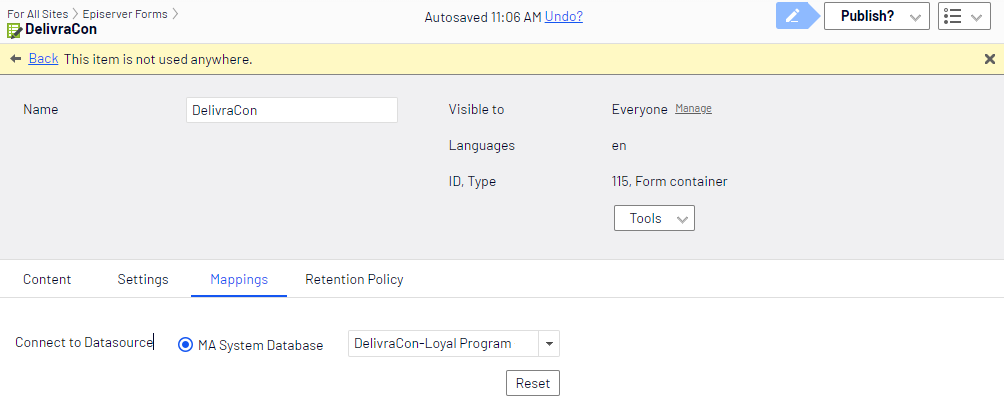
Open the Mappings tab.
-
Select the database to which you map the form fields from the MA System Database drop-down field.
-
Click Publish.
-
On the form, select Edit from a form field's context menu.
-
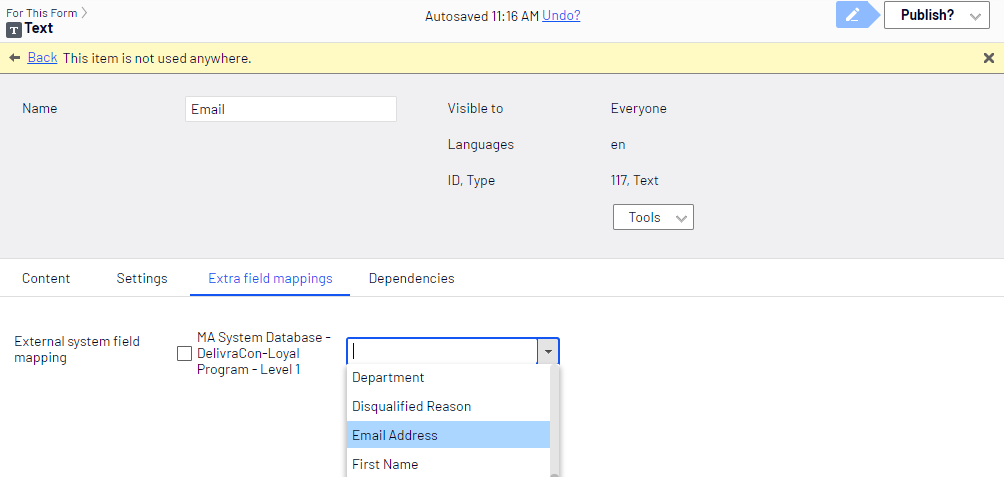
Open the Extra field mappings tab. The database option that you previously selected appears.
-
Enable the database option and open the drop-down list next to a database to see the fields it has available.
For example, if your form has a Text field that was configured to capture an email address:-
Edit the email text field.
-
Select the Extra field mappings tab.
-
Select Email Address from the drop-down list to map the Delivra database field to the Email field on the form.
-
-
Repeat steps 8 through 10 for as many fields that you want to map.
-
Click Publish.
To test the mapping, go to your form on a published page, fill in and submit the form, then go to your Delivra provider to verify that the user is added to the Delivra database.
Retrieve contact data
When a visitor submits the form, the data is sent to Delivra. To see who submitted the form, go to Delivra > Contacts.
Personalize the form using a block
You can personalize a form to show only to a selected group of people. For more information about creating a visitor group and displaying information based on a visitor group, see Audiences.
-
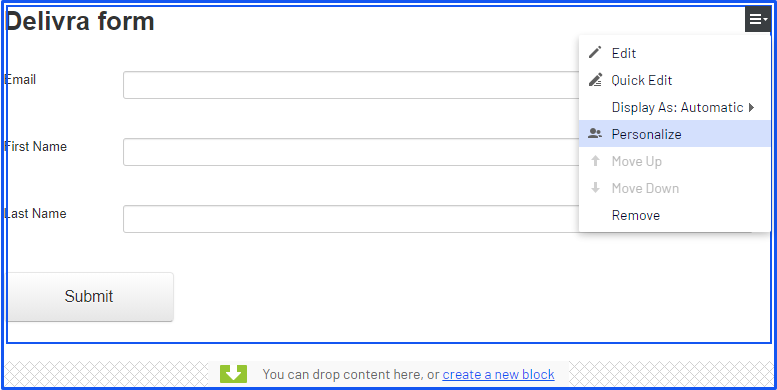
From the context menu on the form on the page, select Personalize. The Large content area dialog box appears.
-
Click Everyone and select a visitor group from the list. The following image shows personalizing the form to show only for people in the VIP visitor group.
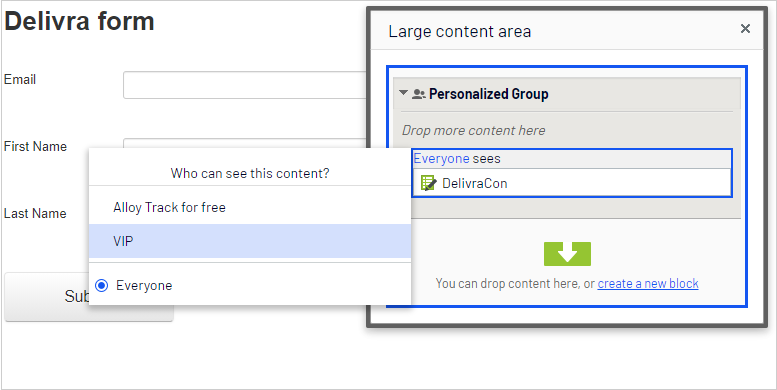
To create a visitor group for an Delivra form, see Create an audience with Marketing automation connector profile criteria.
Updated 2 months ago