
Create a form
Create web forms in Optimizely CMS 13 using form containers and elements. Configure form properties, manage submissions, send emails, and trigger webhooks.
Create a form on your website by adding a form container and one or more form elements. Form elements define the fields on the form, such as a name field, an email field, and a Submit control.
Each form container has metadata that defines the form's title, description, included elements, and confirmation message after submission.
-
Select Forms in the assets panel to list existing form folders. Create a folder for your form by clicking +.
-
Select New Form from a folder's context menu and give it a name such as Coupon for contact information.
-
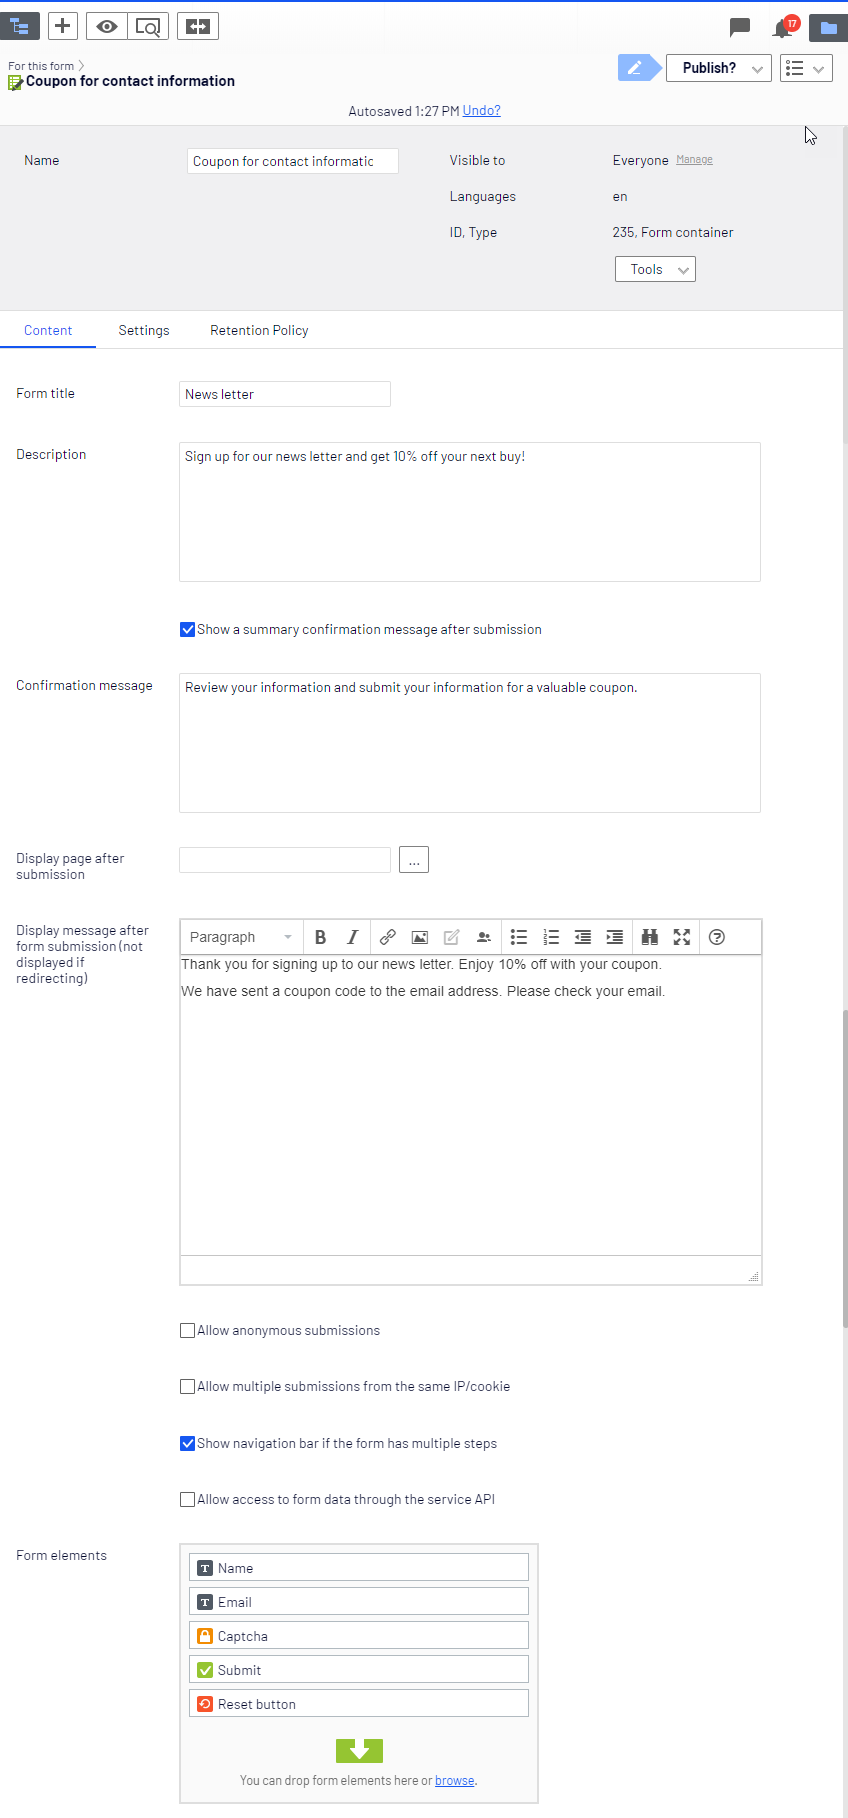
Select the All Properties view. Adjust the properties in the Content tab:
-
Form title – Enter the name of the form.
-
Description – Enter a description of what the form accomplishes.
-
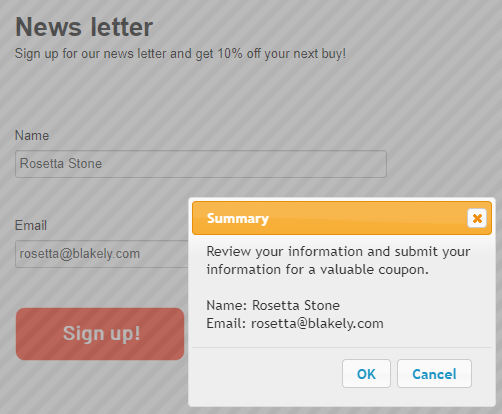
Show a summary – Select this checkbox to display a summary dialog box with the data the visitor entered. Add a message to this dialog box with Confirmation message.
-
Confirmation message – Enter a message to display on the summary dialog box (enabled with Show a summary) along with the entered data. When the visitor accepts the summary, Optimizely saves the data for viewing in Form Submissions. Install the Forms Samples package to style the confirmation message.
-
Display page after submission – Select a page (such as a Coupon page) to display after the visitor submits the form. The Submit element setting overrides this value when configured.
-
Display message after form submission – Enter a message to display after submission. The message does not display when a page is selected in Display page after submission.
-
Allow anonymous submissions – Select to let visitors submit form data (such as an online survey) without logging in. When disabled, visitors must log in to submit the form.
-
Allow multiple submissions from the same IP or cookie – Select to let visitors submit the form more than once. This is useful for testing your form.
-
Show navigation bar if the form has multiple steps – Select to display a progress bar for multi-step forms.
-
Allow access to the form data through the service API – Select to let a developer or application retrieve form submission data using the Forms Service API.
-
Form elements – Drag form elements from the Form Elements gadget to this area. Rearrange the order by dragging elements. Configure elements in the on-page edit view of the form container. See Configure a form element and Form element types.
-
Category – Apply a category to content. A developer must add custom functionality to use categories for filtering. See Create a category.
-
-
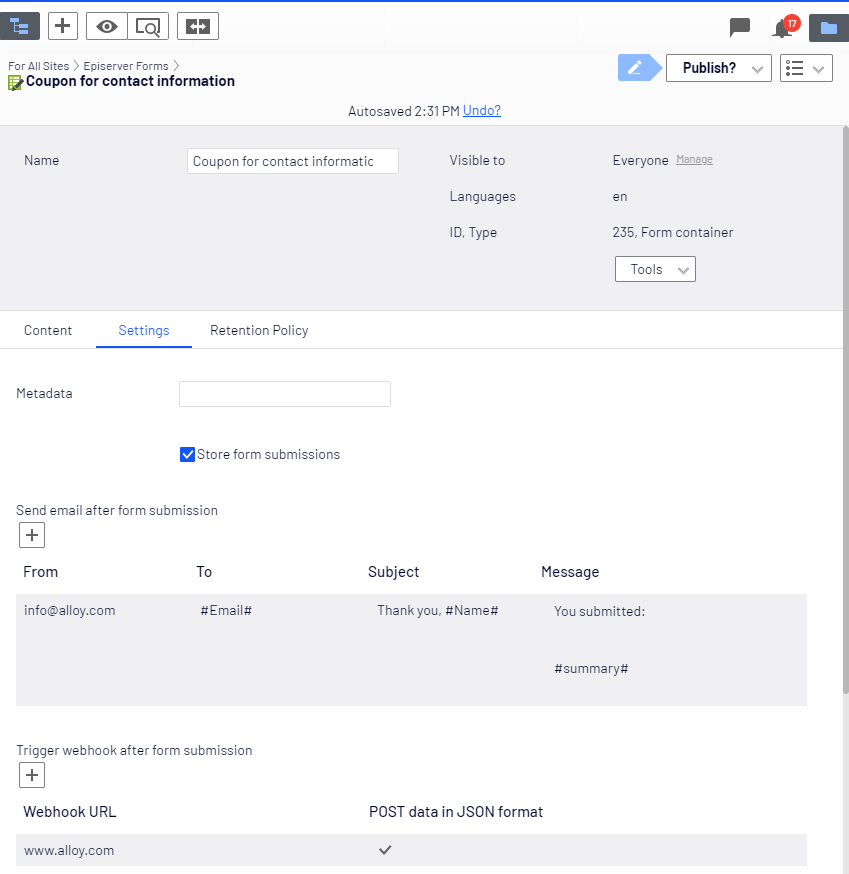
Select the Settings tab and adjust the properties:
-
Metadata – This hidden attribute lets a developer run custom code. See Render metadata in the Optimizely Forms Developer guide.
-
Store form submissions – Select to store submitted data permanently. When disabled, data is temporarily stored in the visitor's browser session until the session expires.
-
Send email after submission – Configure the form to send the visitor an email after submission.
-
Click + to open the Create email template dialog box.
-
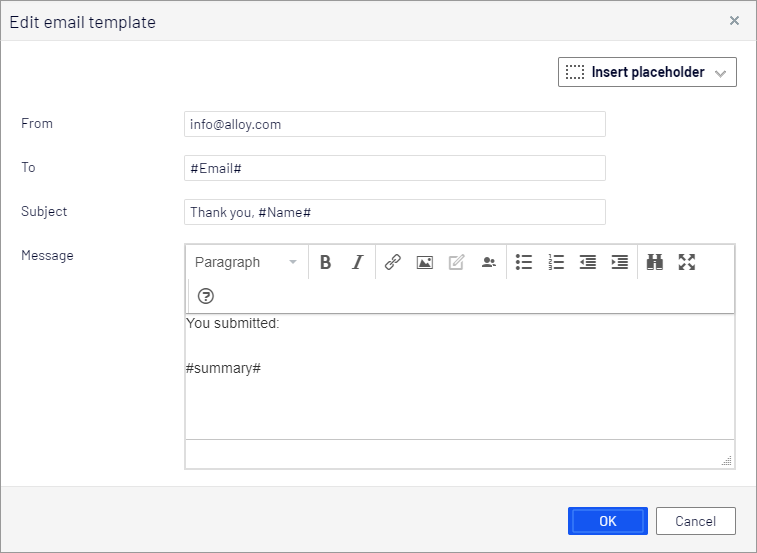
Enter a From address, a To address, and an email subject. Use placeholders to fill in data from the form automatically, such as
::EMAIL::,::NAME::, and::SUMMARY::. Type these or select them from the Insert placeholder menu. Developers create additional placeholders.NoteForms 5.5.0 replaced placeholder syntax from hash (#) to double colons (::). Forms 5.5.1 added support for both formats. Use double colons (::) because they do not conflict with TinyMCE behaviors.
-
Enter body text in the Message field and click Add.
A developer must configure an email server for Optimizely Forms to send emails. See Configure email server.
-
-
Trigger webhook after submission – Click + to open the Add webhook dialog box. Optimizely sends submitted form data to the webhook URL. Select the checkbox to send a POST request in JSON format (
application/json). Clear the checkbox to send data as a standard HTTP POST request (application/x-www-form-urlencoded).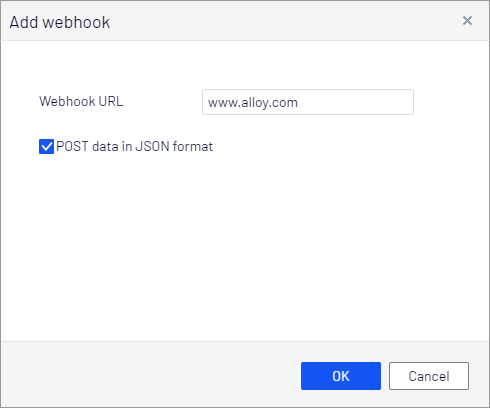
-
Updated 2 months ago