Install Bolt payment provider
Describes the Bolt payment provider installation process for Optimizely Commerce Connect.
Set the configuration options that your Bolt merchant account provides. The values are in the Developers section of the Bolt site.
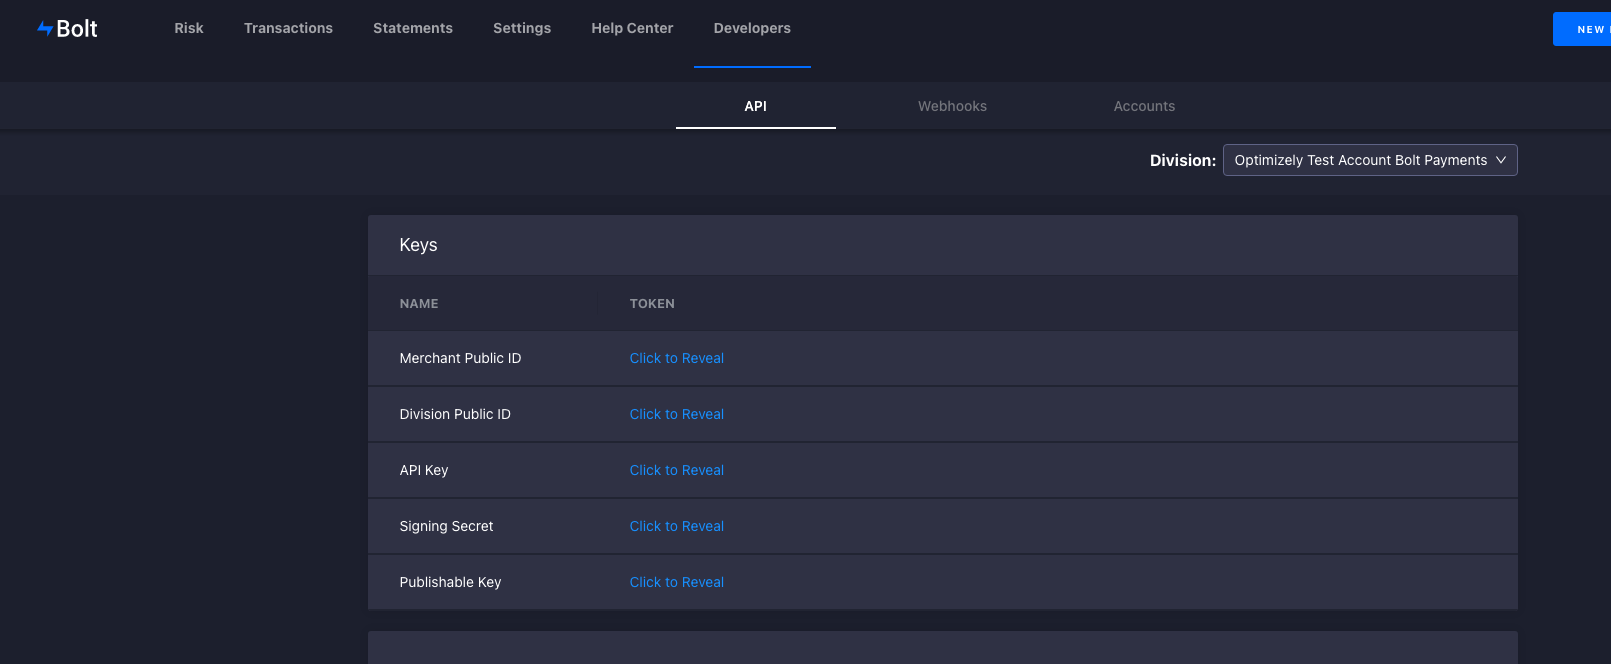
Set the values in appsettings.json or in the startup file.
{
  "EpiServer" : {
    "Commerce" : {
      "Bolt" : {
        "PublishableKey" : "key",
        "ApiKey" : "Api Key",
        "DivisionPublicId" : "Public Id",
        "SigningSecret" : "Signing Secret",
        "AutoCapture" : true,
        "EnvironmentType" : "Sandbox"
      }
    }
  }
}
services.Configure<BoltOptions>(x =>
{
x.EnvironmentType = EnvironmentType.Sandbox;
x.PublishableKey = "Key";
x.ApiKey = "Api Key";
x.DivisionPublicId = "Public Id";
x.SigningSecret = "signing secret";
x.AutoCapture = true;
});Configure Bolt payment provider
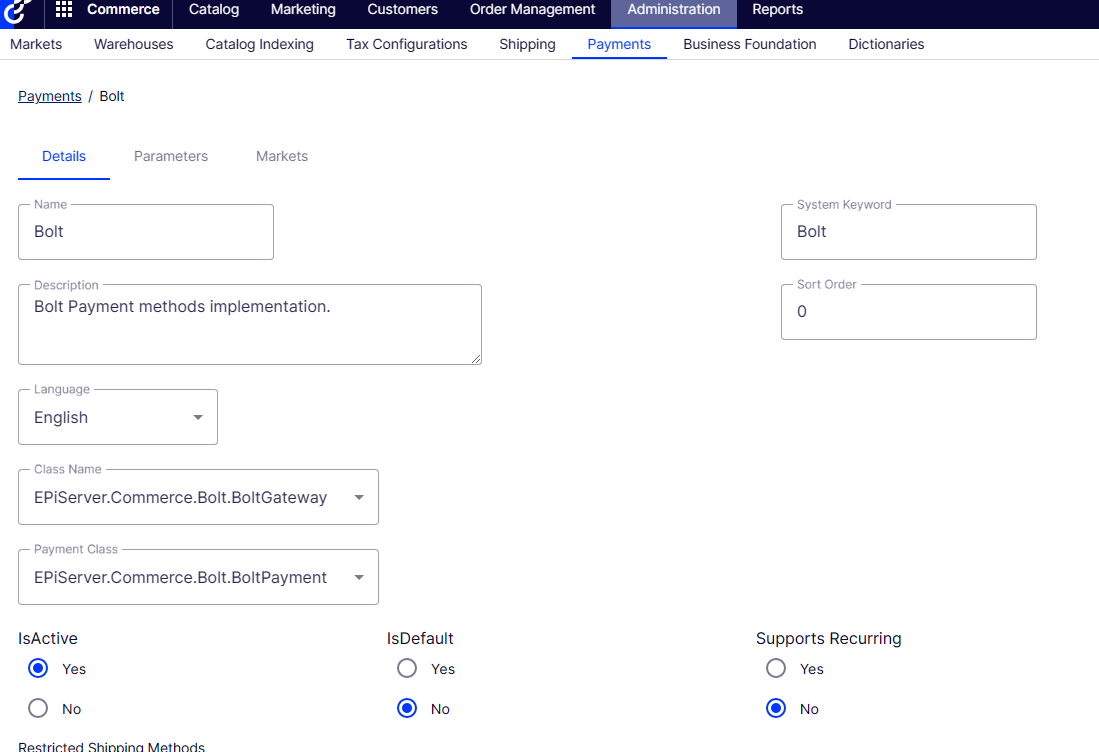
- Go to Commerce > Administration > Payments.
- Click Create.
- Enter the payment provider details. Set System Keyword to
Bolt, Class Name toBoltGateway, and Payment Class toBoltPayment. - Click Save.
Create a Bolt payment provider for each language you plan to support.
Implement Bolt payment provider
NoteThe Bolt payments API requires two-digit country codes, but a default Commerce installation provides three-digit country codes. Update the
Countrytable for the countries you plan to support — there is no way to update the table through the user interface. If you do not useCountryManageron the front end for your addresses, skip this step.
For instructions on implementing Bolt checkout, see the Bolt documentation. An example is also available in Foundation.
When creating a Bolt payment, set the following properties so the Bolt gateway can process the transaction:
var total = cart.GetTotal(_orderGroupCalculator);
var payment = viewModel.Payment.CreatePayment(total.Amount, cart);

if (payment is BoltPayment boltPayment) {
  // The token comes from the Bolt JavaScript tokenize function. Required only for new card payments.
  boltPayment.Token = "token";

  // The CreateAccount value comes from the Bolt createAccount widget flag in the Bolt JavaScript API.
  boltPayment.CreateAccount = true;

  // Set CardId only for saved cards. For non-saved cards, the gateway sets this field automatically on Auth or Capture.
  boltPayment.CardId = "cardId";

  // The API service is in the EPiServer.Commerce.Bolt namespace. The code and scope come from the response of the authorization component in the Bolt JavaScript SDK.
  var token = await _apiService.GetTokenAsync(code, scope);

  // This field is not persisted to the database, but is required to make a request on behalf of the user.
  boltPayment.AccessToken = token.AccessToken;
}

cart.AddPayment(payment, _orderGroupFactory);
payment.BillingAddress = _addressBookService.ConvertToAddress(viewModel.BillingAddress, cart);
To retrieve a list of saved Bolt cards:
[HttpGet]
public async Task<IActionResult> GetBoltCards([FromQuery] string code, [FromQuery] string scope) {
  var token = await _apiService.GetTokenAsync(code, scope);
  if (token == null) {
    return new JsonResult(null);
  }

  var account = await _apiService.GetAccountAsync(token.AccessToken);
  if (account == null) {
    return new JsonResult(null);
  }

  account.Token = token.AccessToken;
  return new JsonResult(account);
}
Updated 12 days ago