Customize views for organizations and contacts
Customize, filter, save, and export organization and contact views in Commerce Connect.
Unless changed by an administrator, Optimizely Commerce Connect presents an unfiltered list of organizations and contacts with default columns. As the list of organizations and contacts gets longer, create and customize views by choosing which columns to show and what filters to apply.
Define columns
-
Go to Organizations > Columns.

-
Use the Table Options modal to edit the columns that display:
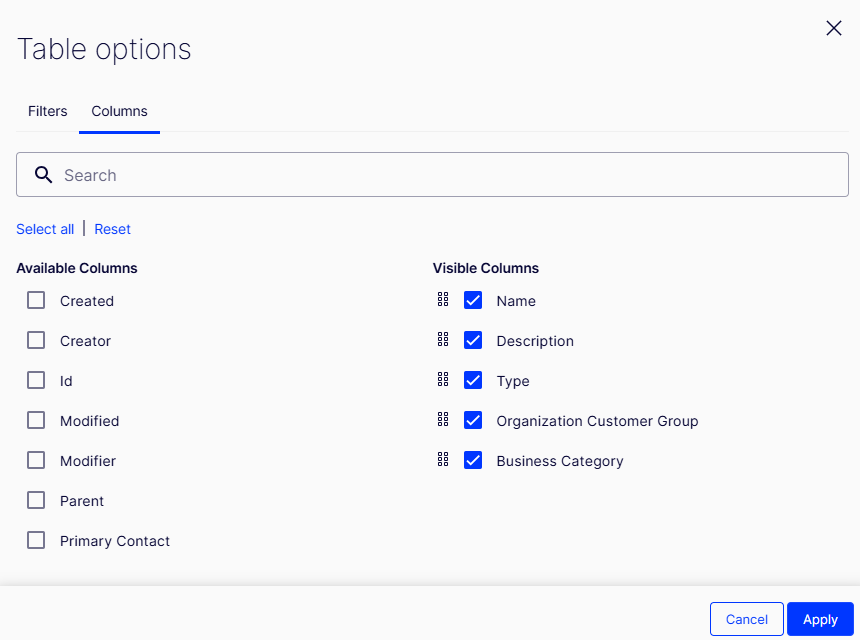
- Select the columns you want to add or remove.
- Drag and drop to reorder the columns.
- Use the search bar to search for a specific column.
- Click Select all to select available columns.
- Click Reset to reset your selections.
-
Click Apply to apply your selection. Click Cancel to exit without applying the changes.
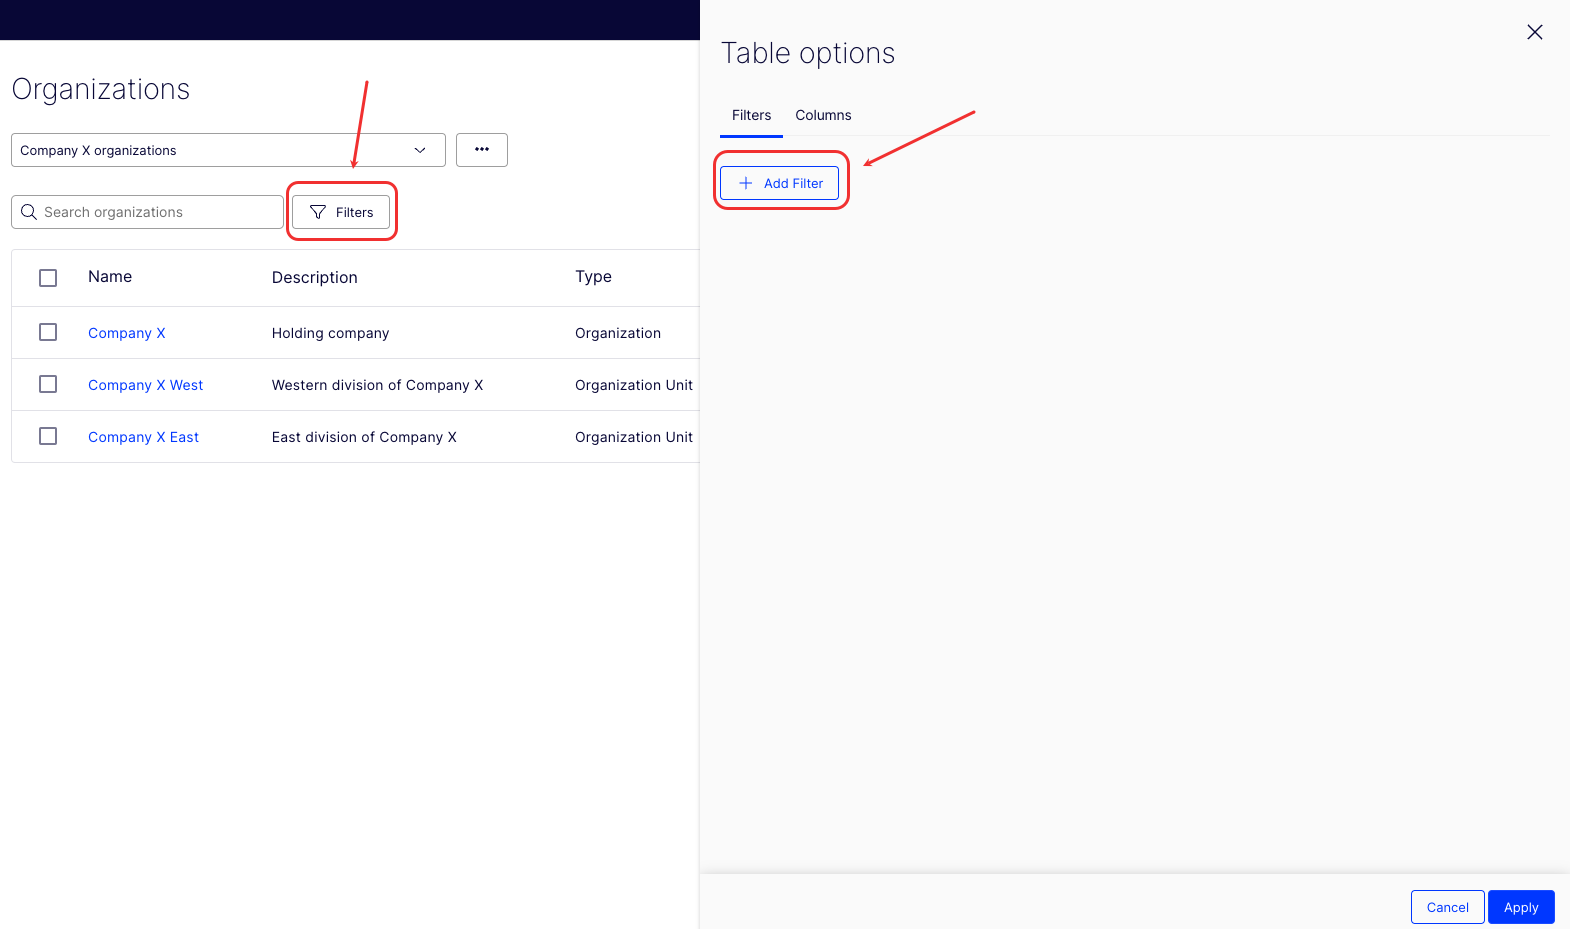
Apply filters
-
Click Filters > Add Filter.
-
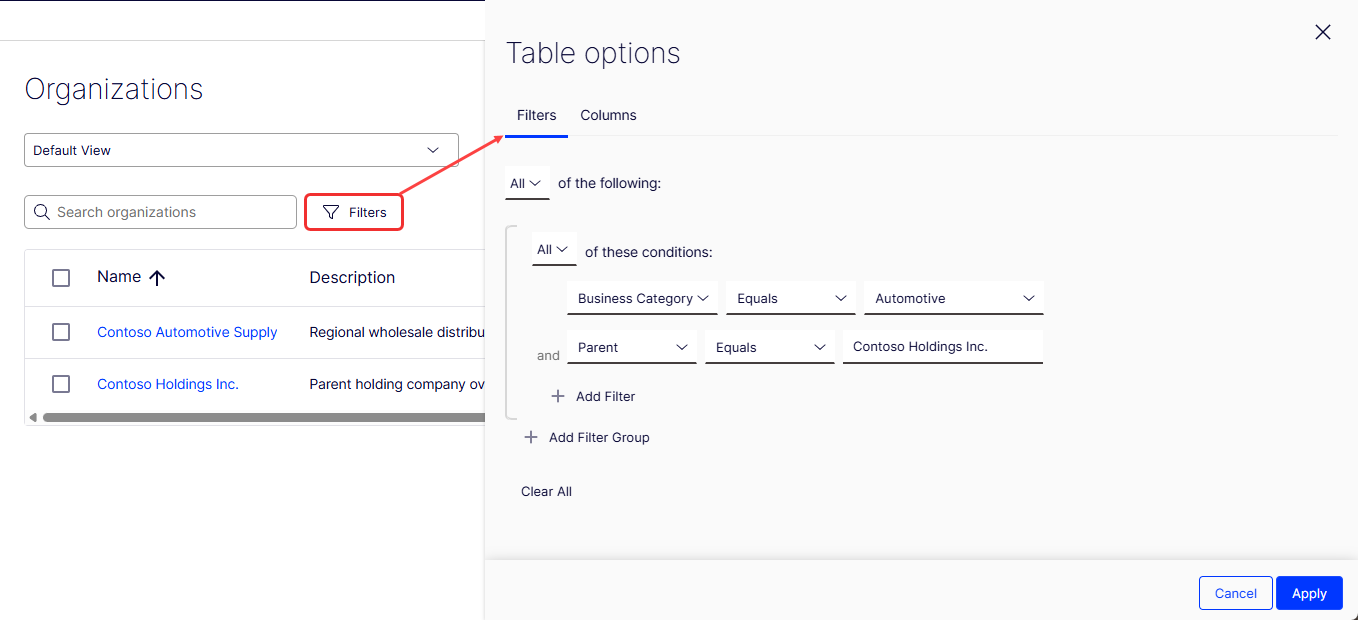
Use the Table Options modal to add filters to the view:
-
Choose Any or All of the following.
-
Choose Any or All of these conditions.
-
Select a filter and condition. For example, Business Category Equals Automotive and Parent Equals Contoso Holdings Inc.
-
Add more filters or filter groups as needed.
-
Click Clear All to clear your selections.
-
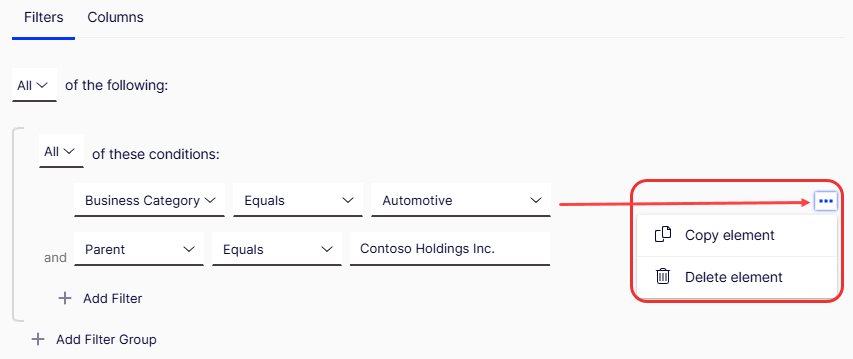
Click More (...) beside a filter to Copy element or Delete element.
-
-
Click Apply to apply the filters, or click Cancel to exit without applying.
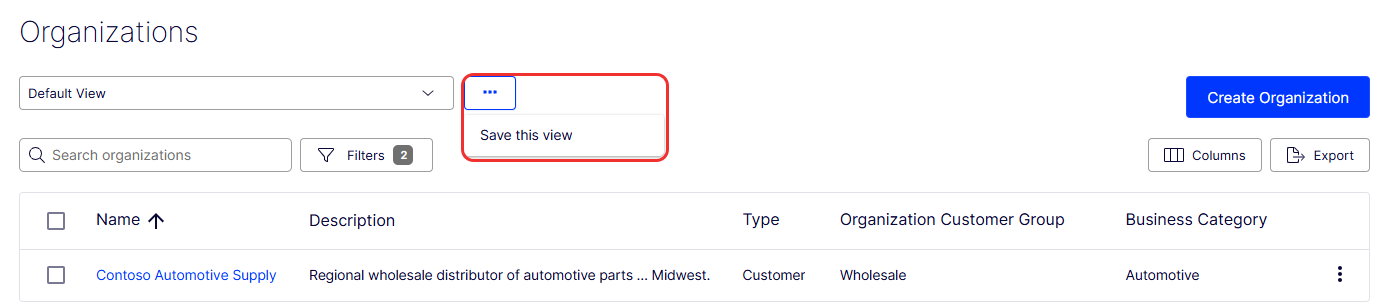
Save view
-
Click More (...) > Save this view to save the view for others to use.
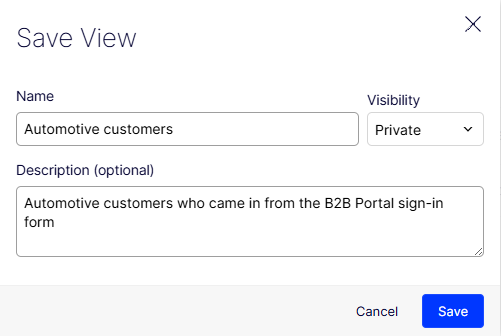
-
Click Save to save the view, or click Cancel to exit without saving. The view displays in the Search drop-down field.
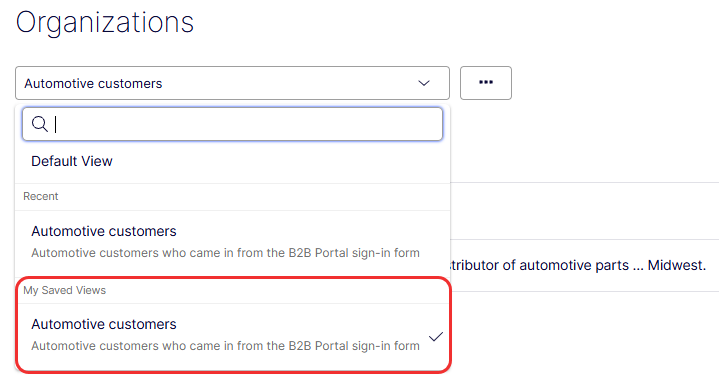
Edit and delete views
- Select the view from the drop-down list.
- Click More (...) > Update this view or Delete this view.
- Update this view – Displays a modal for you to edit the name, visibility, or description for the view. Click Save to update or click Cancel.
- Delete this view – Displays a message asking you to confirm the deletion. Click OK to delete or Cancel.
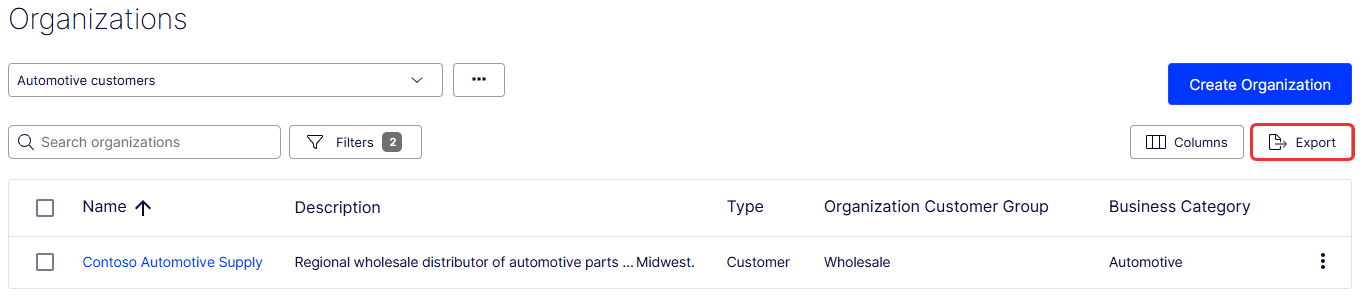
Export views
Export views to download a CSV file. Click Export under Organizations or Contacts.
Updated 12 days ago