Catalog entries
Create and manage catalog entries—categories, products, variants, packages, and bundles.
The Catalog interface in Optimizely Commerce Connect lets you work with catalog data. Marketers may want to create products and variants, and merchandisers may want to enrich products as they are added to ecommerce channels. Ecommerce solutions integrated with an external ERP system may have products with core data that only needs to be completed within Optimizely Commerce Connect. In other scenarios, you can create products from scratch.
When working with catalog entries, you typically complete the following tasks:
- Locate incomplete products added from integrated systems, add content and media, then categorize and publish them.
- Create products, add content, and media from external sources, then publish them.
- Add missing information to variants: product codes, internal and display names, properties, media, pricing, and inventory information.
Create a catalog entry
Create a catalog entry from the catalog tree's context menu or the Create content button. When you expand the catalog tree, context-sensitive options display. For example, after selecting a category, you can create a category, product, variant, package, or bundle. After selecting a product, you can create products or variants.
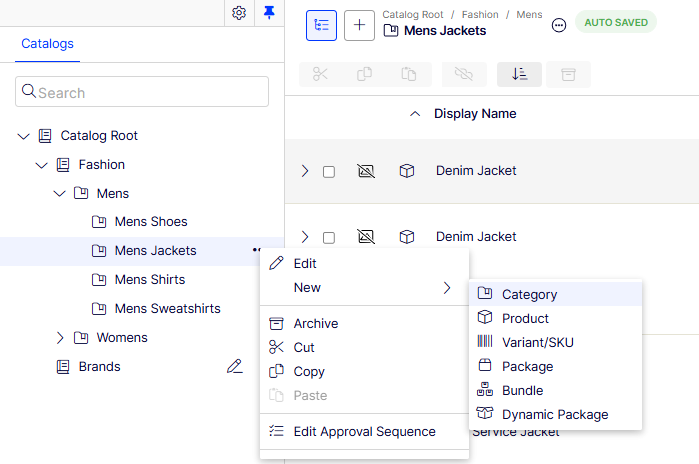
The following example shows how to create a catalog entry.
- Expand the catalog tree and go to the desired category.
- Select the category within which you want to create the catalog entry.
- From the context menu, select New > Category, Product, Variant or SKU, Package, or Bundle.
- Enter a name for the item.
- If your Commerce Connect system supports multiple product types, the system suggests a default one based on the context and previous similar actions. Choose a product type.
- Complete the product's or variant's properties. See Catalog entry properties. Commerce Connect saves the item automatically, but it is only available on the website when published.
Because variants belong to the lowest level in the product hierarchy, you cannot add sub-entries for them. Instead, you can only edit them.
NoteThe catalog tree does not display products or variants, only category nodes. Use the catalog item list to work with products and variants.
To learn about other catalog entry tasks, such as editing, deleting, or moving, see the following Edit catalog entries section.
Types of catalog entries
Each catalog entry has a type:
- Category – A way to group products, such as Art Books or Cocktail Dresses. See Categories.
- Product – Merchandise you can display on a front-end site. A product typically consists of several variants which customers can purchase.
- Variant or SKU – A purchasable product with specific characteristics, such as size, color, sleeve length, and price.
- Package – A purchasable item. For example, a shirt and hat combination is wrapped and sold as a unit. Although a package has multiple variants, it has a unique SKU number and displays as a single line item in a shopping cart. See Packages and bundles.
- Dynamic Package – A content type extended from a package. Although a dynamic package has multiple products, each product contains one or more variants as an option. This lets customers select variants from configured packages.
- Bundle – A collection of variants, letting customers purchase two or more items at once. Each item is priced separately. For example, a matching shirt and hat are presented together on the front end so a user can buy both items at once. Each item displays on its own line in a shopping cart. See Packages and bundles.
Edit catalog entries
After you import products and variants, you can edit, archive, or delete them.
Properties for products and variants are similar, but pricing and inventory information is only defined for variants.
NoteChanges to related entries, pricing, and inventory information are immediately published and visible on the website and are not part of the publishing flow.
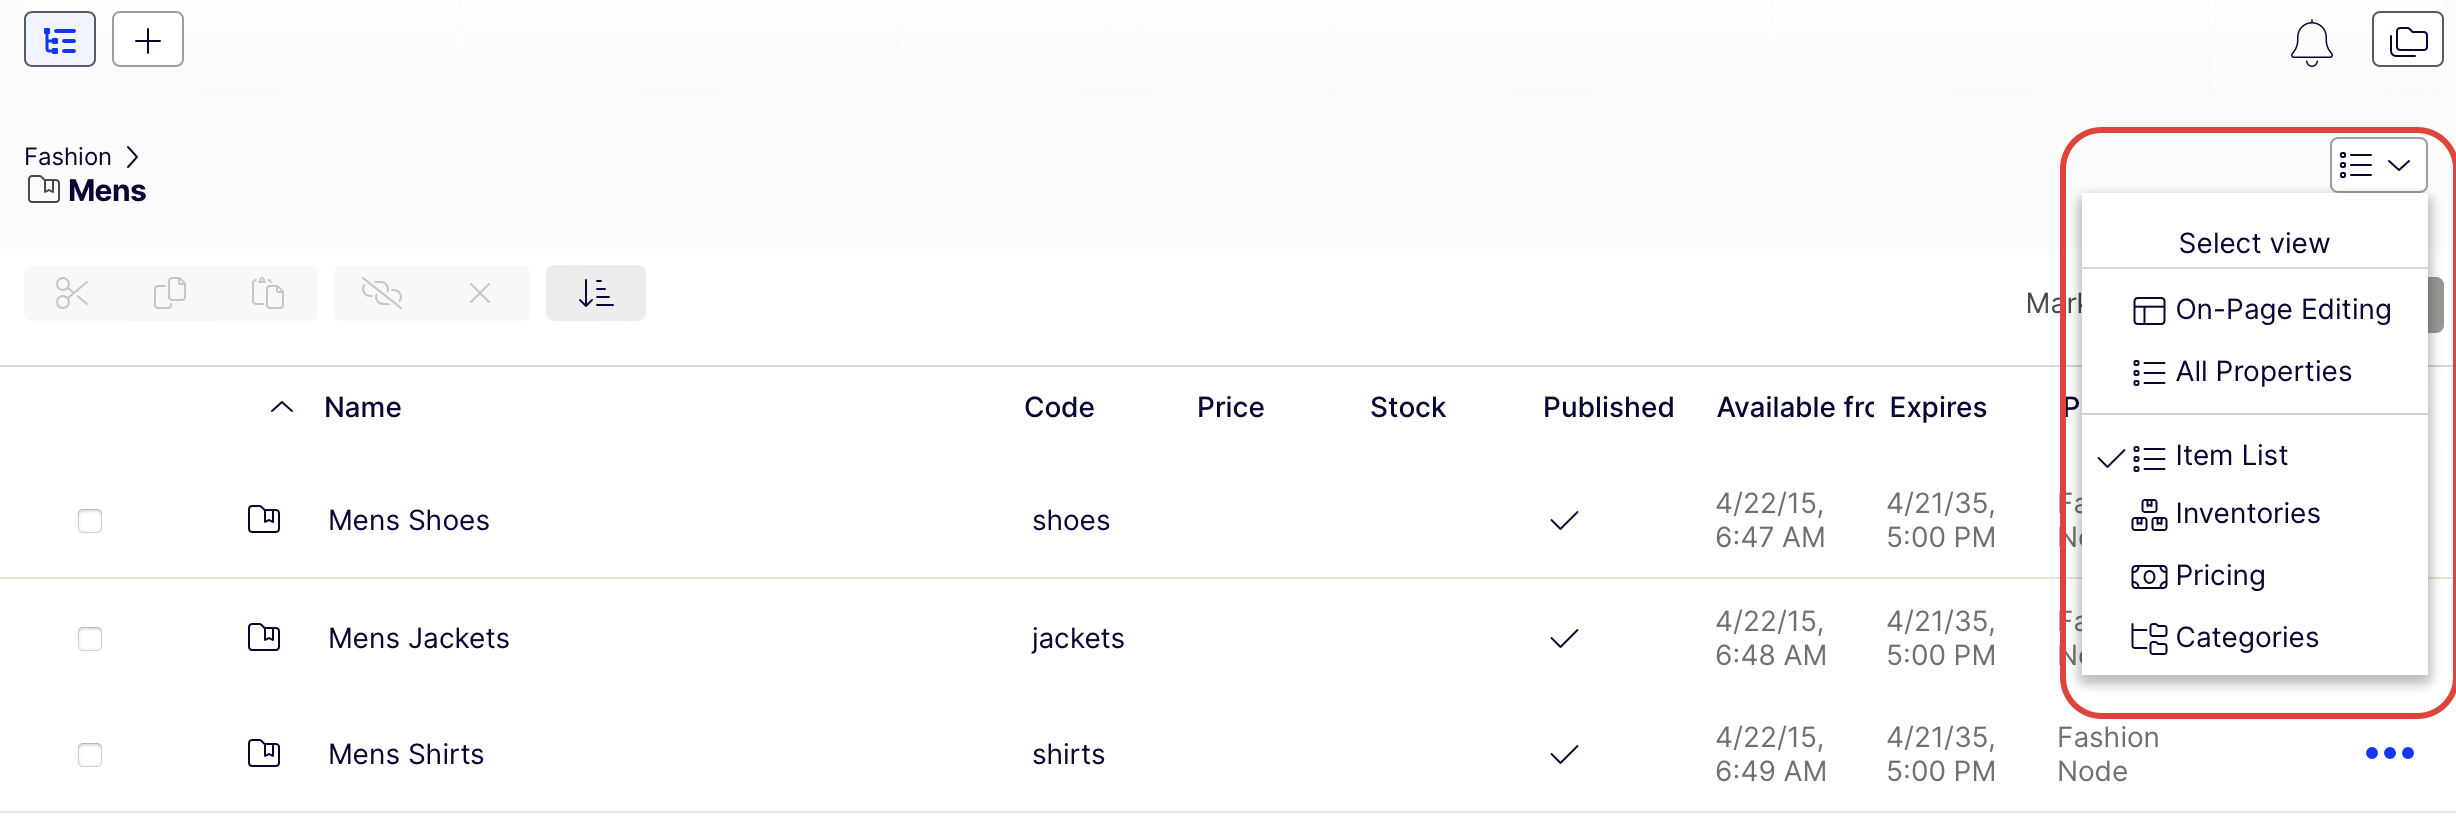
Catalog-specific editing options
The catalog item list has Select view with additional editing options. Use these to edit and access the Inventories, Pricing, Categories, and Related Entries (only available for catalog entries).
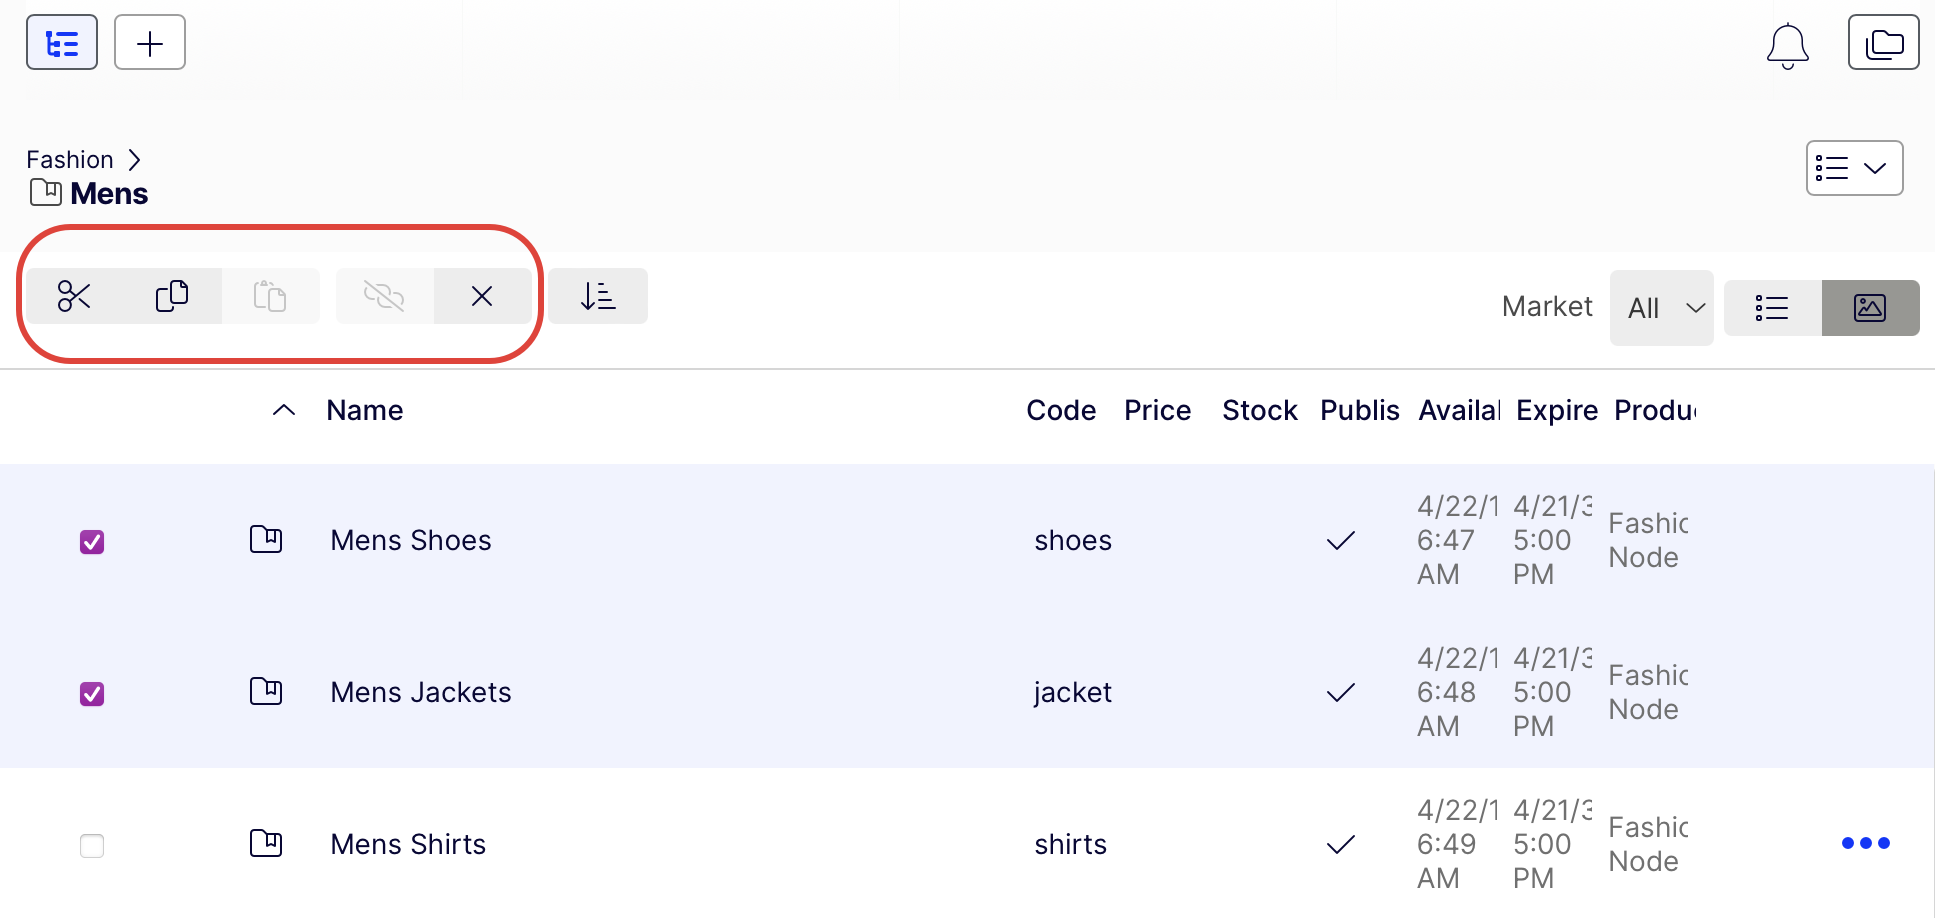
Edit multiple catalog entries
Work with multiple catalog entries at once by selecting items and using options, such as Cut, Copy, Paste, or Delete.
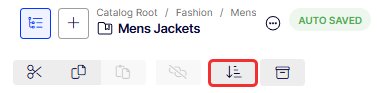
Sort catalog entries
Sorting changes the display order of items in a category. This affects the Catalog view.
When creating your page templates, a developer determines how to arrange the items on a page. Sort order is one option. Sorting can also change the arrangement of items on your website's pages.
-
Go to the category that contains items you want to sort.
-
Click Sort mode. This enables sort mode. A drag handle displays beside every eligible item's checkbox.
-
Select one or more items whose sort order you want to change.
-
Drag and drop items to the new position.
For a single item, open its context menu (...) and select Move up or Move down.
Note
- Changing an item's sort order affects it within that category only.
- Sort mode remains enabled until you click the button again, even if you go to other categories.
- You cannot sort categories.
Sort variants
-
Select the catalog entry.
-
Click Select view > Variants.
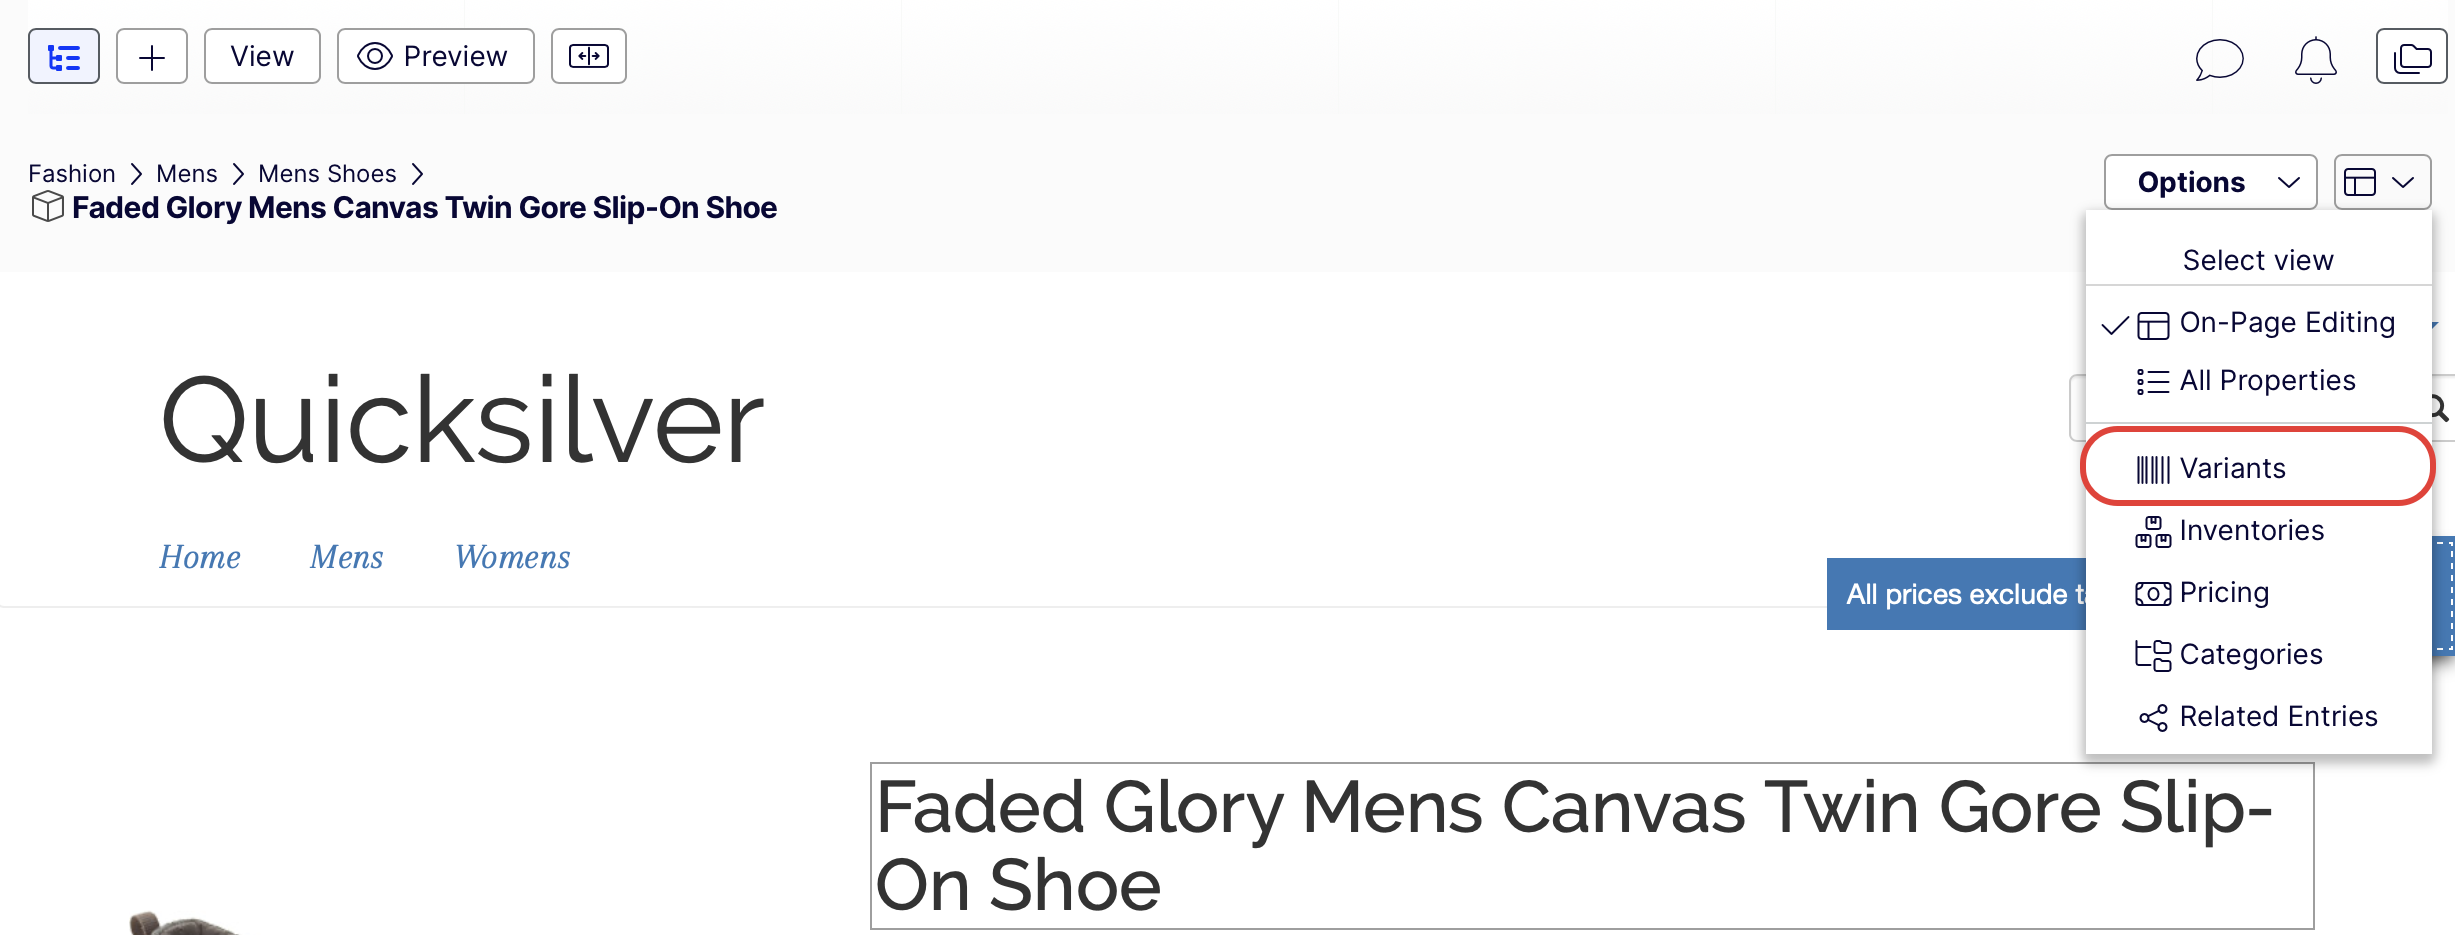
-
Drag and drop variants to a new position.
Duplicate catalog entries
Duplicate an existing entry to create one. It gets a unique ID, and you can edit the following details and then move the entry to a different catalog tree location.
- If you duplicate a category, Optimizely Commerce Connect creates a code, name in URL, and SEO URL based on the original. The name, internal name, and content are the same as the original. Sub-entries in the original category, such as products and variants, are not duplicated.
- If you duplicate a product, variant, package, or bundle, Optimizely Commerce Connect creates a URL name, SEO URL, and product code based on the original. Other information (name, internal name, and content) is the same as the original.
You can duplicate one or several catalog entries. The following example duplicates multiple variants and moves them to a different category.
-
Open the desired catalog or category node to see the items you want to duplicate.
-
Pin the catalog tree so it remains open.
-
Select items to be duplicated.
-
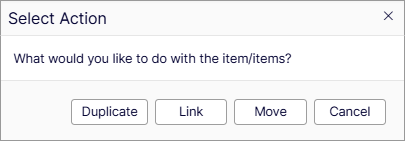
Drag selections to the desired catalog tree location. The Select Action window displays.
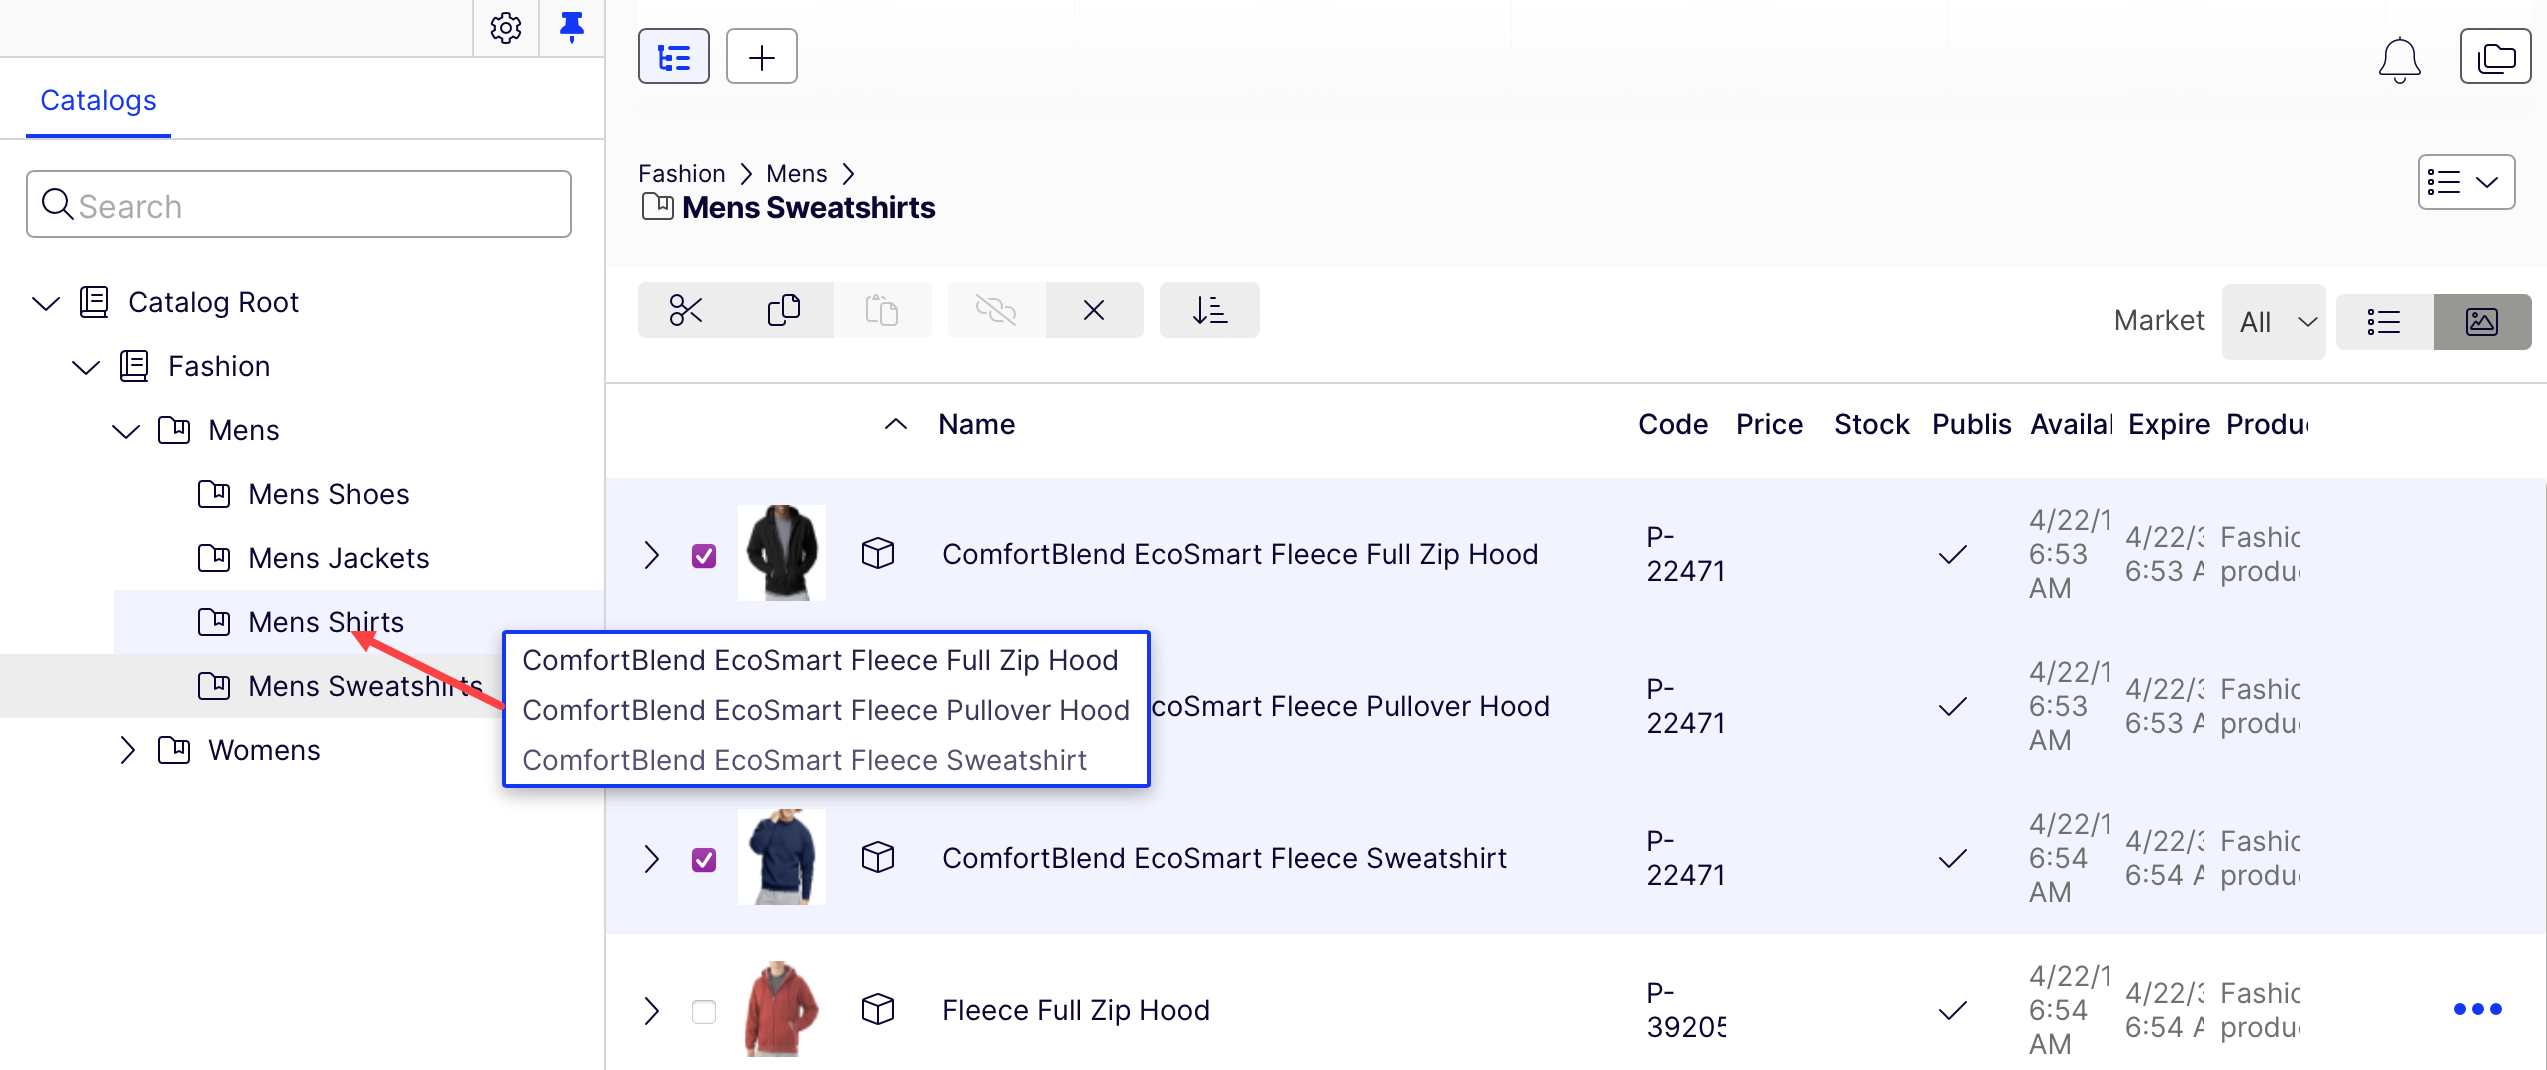
-
Click Duplicate. The selected entries are duplicated in the selected location.
Use the List menu's Copy and Paste options to duplicate multiple entries or the Context menu's Copy and Paste options to duplicate a catalog entry.
Move catalog entries
Moving a catalog entry is the same as assigning it to a different primary category.
Translate catalog entries
Like other types of content, catalog entries can exist in multiple languages. See Translate content with Optimizely Opal.
Archive and delete catalog entries
Archiving catalog entries lets you remove them from your catalog without permanently deleting them. This gives you the ability to restore or republish them later if needed.
-
Select a catalog item.
-
Click the options menu (...).
Select one or more entries and click the Archive icon.
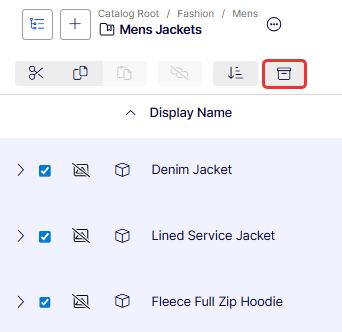
-
Select Archive. Because archived content is automatically unpublished from the website, you receive a notification if the content is linked from other content in case unpublishing creates broken links. A prompt displays showing you any associated variants with that item. Click View to view the variants.
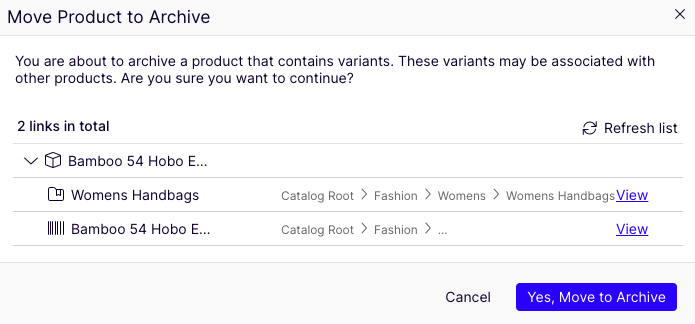
-
Click Yes, Move to Archive when ready.
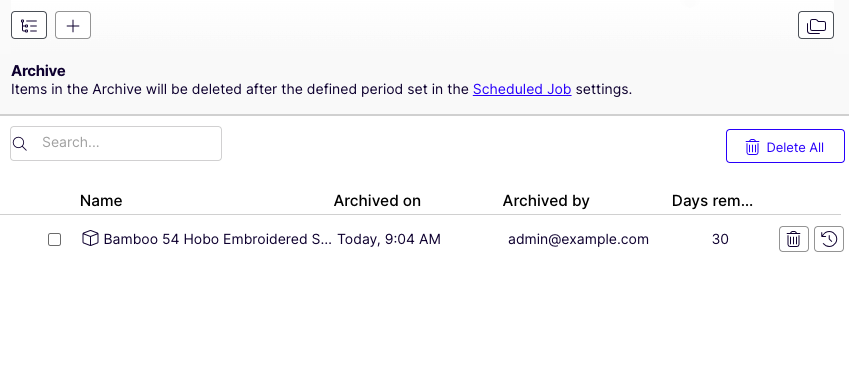
View archived entries
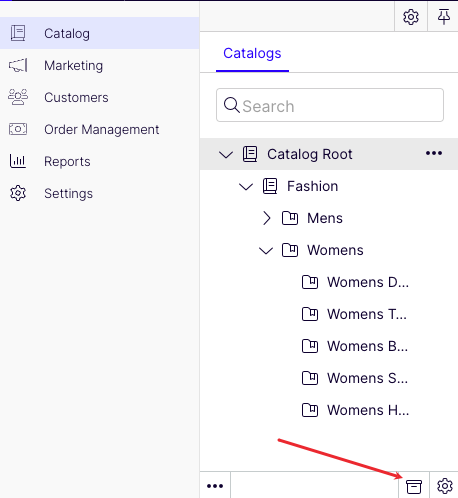
-
Open the navigation pane.
-
Click the Archive icon.
This opens the Archive section where you can Delete or Restore entries by clicking the appropriate icon.
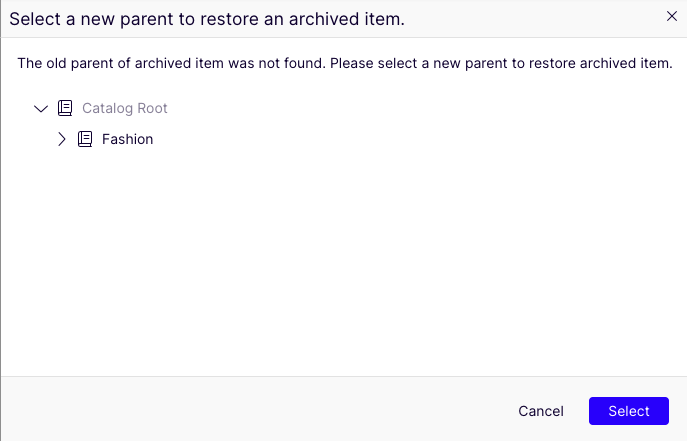
Restore entries
Select the entries you want to restore and click Restore selected.
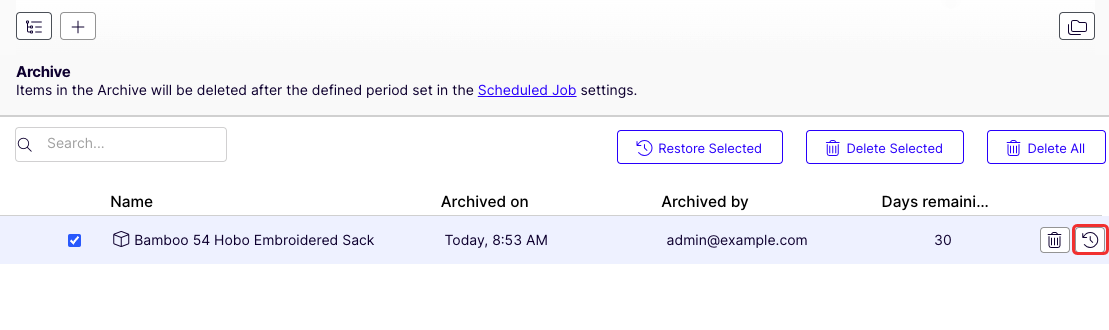
You may be prompted to choose where the entry should go. Choose the appropriate location and click Select.
Delete entries
Click Delete all to permanently delete all archived entries. Click Delete beside an archived entry to delete it permanently. Select one or more entries and click Delete selected.
Use a scheduled job to automatically delete archived content regularly.
When deleting a product or a variant, the following happens:
- If a product or variant is deleted, all links from other catalog entries are removed.
- If a product with associated variants is deleted, the variants are left associated with the deleted product's category.
- Any children are also deleted.
Updated 13 days ago