Configure Firebase
How to use Firebase with the Optimizely Configured Commerce Mobile App.
To use a Firebase account with your Optimizely Configured Commerce Mobile App, complete the following steps.
Create a Firebase project
- Go to the Firebase Console.
- Log in with your Google account, or create one if needed.
- Click Add Project.
- Enter your project name, such as YourCompanyNameB2BApp.
- (Optional) Enter the Project ID if you want a custom identifier.
- Click Continue.
- Enable Google Analytics to view mobile analytics in Firebase, or keep it disabled.
- Click Create Project.
- Wait for Firebase to finish provisioning.
- Click Continue to enter your new project dashboard.
Add your app to the Firebase project
You must add your mobile app (IOS or Android) to the Firebase project to use the services offered.
Android
-
Go to the Firebase project settings.
-
Click Android from Add app to get started.
-
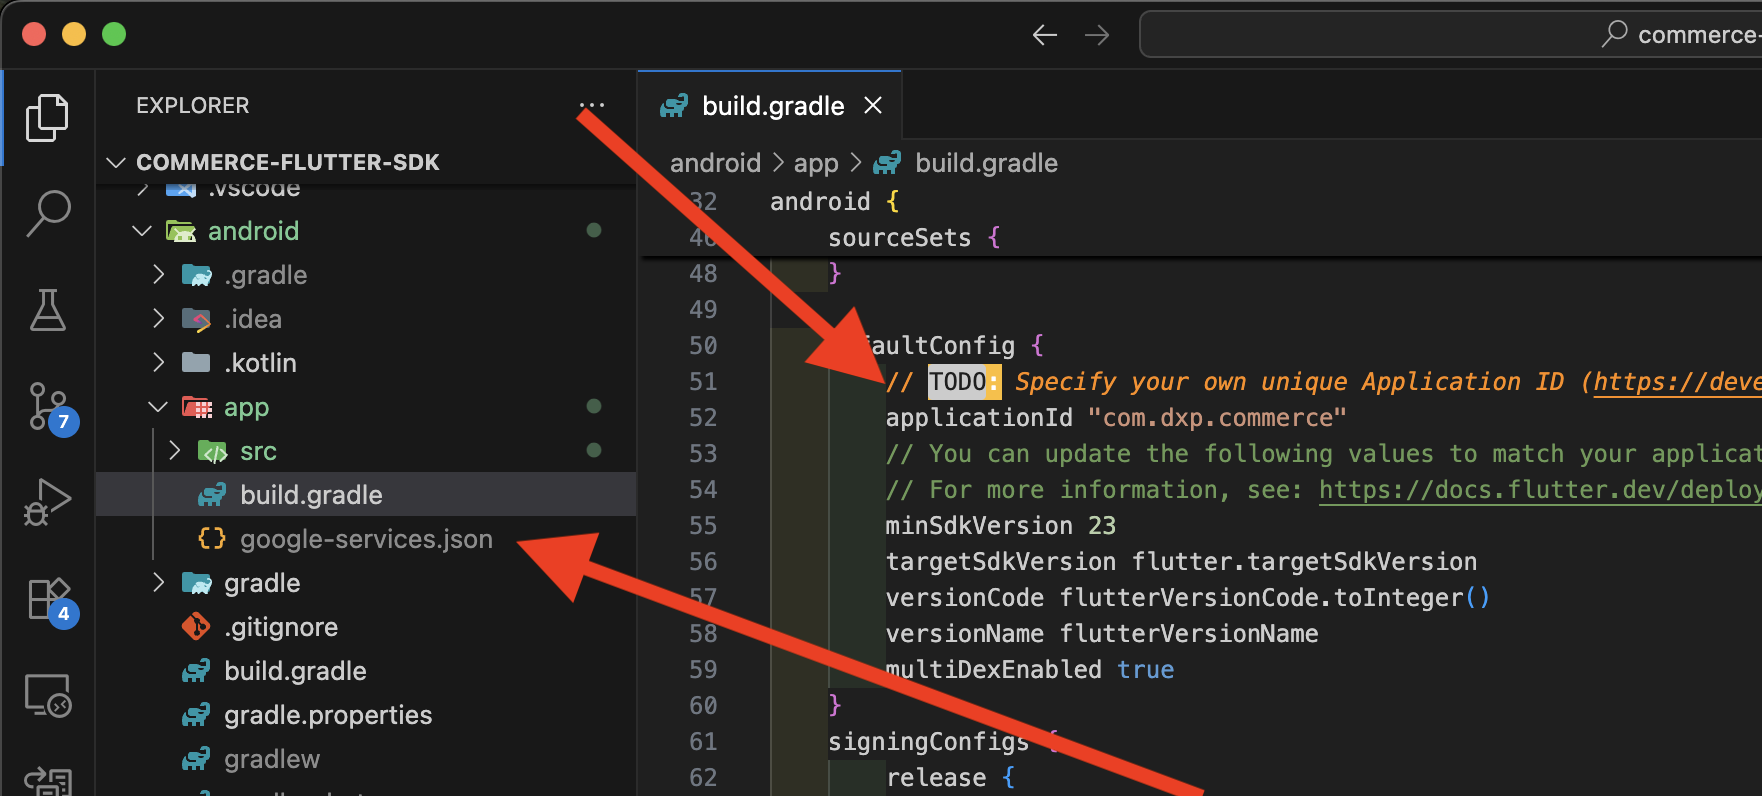
Enter your app's applicationId from your app's
android/app/build.gradlefile fromdefaultConfig. -
(Optional) Add an app nickname.
-
Click Register app.
-
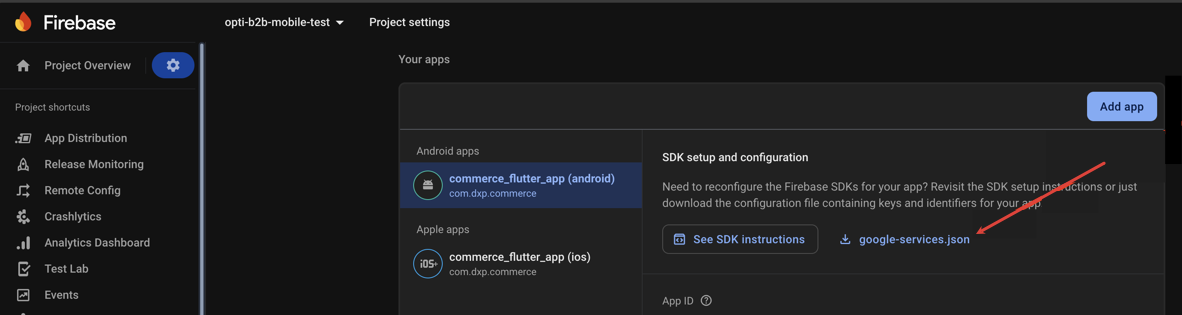
Click Download google-services.json.
-
Place this file in your app’s android/app directory in your Android project.
iOS
-
Go to the project settings.
-
Click iOS from Add app to get started.
-
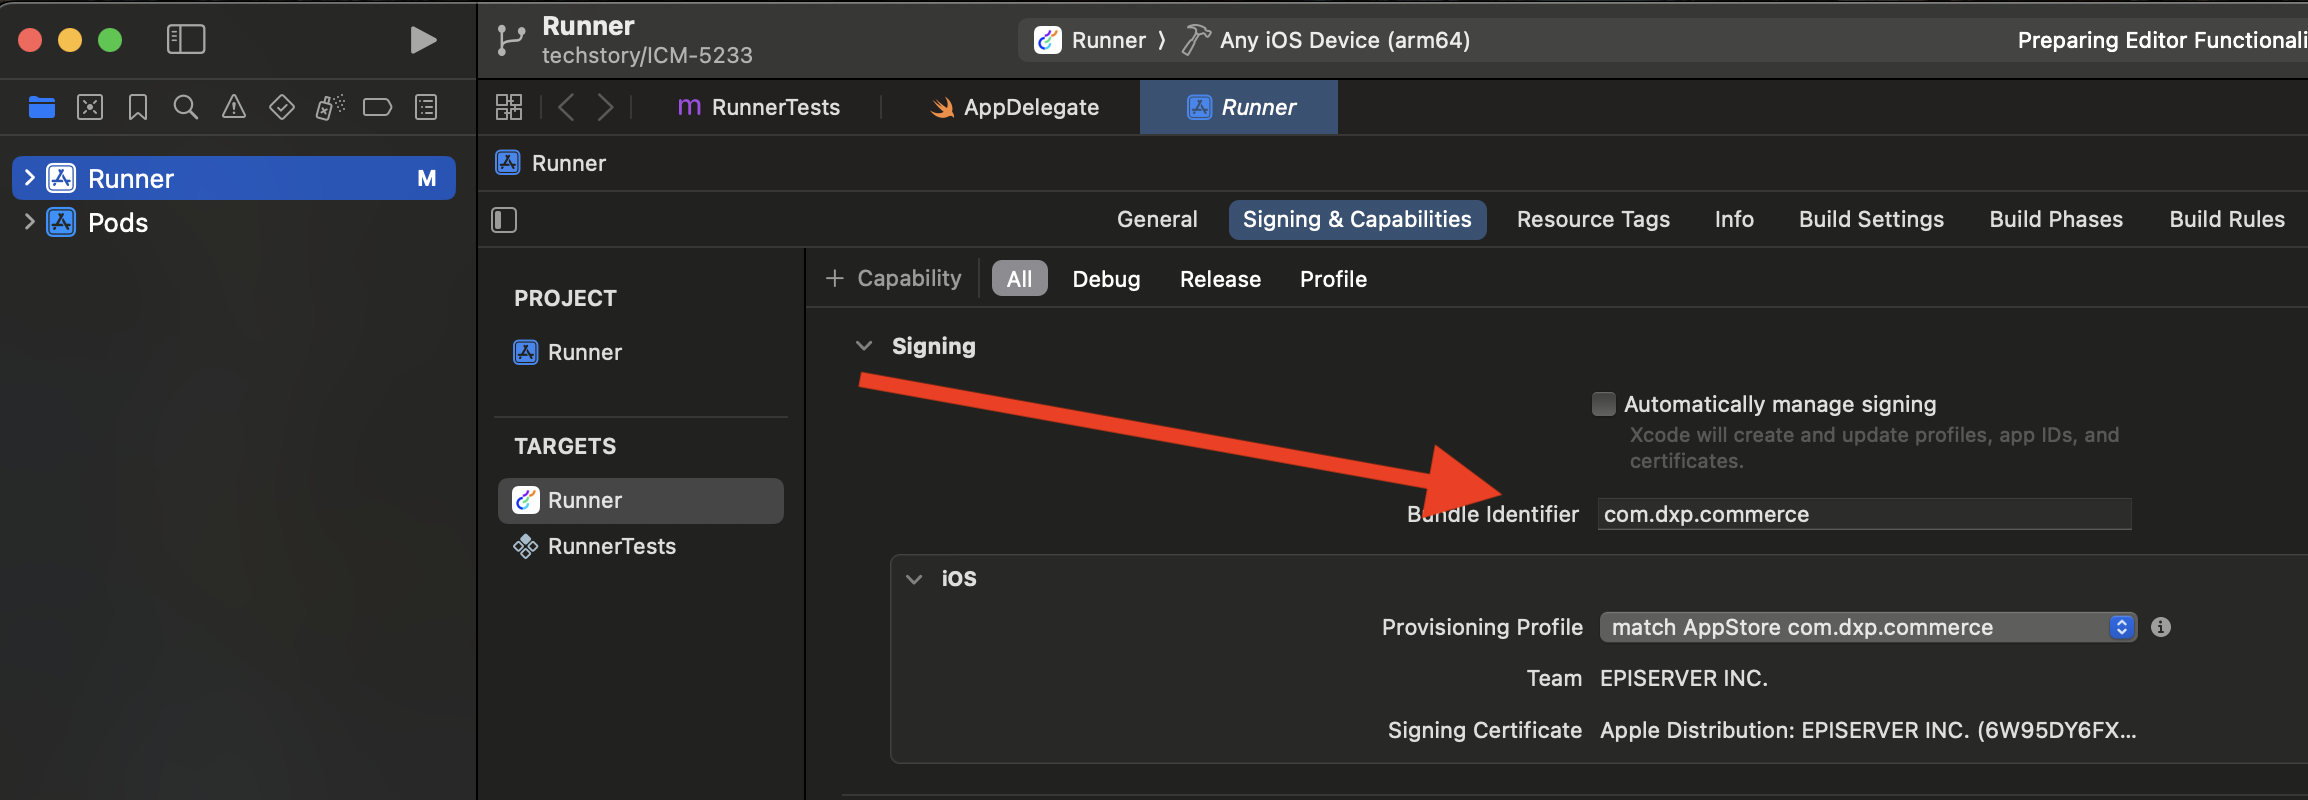
Enter your app's iOS bundle identifier (from Xcode).
-
(Optional) Add an app nickname.
-
Click Register app.
Update base_config.json
Update the following values in base_config.json, which help establish the connection between the app and firebase:
"firebaseAndroidApiKey""firebaseAndroidAppId""firebaseAndroidMessagingSenderId""firebaseAndroidProjectId""firebaseAndroidStorageBucket""firebaseIOSApiKey""firebaseIOSAppId""firebaseIOSMessagingSenderId""firebaseIOSProjectId""firebaseIOSStorageBucket""firebaseIOSBundleId"
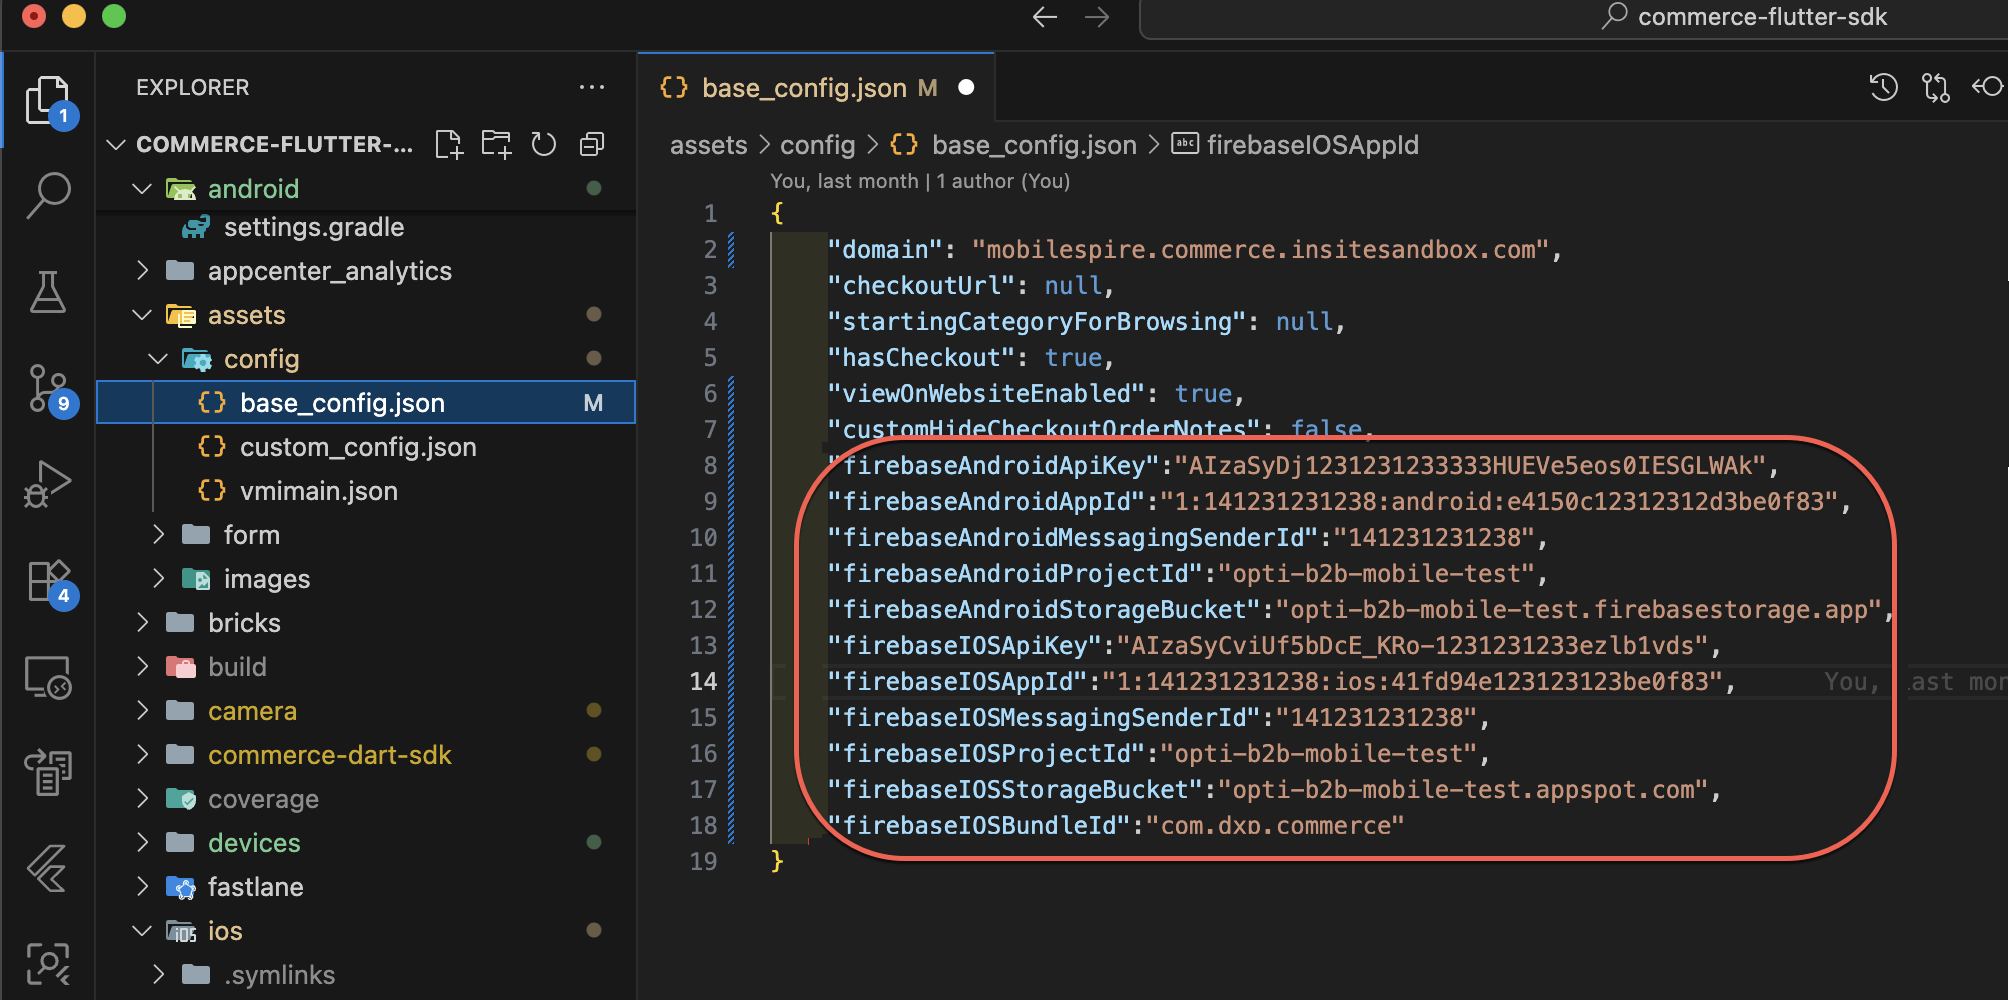
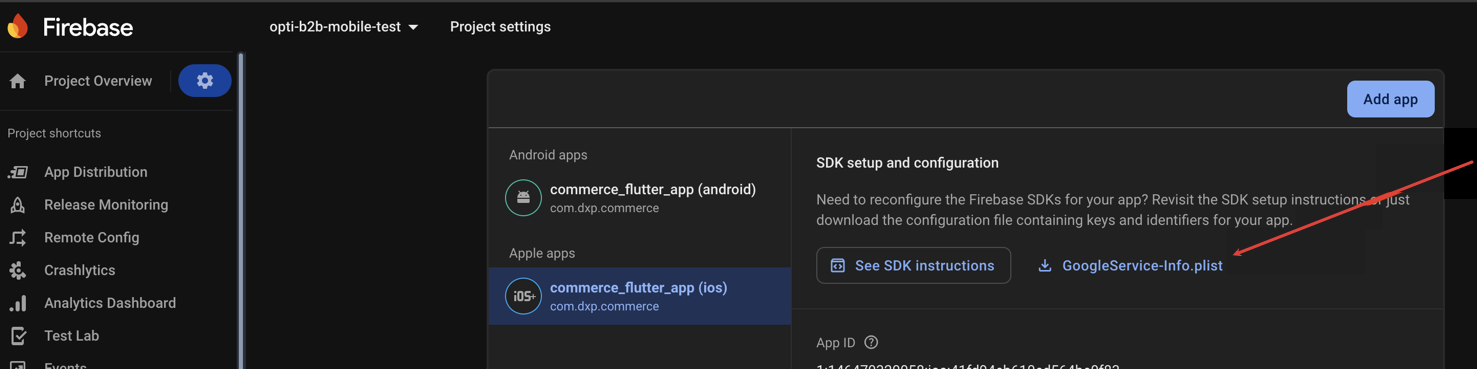
You can collect these values from the google_service.json andGoogleService-Info.plist files. Locate these files by going to the project settings and selecting GoogleService-Info.plist for the app.
Map values for GoogleService-Info.plist
Map the following values from the GoogleService-Info.plist file.
"firebaseIOSApiKey" : "API_KEY","firebaseIOSAppId" : "GOOGLE_APP_ID","firebaseIOSMessagingSenderId" : "GCM_SENDER_ID","firebaseIOSProjectId" : "PROJECT_ID","firebaseIOSStorageBucket" : "STORAGE_BUCKET","firebaseIOSBundleId" : "BUNDLE_ID"
Map values for google_services.json
Map the following values from the google_services.json file. If you have multiple clients in the file, copy the one where your Android application ID matches the package_name inside that client.
"firebaseAndroidApiKey" : "current_key","firebaseAndroidAppId" : "mobilesdk_app_id","firebaseAndroidMessagingSenderId" : "project_number","firebaseAndroidProjectId" : "project_id","firebaseAndroidStorageBucket" : "storage_bucket",
Updated 12 days ago