Build service v2
Describes how to configure version 2 of Optimizely Configured Commerce's build service.
Optimizely has introduced a new build service for Configured Commerce that runs in Kubernetes instead of the legacy system that uses TeamCity. Running on Kubernetes provides additional scalability and security, such as:
- Using Configured Commerce's internal Kubernetes infrastructure for dynamic scaling of build resources to reduce queue time and overall build times.
- Using a GitHub app to receive webhooks that notify the new build service of code changes that must be built and deployed. This helps add requested builds to the queue faster and removes the need for Optimizely to add a public SSH key into extension repositories.
NoteYou must be on build service V2 to consume any new packages added to the allowlist.
Upgrade existing instances
NoteAll Configured Commerce instances within the same organization must be migrated to the new build service at the same time and as part of the same request; Optimizely does not support migrating subsets of instances or single instances.
To migrate existing instances to the new build service, follow these steps:
-
Install the Configured Commerce Build Service GitHub app in all repositories used by the organization's Commerce instances.
-
Open a ticket with Optimizely Support to move all existing instances from the legacy build service to the v2 build service. The ticket should include the following:
-
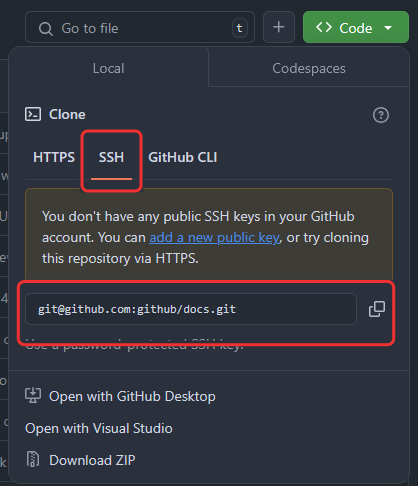
The GitHub repository (SSH URL is required) and branch for each commerce instance – Each production instance should be associated to a different branch, but multiple lower environments can share a branch. URL redirects are not supported and must be the actual repository SSH URL.
 Important
Branch names can only be alphanumeric. You cannot use special characters, like slashes.
Branches must meet the following requirements:
- Contain at least 2 characters.
- Contain at most 30 characters.
- Contain only lowercase alphanumeric characters or
-. - Start with an alphanumeric character.
- End with an alphanumeric character.
-
The email address for build notifications – This applies to all commerce instances.
-
Configure new instances
To create an instance on the build service, follow these steps:
-
Install the Configured Commerce Build Service GitHub app in the repository.
-
Open a Project Initiation request with Optimizely Support to provision the instance. The ticket should include the following:
-
The GitHub repository (SSH URL is required) and branch for each commerce instance – Each production instance should be associated to a different branch, but multiple lower environments can share a branch. URL redirects are not supported and must be the actual repository SSH URL.
 Important
Branch names can only be alphanumeric. You cannot use special characters, like slashes.
Branches must meet the following requirements:
- Contain at least 2 characters.
- Contain at most 30 characters.
- Contain only lowercase alphanumeric characters or
-. - Start with an alphanumeric character.
- End with an alphanumeric character.
-
The email address for build notifications – This applies to all commerce instances.
-
GitHub app
The Configured Commerce Build Service GitHub app lets the Configured Commerce Build Service interact with the source code repository, including the following:
- Allowing commits to the repository to trigger builds in the Configured Commerce Build Service, removing the need to add the insite-teamcity-build user to the repository.
- Allowing the Configured Commerce Build Service to generate temporary tokens to clone the repository for building.
Install the app
Full instructions and additional information on installing GitHub apps can be found directly on GitHub (Optimizely uses their standard process).
Follow these steps for Configured Commerce:
- Open the GitHub app install page.
- Click Configure.
- Select the organization associated with the repository where you intend to add the Kubernetes build service.
- Select the Only select repositories option.
- Select the repository where you want to incorporate the Kubernetes build service.
- Select Install if you have admin privileges. If you do not have admin privileges, select Request or Install & Request, depending on your permissions. You must follow-up with the repository admin to approve the app install. You can provide the information below to explain the permissions and events requested.
Required permissions and events
Permissions
The following read-only permissions are required for the GitHub app to function correctly:
- Contents – Gets webhooks for pushes to the repository (which trigger builds).
- Metadata – Gets webhooks for pull requests to the repository.
- Pull Requests – Gets webhooks for merged pull requests to trigger builds.
Note
The Pull Requests permission is not currently used by Optimizely but is intended for future functionality.
Events
The build service uses the following event subscriptions to trigger builds:
- Meta – Lets the GitHub app know if the app was deleted and the webhook was removed.
- Pull Request
- Push
Build logs
Read build logs
The build logs are attached to the email sent when the build completes (successful or otherwise). Each set of logs is sectioned into discrete build steps in the following format:
========= Start Build Step: dogfood-sandbox-123-qc8mp-build-container-3105298733/ =========
Copy extensions.dll (if exists) to artifacts directory
'./dist/Extensions.dll' -> './artifacts/Extensions.dll'
Building init container
...
========= Finish Build Step: dogfood-sandbox-123-qc8mp-build-container-3105298733/ =========
The build step name (noted at the beginning and end of the step above) is a concatenation of information in the following format:
{project}-{branch}-{build number}-{build system unique ID}-{build step}-{build system unique ID}
Using this format, you can take the example build step in the above snippet dogfood-sandbox-123-qc8mp-build-container-3105298733 and identify the following details:
- Branch – sandbox
- Build number – 123
- Unique ID from build system – qc8mp
- Build step – build-container (most important detail)
- Unique ID from the build system – 3105298733
Important notes
- The build log does not contain all available logs because some logs could contain sensitive information (notably deployment logs). If a failure occurs in an area where Optimizely restricts logs (like during the deployment), you may not receive pertinent failure information in the build email. Contact Optimizely Support who will find and provide the relevant information.
- A failing step may display twice in the logs due to the automatic retry mechanism implemented to mitigate intermittent failures (for example, during intermittent network unavailability or other external resource outages).
- The build service cannot detect multiple simultaneous commits to a repository. When multiple commits are pushed at the same time (such as pushing to multiple branches through automation), the build service is not able to pickup the change and fails to create a build.
Updated 25 days ago