Directives (partial views)
Demonstrates the process for creating a Directive template.
ImportantClassic CMS reached end-of-life in January 2025 and is no longer receiving feature updates or bug fixes. You should migrate to Spire CMS.
Directives are templates that are used for Angular directives. They are typically custom \<isc-*> tags that include smaller chunks of HTML used to display a larger visual component inside widget templates. Some of the directives used inside the product detail widget include product images and product price. Inside the ~\Views\Directives\ directory is another level of directories with names that correspond to the view. For example, one of the directories is named "Catalog". This directory contains multiple directive view files used throughout the catalog on the website. One of these files is named ProductPrice.cshtml. This file includes markup for rendering the price for a product. Just like widget templates, these Directive templates can include Angular and DotLiquid markup to help render data. Keep in mind that Angular markup is rendered on the client, while DotLiquid markup is rendered on the server.
When a template for a given directive is retrieved from the server, it is done by an alias. This provides a developer with a cleaner method of overriding the template that will be used. As an example, when the ProductPrice template is loaded with angular, it is retrieved using the URL /PartialViews/Catalog-ProductPrice. This endpoint looks for the Directive that is current set up for the alias of Catalog-ProductPrice. Using the Theme Configuration File a developer may override which directive template will be returned for that alias.
Before you can change the default template for a directive, you must create another template to choose. The sections in this walk-through are meant to be used together, not individually.
Prerequisites
- Visual Studio and SDK installed
- Theme created (read about how to create a new theme)
Create a template
This section adds a template for the Catalog-BreadCrumb view.
-
In Visual Studio, open the B2B Commerce solution.
-
Find your theme project.
-
In your theme project, find the **~\Views\Directives\Catalog**directory.
-
In the Catalog directory, make a copy of the BreadCrumb.cshtml file and rename it to "CustomBreadCrumb.cshtml".
-
Open the CustomBreadCrumb.cshtml file.
-
Find the following DotLiquid tag:
[% translate 'Home' %] -
Change the "Home" value to "Home Page":
[% translate 'Home Page' %] -
Save the file.
The template is finished. Now you need to change the template that is used for the Catalog-BreadCrumb alias.
Change the template returned for an alias
This section will use the theme configuration file to change the template that is returned for a given alias.
-
In Visual Studio, find your theme project.
-
In your theme project, find the theme.json file located at the root of your theme.
-
Open the theme.json file.
-
Scroll to the bottom and find the Views property.
-
In the Views property, add a property named "Catalog-BreadCrumb" and give it a value of "CustomBreadCrumb". The property name matches the alias name and the value name matches the template name. You can read more about configuring views in the theme configuration file to better understand both the naming convention and file references that can be used in this article: .
-
Save the file.
-
Build your solution.
-
Navigate to the Home page on the Storefront.
-
Search for a product using the search text box.

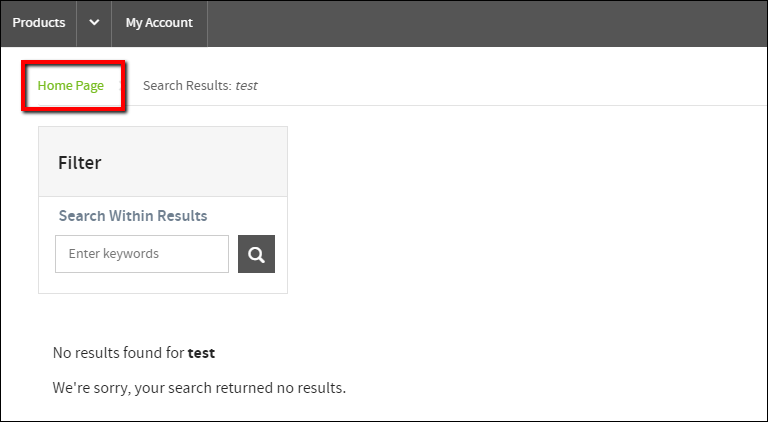
Notice in the breadcrumbs that the first breadcrumb has the text "Home Page" instead of "Home". Now, wherever the isc-catalog-breadcrumb directive is used, this new template will be displayed.
Updated 3 months ago
