Set up OpenId Connect SSO
This topic describes the process for enabling OpenId Connect SSO as an identity layer to verify user identities based on Authorization Server authentication.
You can use OpenId Connect SSO as an identity layer on top of the OAuth 2.0 protocol. This allows you to verify user identities based on the authentication performed by an Authorization Server.
Login via OpenId Connect is enabled by changing the relevant settings in the Admin Console. Changes to these settings will not take affect until after the application pool is recycled.
Enable OpenId Connect SSO
- Go to Administration > System > Settings in the Admin Console.
- Search for Allow Sign in With OpenId Connect.
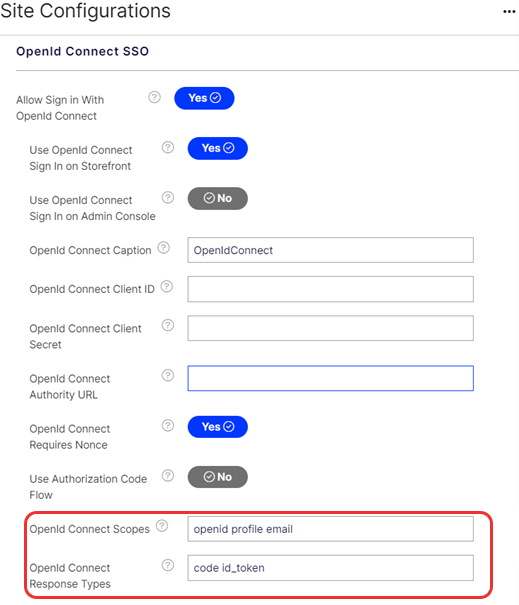
- Set the Allow Sign in With OpenId Connect toggle to YES. If Yes, an OpenId Connect button will appear on the sign in page. Default value: No.
- Set the Use OpenId Connect Sign In on Storefront toggle to YES, if you want to enable this. If Yes, an OpenId Connect button will appear on the storefront sign in page. Default value: No.
- Set the Use OpenId Connect Sign In on Admin Console to YES, if you want to enable this. If Yes, an OpenId Connect button will appear on the admin console sign in page. Default value: No.
- Enter an OpenId Connect Caption. This is the caption to show on the OpenId Connect button. Default value: OpenIdConnect.
- Enter your OpenId Connect Client ID. The client ID identified by your OpenId Connect application used for OpenId Connect login.
- Enter your OpenId Connect Client Secret. The Client Secret identified by your OpenId Connect application used for OpenId Connect login. Leave this blank if it's not required.
- Enter you OpenId Connect Authority URL. The Authority URL of your OpenId Connect application.
- Set the OpenId Connect Requires Nonce toggle to NO, or false, if your OpenId Connect provider does not support nonce. Default value: Yes.
- Click Save.
NoteIf you plan on using SSO for the Admin Console and you do not wish to automatically assign any permissions, you should update the Assign A/C User Role with SSO setting to NO. New Admin Console users will then require an existing user to set their roles up manually. Default value: Yes.
Configure the SSO Clients
NoteThis step is not required in net8.0+.
- Go to Administration > Permissions > Single Sign On in the Admin Console.
- Click Edit for the ext client to use OpenID Connect for the storefront. Enter your website URLs in the Redirect Uris (comma separated list of redirect URIs). These have to use the path
/identity/externalcallback, such ashttps://www.b2bcommercesite1.com/identity/externalcallback,https://www.b2bcommercesite2.com/identity/externalcallback, and so on. Click Save. - Click Edit for the isc_admin_ext client to use OpenID Connect for the Admin Console. Enter your website URLs in the Redirect Uris (comma separated list of redirect URIs). These have to use the path
/identity/adminexternalcallback, such ashttps://www.b2bcommercesite1.com/identity/adminexternalcallback,https://www.b2bcommercesite2.com/identity/adminexternalcallback, and so on. Click Save.
Enable the Use Authorization Code Flow setting
This global setting is only available to ISC_System and ISC_Implementer and is hidden unless Allow Sign in With OpenId Connect is toggled to Yes.
- Go to Administration > Settings > Site Configurations > Openid Connect SSO in the Admin Console.
- Toggle Use the Authorization Code Flow instead of the Hybrid Flow to Yes if your OpenId Connect provider does not support the Hybrid Flow (AWS Cognito).
Additional extension points
Settings
There are now settings for Scopes and ResponseTypes that have default values of openid profile email for Scopes and code id_token for ResponseTypes. You can change these values if you need to for your IDP.
Plugins
NoteThese extension points are not available in net8.0+.
- Implement
IInjectOidcFactoryStartupwhich passes you theIdentityServerServiceFactoryto make any changes or additional configurations. - Implement
IInjectOidcSecurityTokenValidatedto inject logic into the Security Token Validated event.
Updated about 1 month ago