Upgrade Configured Commerce
Describes how to upgrade Optimizely Configured Commerce.
Ensure the upstream branch is set
You must have the InsiteSoftware/insite-commerce-cloud repository as a remote branch to pull upgraded base code into your local repository.
To find the repository, entergit remote get-url upstream.

If you do not see it, add it with git remote add upstream https://github.com/InsiteSoftware/insite-commerce-cloud.git.
Update local sandbox
You should always work with the latest sandbox version, and the production branch should always mirror what is currently deployed to the live site. You can use selective merging when testing a specific Optimizely Configured Commerce version.
Git fetch retrieves all of the commits in the upstream repository. This does not change local repository files, but it does make them available to the developer. Git pull is a combination of a fetch and merge to current version.
For example, retrieve the latest versions and update the local repository:
git checkout Sandboxgit fetch upstream --tagsgit merge 4.3.2.12345
Add or update files
- Open git bash or command line
git checkout sandbox- Make any changes to the projects
When you make changes within your Extensions project, there is one extra step you must take after building your project and solution: the Extensions.dll file that is produced from the build must be placed inside the /dist directory found in your local copy of B2B Commerce. This is the directory that will be searched in order to find server-side extensions. The Extensions.dll file will be deployed to your sandbox environment by an internal Optimizely process. A PowerShell script is included in the /dist directory that builds your Extensions project in Release mode and copies the Extensions.dll to the appropriate place for deployment. You can have Visual Studio execute the PowerShell script automatically with a build script. Copy the following script and add it to the Post-build event field in the project properties.
powershell.exe -command "& { $(SolutionDir)..\dist\buildExtensions.ps1 }"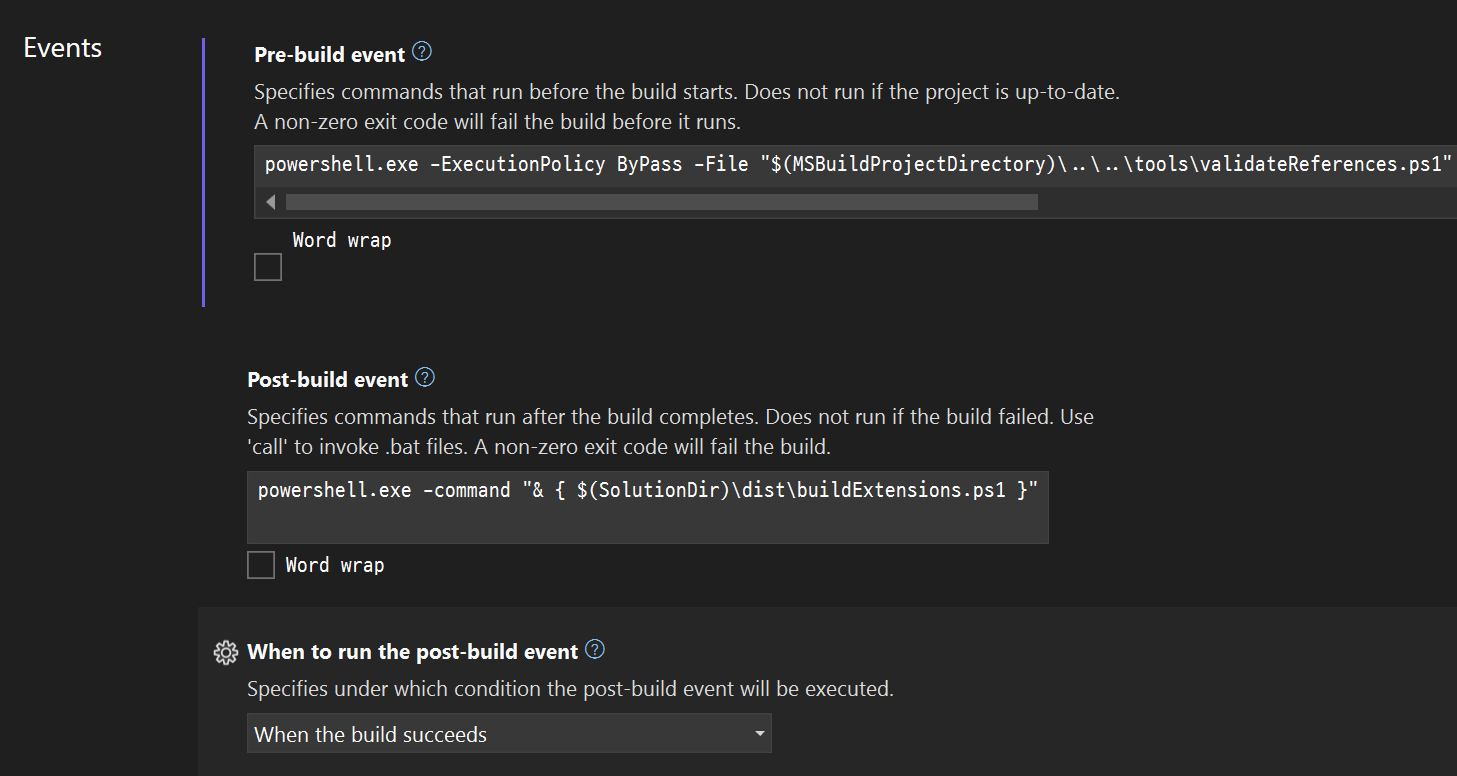
Once saved, the following lines should appear in the Extensions.csproj file:

Upon building the solution, the Visual Studio Output window should show an indication that the buildExtensions.ps1 file has been run.
Add files to Sandbox branch
Add all changed files to the sandbox branch, then commit all sandbox branch changes to the local git repository.
git add -allgit commit -m "First commit"
Push the Sandbox branch to Commerce Cloud
The process to push changes to sandbox is the same for production, except the changes are not automatically applied in production. If a branch does not exist on the remote repository, then it is created when you execute the git push command.
- Open git bash or command line
git checkout sandboxgit push -u origin sandbox
Configure the website to use the theme
In the Commerce Cloud Admin Console, edit the website to use the newly configured theme.
- Log in to
[projectidentifier].insitesandbox.com/admin. - Go to Websites > Edit .
- Click the Theme drop down and select the desired theme.
The site is now live. Go to [projectidentifier].insitesandbox.com and review the website.