Start a Spire project
Describes how to start a Spire project.
Getting started with a Spire project is very similar to beginning an Optimizely Configured Commerce project with Classic CMS, with a few changes. See Understanding the development architecture for a front-end architecture diagram of Spire CMS.
All development work is the responsibility of the Implementation Team. As a result, implementation teams need to initiate the request to provision Configured Commerce environments in the cloud for Optimizely customers. This document outlines the process, environments, and resources involved to ensure a smooth transition for implementation teams and Optimizely customers.
Configure
Configured Commerce needs multiple data points to initiate a project. See Build service v2 for information. Optimizely uses Git source control and infrastructure tools to deploy Configured Commerce websites to the cloud environment.
ImportantBe sure to review the
README.mdfile when you complete your developer setup. You must add/contentadminto the end of your site URL to access the Spire CMS.
Front end setup (/FrontEnd)
- Install node/npm
- Run
npm installfrom /FrontEnd.
Follow the instructions below for use with Visual Studio Code and Rider/WebStorm.
Visual Studio code
- Open the /FrontEnd directory. A launch configuration is already present so no additional steps are required to start the application.
- (Recommended) Install the ESLint extension from Microsoft to see ESLint errors in the editor.
Rider/WebStorm
- make sure to enable tslint settings - languages & frames - typescript - tslint - pick proper tslint.json file
- turn on recompile on changes to see ts errors in rider
- a number of launch configurations are already present
Launch Spire
- Run
npm run startfrom /FrontEnd. This launches Spire with the default blueprint and port. Note: This step is already setup in Visual Studio Code and Rider as a launch configuration. - Go to
http://localhost:3000.
By default, API requests are forwarded to http://commerce.local.com. You can change this URL in the /FrontEnd/config/settings.js file.
Launch Spire with a custom blueprint
In addition to launching Spire with the base blueprint, you can create a custom blueprint and launch spire using that blueprint. The steps to do that are below:
- Create new blueprints in Spire.
- Run
npm run start \{customBlueprintName}from /FrontEnd. - Go to
http://localhost:3000.
You can also create a launch configuration in Visual Studio Code or Rider to launch spire using the custom blueprint.
Site generation
The pages for a site will automatically generate the first time a request is made to the server, if there are no pages present. You can force the regeneration of the site by running the following SQL statement in your Configured Commerce database:
````
```sql
DELETE FROM content.Node
```
````
Then load the site again.
Project initiation form
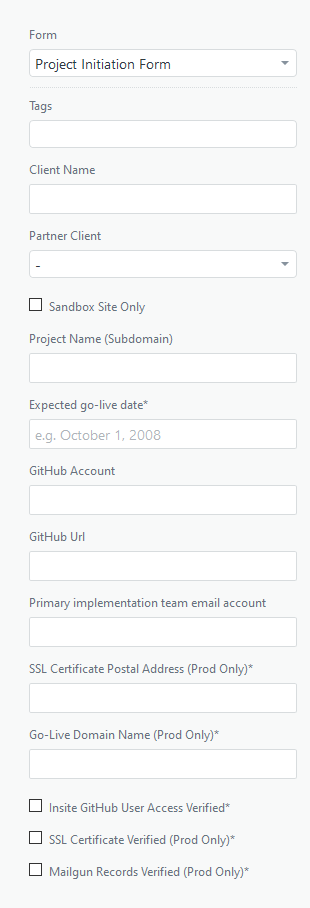
The following online form is used to capture the important data-points needed to provision the Configured Commerce in the Cloud environment.

To submit the project initiation form, follow the same process you would to submit a ticket and select the Project Initiation Form from the Form drop-down list. Populate the fields that appear. If you want your site to have access to Spire, you will need to indicate this in the CMS Type field. You may select both Spire CMS and Classic CMS if necessary.
Upgrade base code
After you have wired up your Extensions repo to your Spire environment, you can update the base code version yourself by updating the versionInfo.yaml file in your Extensions repo. Note that versionInfo.yaml is only used in a containerized environment and its not just for Spire. Non containerized environments will require a ticket to upgrade the base code version.
Deployment and environments
Optimizely provisions and maintain two hosting environments: sandbox and production.
Code pushed to the sandbox and production branches are picked up by Optimizely's CI, which builds the extensions, Classic themes, and Spire blueprints. Deployment for sandbox environments is automatic. You must request deployment for production environments.
Deployment for sandbox environments is automatic or can be manually triggered within Mission Control. You must request production deployments from the Optimizely support team or manually trigger them within Mission Control. To learn more about Mission Control and the other self-service activities available to partners and customers, see Mission Control overview.
Updated 5 months ago
