Set up Microsoft Entra ID SSO
Describes how to set up Microsoft Entra ID Active Directory Federation Services (ADFS) Single Sign-On (SSO) for the Admin Console and the storefront.
Create an application registration in Microsoft Entra ID
-
Go to Entra ID Active Directory in the Entra ID portal.
-
Select App registrationsunder Manage in the Microsoft Entra ID portal.
-
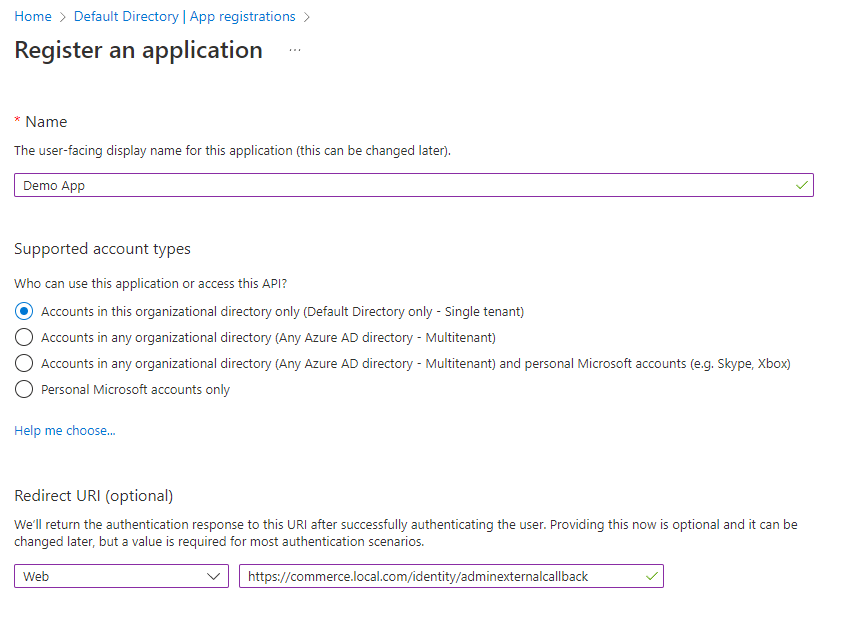
Click New registration to register a new application.
-
Enter a display Name for your application.
-
Specify who can use the application, sometimes called the sign-in audience.
-
Click Register.
-
Click Add an Application ID URI for the application.
-
Click Set next to Application ID URI. Copy the default value, which will be used later.
-
Click Save.
-
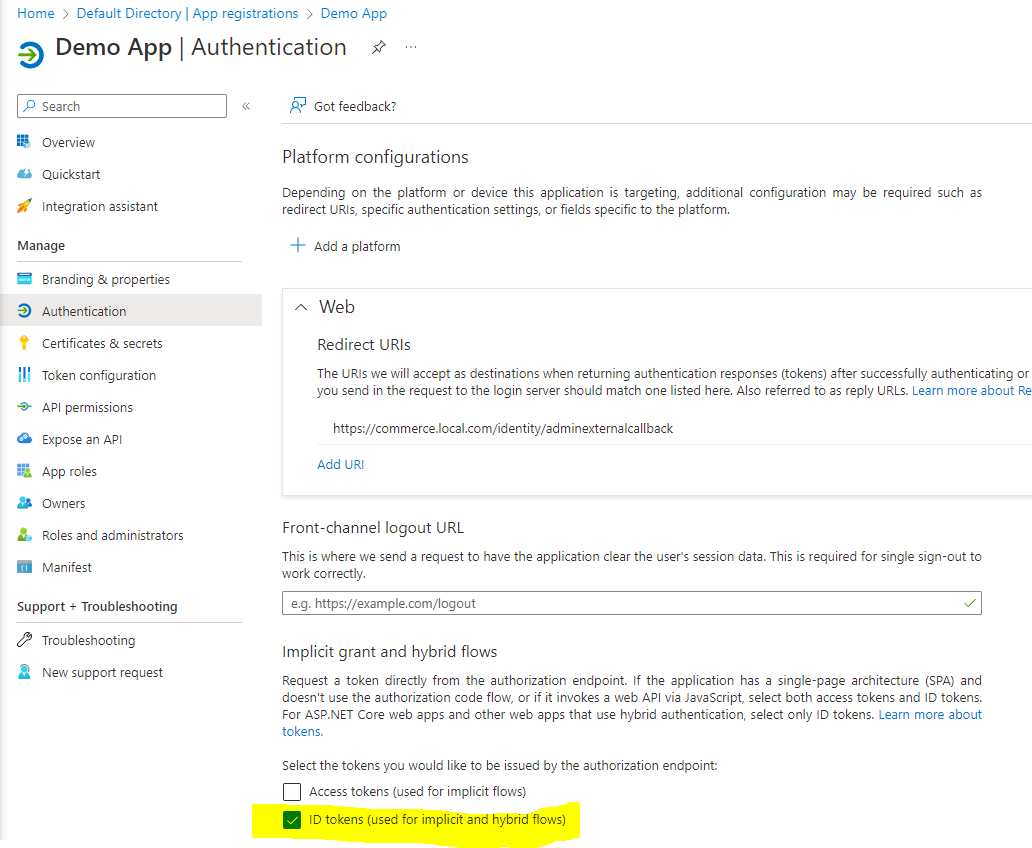
Click Add a Redirect URI for the application.
-
Ensure ID tokens is selected.
-
Select the platform for your app. For example, enter
https://www.b2bcommercesite/identity/externalcallbackif used for the storefront orhttps://www.b2bcommercesite/identity/adminexternalcallbackif used for the admin console (where www.b2bcommercesite is your url) for the Redirect URI, and click Configure. -
Return to the Overview page for your app and note the Directory (tenant) ID for tenant-specific endpoints. For tenant-independent endpoints, use the FEDERATION METADATA DOCUMENT endpoint value in this article.
Next, enable SSO using Windows settings for Entra ID or OpenId Connect.
Enable Windows SSO
-
Go to Administration > System > Settings in the Admin Console.
-
Search for Allow Sign in With Windows Account. (You may also navigate to Site Configurations > Windows SSO from Settings.)
-
Set the Allow Sign in With Windows Account toggle to YES. If Yes, a Windows button will appear on the sign in page. Default value: No.
-
Set the Use Windows Sign In on Storefront toggle to YES, if you want to enable this. If Yes, a Windows button will appear on the storefront sign in page. Default value: No. If this setting is enabled, the following fields will be available:
- Storefront Caption – This is the caption to show on the Windows button. Default value: Windows.
- Storefront Application ID URI – This is the globally unique URI used to identify this web API. Also referred as an identifier URI, it works as the prefix for scopes and in access tokens as well as the value of the audience claim. Paste the text copied from the Application ID URI from step 8 above into this field. The default is blank.
- Storefront Windows Metadata URL – This is the address used to retrieve WsFederation metadata. The default is blank.
-
Set the Use Windows Sign In on Admin Console to YES, if you want to enable this. If Yes, a Windows button will appear on the Admin Console sign in page. Default value: Yes. If this setting is enabled, the following fields will be available:
-
Admin Console Caption – This is the caption to show on the Windows button. Default value: Windows.
-
Admin Console Application ID URI – This is the globally unique URI used to identify this web API. Also referred to as an identifier URI, it works as the prefix for scopes and access tokens as well as for the value of the audience claim. Paste the text copied from the Application ID URI from step 8 above into this field. The default is blank.
ImportantMicrosoft Entra ID SSO requires the use of verified URLs. When using a verified URL, the value for the Admin Console Application ID URI follows the format
https://www.verifiedURL.com/identity. Otherwise, you can use the formatapi://{appId}(found in the Entra ID Portal) instead. -
Admin Console Windows Metadata URL – This is the address used to retrieve WsFederation metadata. The default is blank. Under endpoints in Entra ID this would be the Federation metadata document.
.png")
-
-
Click Save.
NoteIf you plan on using SSO for the Admin Console and you do not wish to automatically assign any permissions, you should update the Assign A/C User Role with SSO setting to NO under Administration > System > Settings > System Settings > Security. New Admin Console users will then require an existing user to set their roles up manually. Default value: Yes.

Configure the SSO Clients
NoteThis step is not required in net8.0+
-
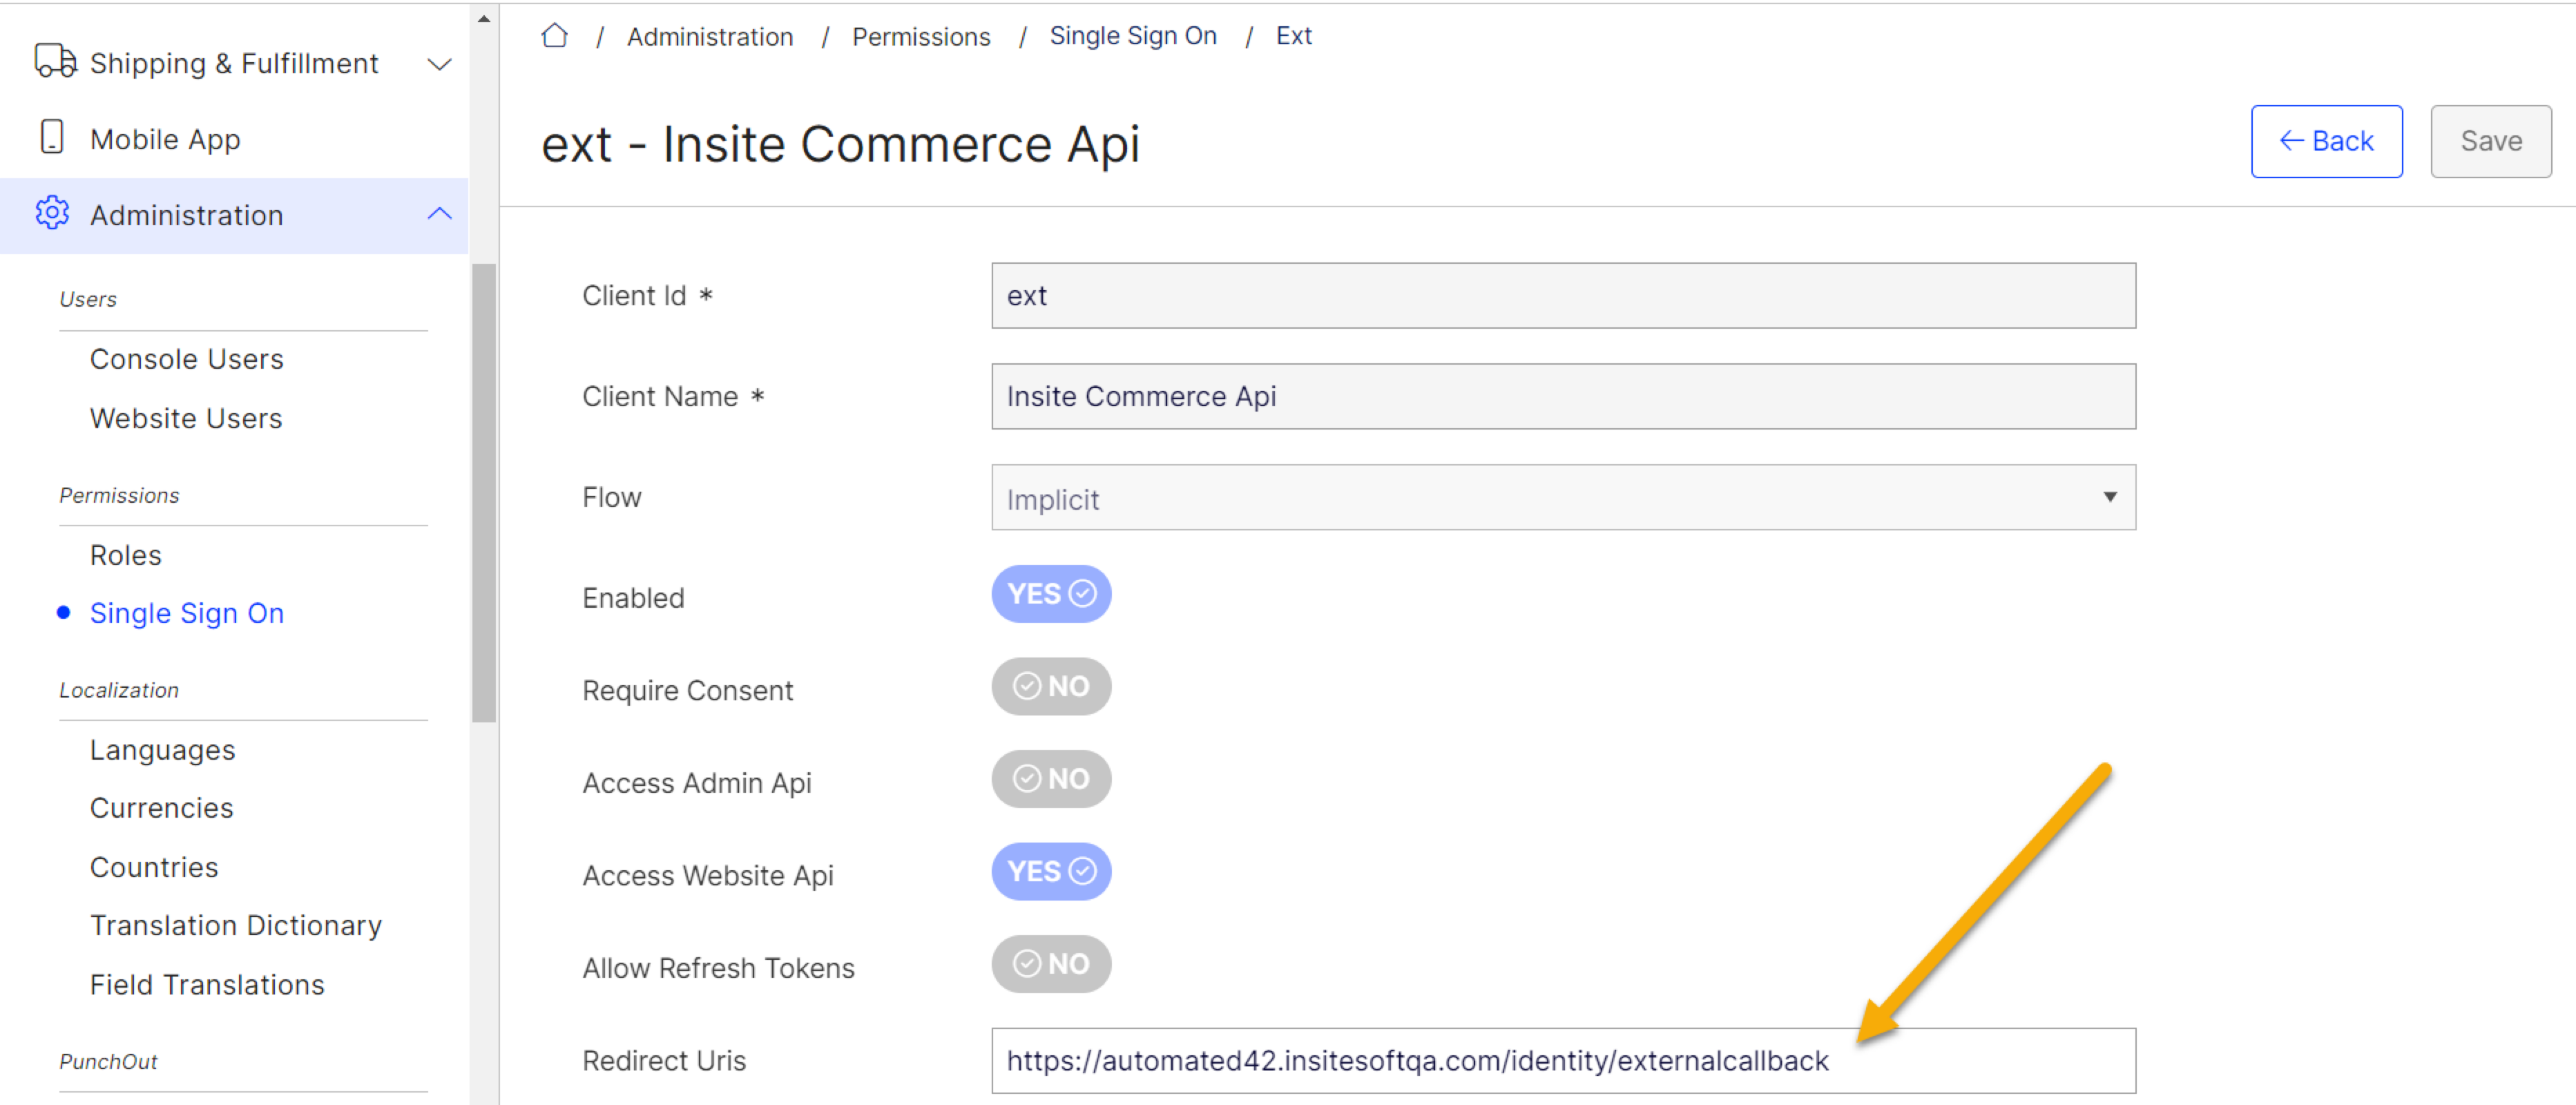
Go to Administration > Permissions> Single Sign On in the Admin Console.
-
If you want to use Windows for the storefront, click Edit for the ext client.
- Enter your website URLs in the Redirect Uris (comma separated list of redirect URIs). These have to use the path
/identity/externalcallback, such ashttps://www.b2bcommercesite1.com/identity/externalcallback. - Click Save.
- Enter your website URLs in the Redirect Uris (comma separated list of redirect URIs). These have to use the path
-
If you want to use Windows for the Admin Console, click Edit for the
isc\_admin\_extclient.- Enter your website URLs in the Redirect URIs (only one URI is supported). These have to use the path
/identity/adminexternalcallback, such ashttps://www.b2bcommercesite1.com/identity/adminexternalcallback. - Click Save.
- Enter your website URLs in the Redirect URIs (only one URI is supported). These have to use the path
CautionAny SSO settings changes require a restart to be applied.