
Manage categories
Classify content in Optimizely CMS (SaaS) with categories to power filtering, search, and navigation, and filter content by category in Content Manager.
Taxonomy in Optimizely Content Management System (CMS) (SaaS) provides a structured system for organizing content. A taxonomy consists of terms that classify and categorize content. CMS (SaaS) supports hierarchical terms called Categories. Categories support parent-child relationships with multiple nesting levels, which enables taxonomic organization, browsable navigation paths, and logical grouping of related content.
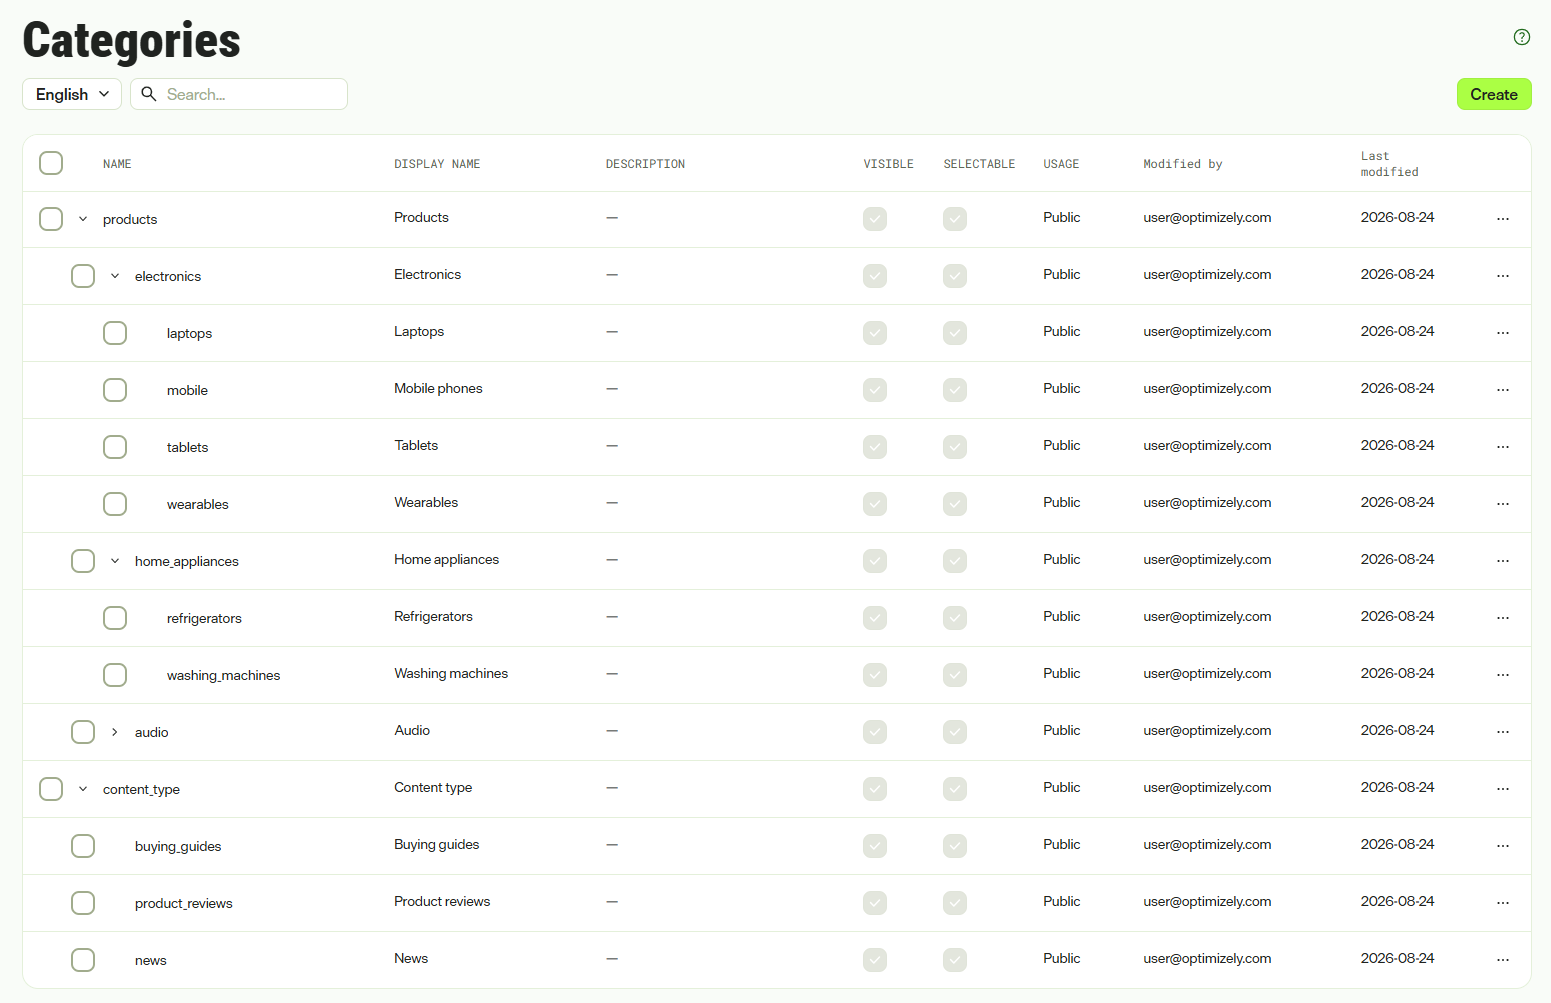
Category benefits
Categories provide the following benefits:
- Structured organization – Create multi-level hierarchies that reflect your content taxonomy, making it easier to organize large volumes of content according to business logic.
- Enhanced discoverability – Let users find content through category-based filtering, hierarchical navigation, and search in Content Manager.
- Flexible classification – Support both broad parent categories and specific leaf categories so that you can classify content at the appropriate level of granularity.
- Graph integration – Category terms are indexed in Optimizely Graph, which enables content queries in headless scenarios.
- Scalability – As your content library grows, categories provide consistent classification patterns that scale with your needs.
When to use categories
Use categories in the following scenarios:
- Content taxonomy – Organize content according to a predefined taxonomy structure (for example, Sport > Running > Training Plans).
- Departmental structure – Map organization structure to content ownership and reflect this in content classification.
- Hierarchical navigation – Provide users with browsable navigation paths through related content.
- Multi-level classification – Classify content at different granularity levels, with high-level categories and detailed subcategories.
Create a category
-
Go to Settings > Categories.
-
Choose whether you want to create a standalone, parent, or child category:
-
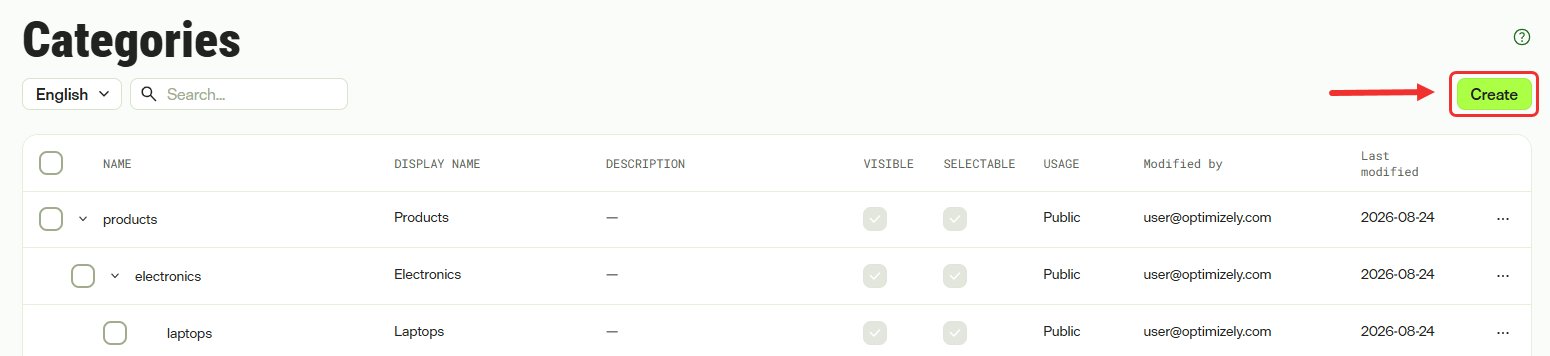
Standalone or Parent category – Click Create to create a top-level category with no parent.
-
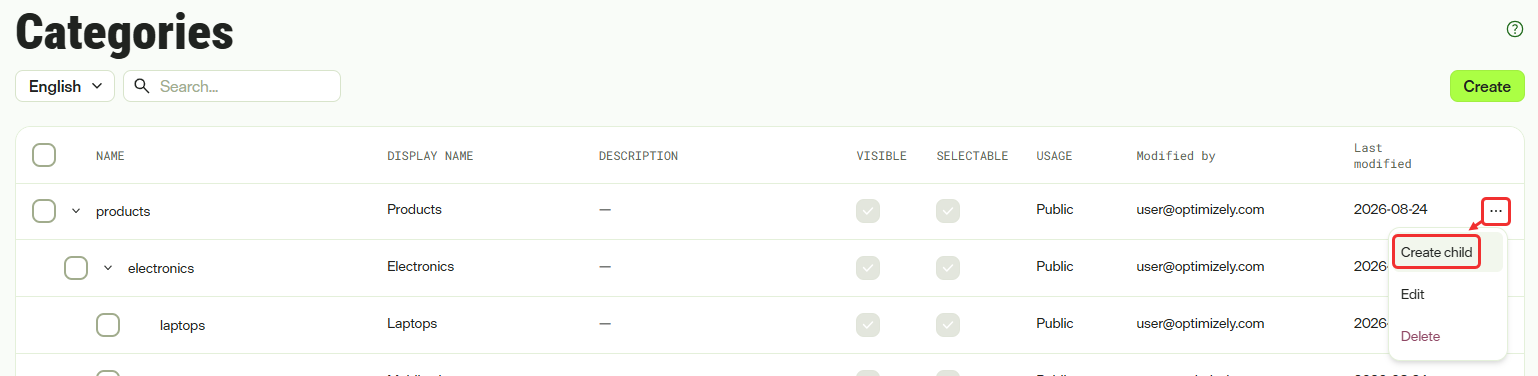
Child category – Select More > Create child on an existing category to create a subcategory.
-
-
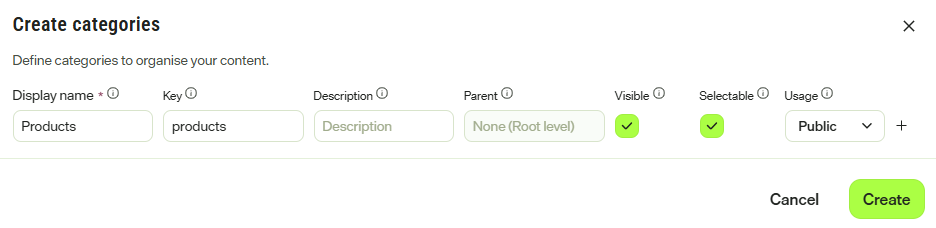
Enter the following information:
- Display name – A human-readable label shown in the UI. Localizable. Required. Maximum 255 characters.
- Key – A unique identifier for the category used in APIs and code. Required. Maximum 100 characters.
- Description – (Optional) An explanation of the category's purpose or usage. Localizable. Maximum 500 characters.
- Parent – Displays the parent category, populated automatically based on where you started the create action. Read-only.
- Visible – Controls whether the category displays in category selection UI.
- Selectable – Controls whether CMS users can assign this category to content.
- Usage – Metadata that indicates the intended scope of the category. Select Public for general use or Internal for internal classification. This is guidance for developers. Both Public and Internal categories are indexed to Optimizely Graph and available in queries.
-
(Optional) Click the plus (+) icon to continue creating categories at the same level (parent or child).
-
Click Create.
NoteAfter you create categories, see Categorize content to assign categories to a content item.
Visible and Selectable flags
The Visible and Selectable flags control category behavior in different contexts:
- Visible – Determines whether the category displays in category selection dialog boxes and UI components.
- Selectable – Determines whether CMS users can assign the category directly to content items.
These flags apply to individual categories and do not cascade to child categories. Configure each category according to its purpose. Consider these common patterns:
- Active categories – Select both Visible and Selectable for categories that users should see and assign.
- Deprecated categories – Clear both Visible and Selectable to hide a category without deleting it.
- Historic categories – Select Visible and clear Selectable to show a category in the UI without allowing users to assign it to content. For example, when a category is no longer in active use but needs to remain visible for organizational purposes, like a marketing campaign that is no longer actively running.
Usage field
The Usage field is metadata that indicates how you intend to use a category:
- Public – Categories intended for public-facing use cases, such as website navigation and public content organization.
- Internal – Categories intended for internal classification, such as workflow states, internal department codes, and editorial notes.
The Usage field does not restrict access or indexing. Categories marked as Internal are still indexed to Optimizely Graph, available in Graph queries, and assignable to content in CMS. Developers decide which categories to use in their implementations. For example, a project might be internal (admin) or public (website), and developers filter categories based on the Usage field according to their needs.
Edit a category
-
Go to Settings > Categories.
-
Select More > Edit on a single category.

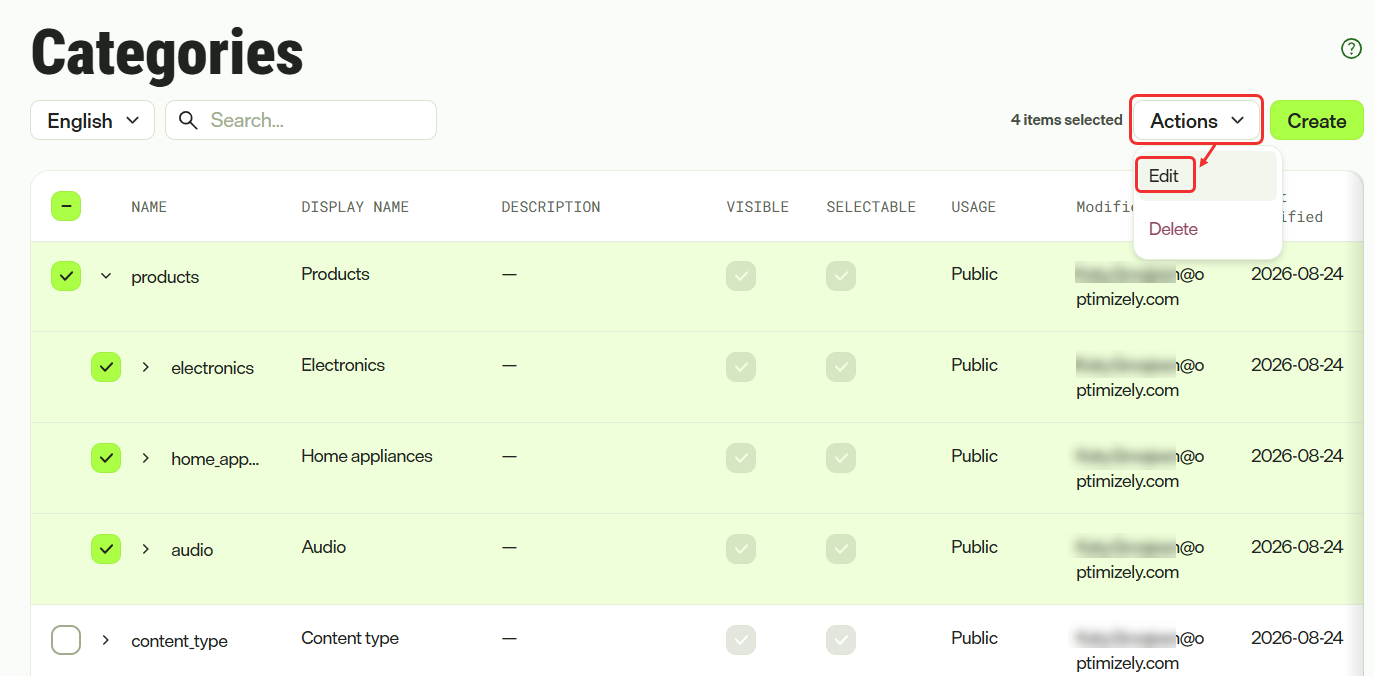
You can bulk edit categories by selecting the checkbox for each category that you want to edit, and then selecting Actions > Edit. Select the checkbox in the header row to select all categories on the page. Selecting a parent category automatically selects all child categories.
-
Make your desired category updates. The following fields are editable:
- Display name
- Description
- Visible
- Selectable
- Usage
-
Click Save.
Changes to a category affect how it displays in selection UI and filtering, but do not change content already tagged with the category.
Delete a category
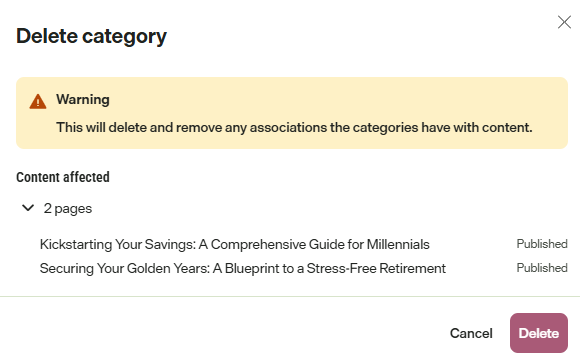
WarningDeleting a category removes it from the system along with its translations, and content tagged with the category loses that classification. To deprecate a category without losing historical associations, clear Visible and Selectable instead.
-
Go to Settings > Categories.
-
Select More > Delete on a single category.

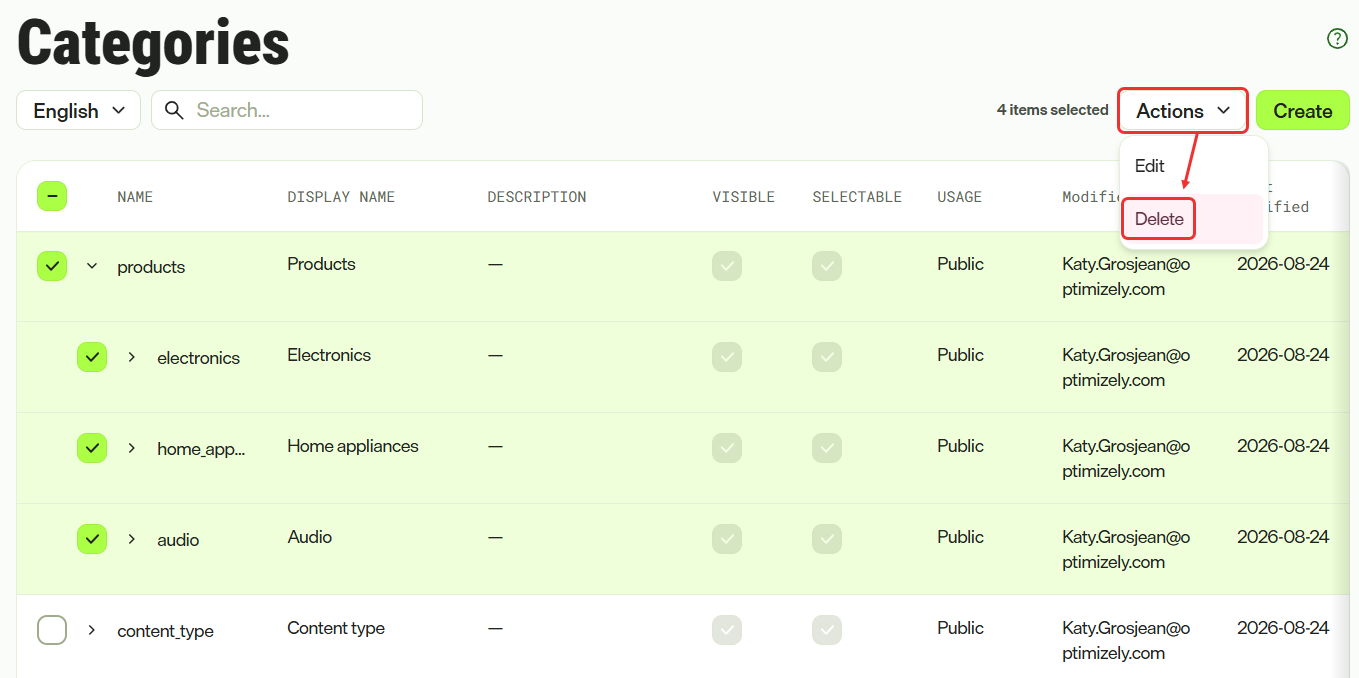
You can bulk delete categories by selecting the checkbox for each category that you want to delete, and then selecting Actions > Delete. Select the checkbox in the header row to select all categories on the page. Selecting a parent category automatically selects all child categories.
If the category is associated with any content, a warning displays where you can review the associated content before confirming or canceling the deletion.
-
Confirm the deletion.
Organize hierarchies
Categories support multi-level parent-child relationships, so you can build deep taxonomies that reflect your content structure.
NoteAfter you create a category, you cannot change its parent. To move a category to a different location in the hierarchy, delete the category and create a new one with the desired parent.
Best practices for hierarchies
Follow these best practices:
- Logical grouping – Organize categories in a way that reflects how users think about and search for content.
- Appropriate depth – Avoid hierarchies deeper than three or four levels, which can make navigation cumbersome.
- Consistent granularity – Ensure categories at the same level represent similar levels of specificity.
Localize categories
Categories support localization so that you can provide translated display names and descriptions for different languages.
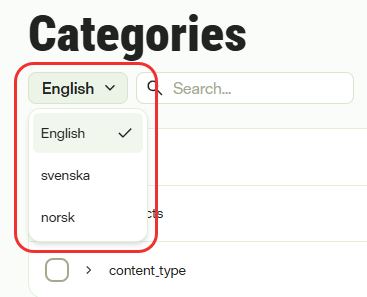
The languages enabled for CMS content determine which languages are available. To provide translations, follow these steps:
-
Go to Settings > Categories.
-
Select a language from the language drop-down list.
-
Select More > Edit on the desired category you want to edit. The edit form displays placeholder text showing the default language values (for example, "(en) Electronics").
-
Enter translated values in the Display name and Description fields for the current language.
-
Click Save.
The category Key remains constant across all languages because it serves as the technical identifier in APIs. Only Display name and Description are localized. Categories without translations in a language show an em dash (—) in the Display name column for that language, and the Key column shows the identifier value.
Updated 22 days ago