Integrate external content sources with CMS (SaaS)
Describes the steps to integrate and use external content sources, such as digital asset management (DAM) systems or e-commerce platforms, with Optimizely CMS (SaaS)
Optimizely Content Management System (SaaS) can use external content sources without duplicating or migrating the content, which dramatically reduces operational overhead. This topic describes how to integrate and manage external resources within the CMS (SaaS) environment. It covers connecting external content sources like DAM systems, PIMs, or other third-party applications, setting up mappings, and managing content types to enable seamless access to external content.
Part 1 – Configure a data sync
NoteBefore you begin, ensure that the external application (for example, Bynder, Shopify) is installed and configured within your Optimizely Connect Platform (OCP) instance. For details on installing apps, see App Directory Overview in OCP documentation.
Currently, all external applications are grouped under OCP App in the source selection. These may be later separated into individual source groups, such as Bynder or Shopify, for clearer identification.
To use external content in Optimizely CMS (SaaS), configure a data sync. This involves defining your external data source, setting Optimizely Graph as the destination, and mapping content types for seamless integration.
-
In Optimizely Connect Platform (OCP), go to Data Setup > App Directory to display the available integration apps.

-
Select the desired app, for example, Bynder.
-
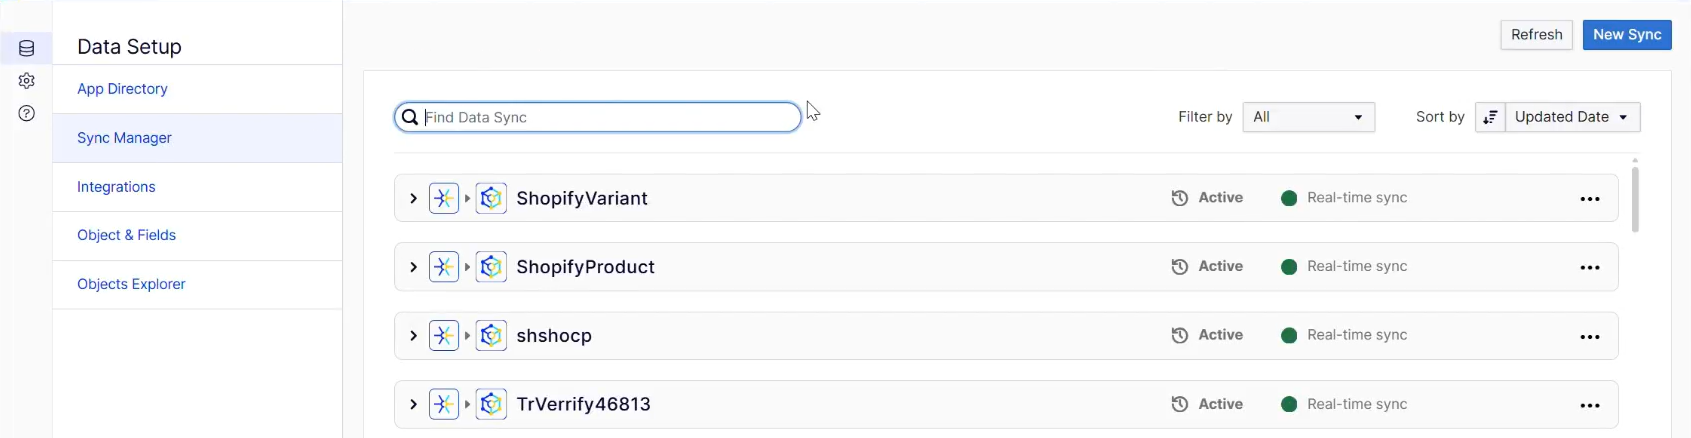
Select the Sync Manager window, which displays sources that are already connected.
-
Click New Sync.
-
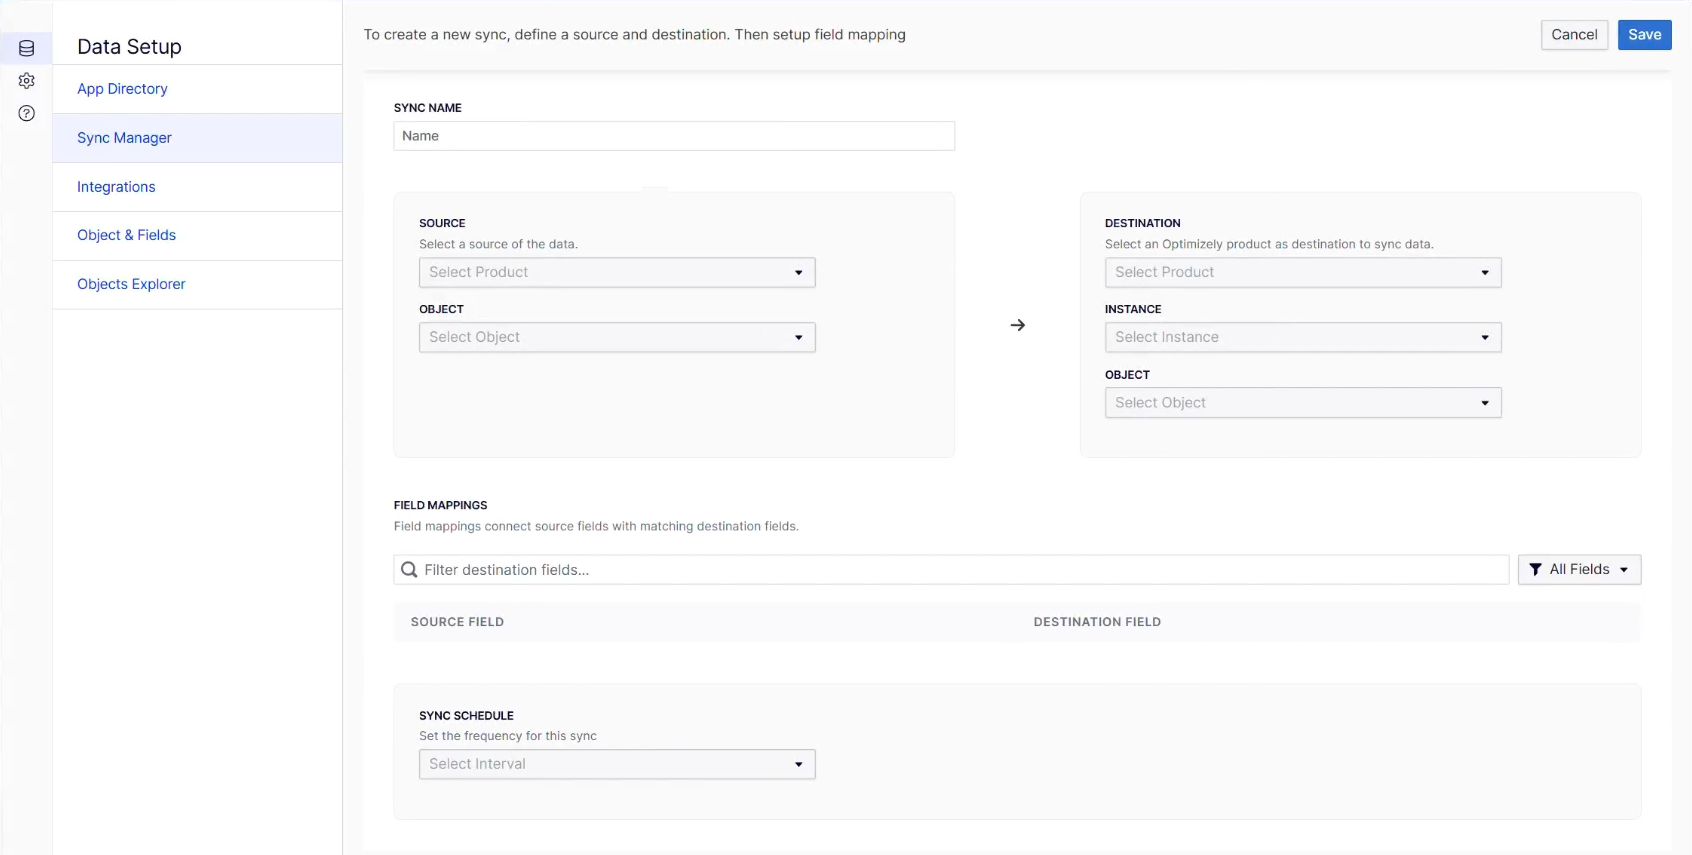
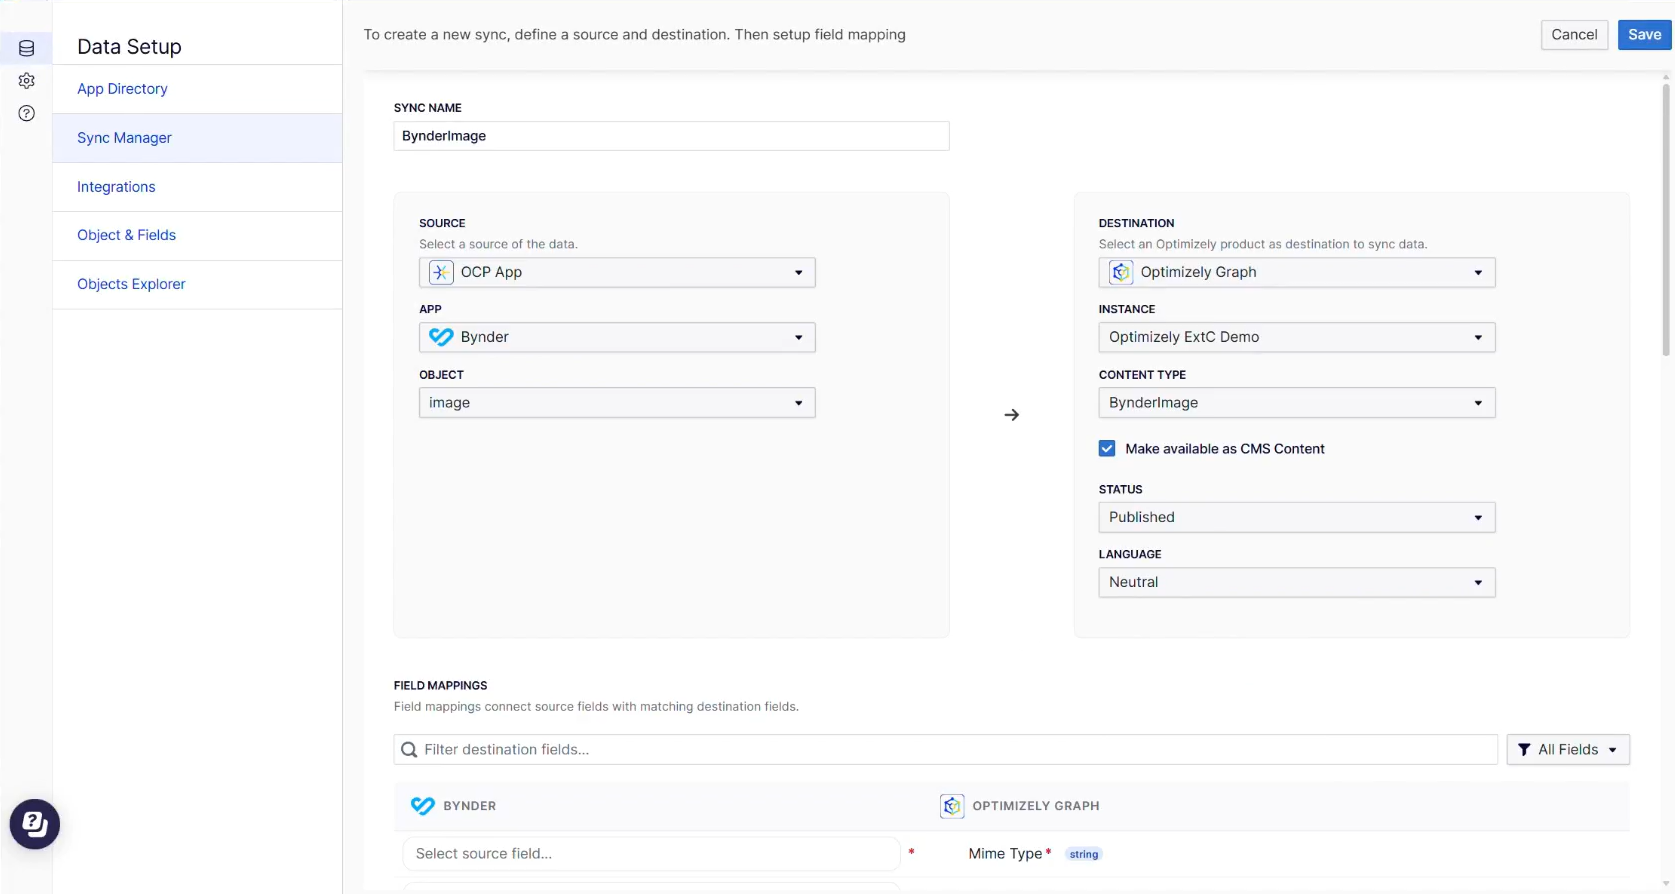
On the Create a new sync configuration page, define the following:
-
Sync Name – Enter a descriptive name for your sync in the Sync Name field (for example, BynderImage).
-
Source – Select a source of the data, for example, the OCP App.
-
App – Select the external application, for example, Bynder.
-
Object – Select the type of content you want to sync, for example, image.
-
Destination – Select the Optimizely product, for example, Optimizely Graph, as the destination to sync data with.
-
Instance – Select the instance, for example, Optimizely ExtC Demo.
-
Content Type – Select from any of your existing schemas in Optimizely Graph, or you can create a content type, for example, BynderImage. To create a content type, select Clone Source Schema from the dropdown and fill in the Add New Object window as shown in the following example. Click Apply. Once created, select your new content type (BynderImage) from the dropdown.

-
Make available in CMS content – Select this option to use synced content in CMS (SaaS).
-
Status – Select the content status you want. For example, select Published to ensure assets coming to CMS (SaaS) are published assets.
-
Language – Select the language as required, or Neutral.
-
-
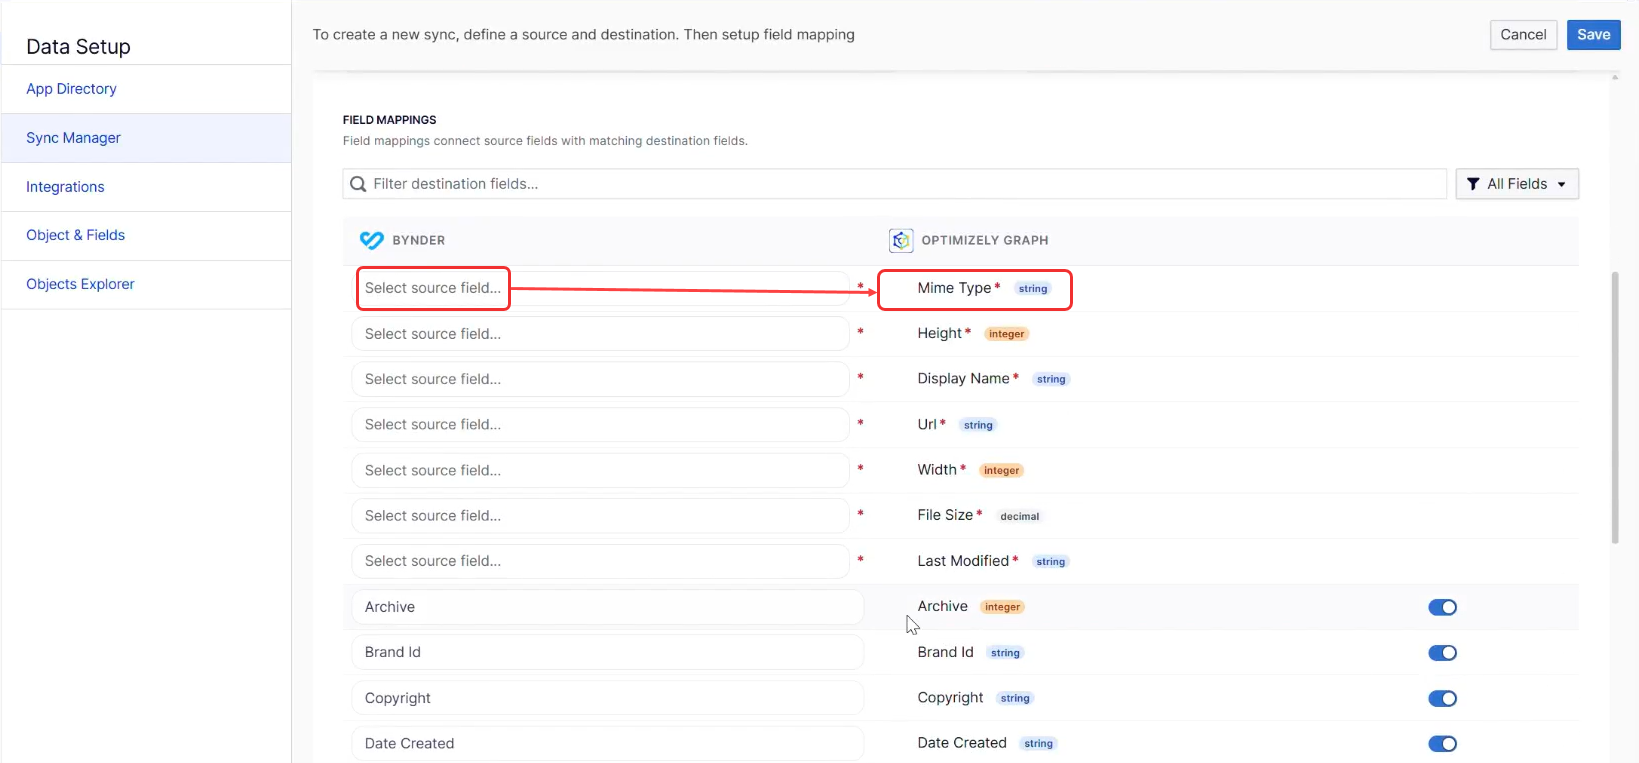
Scroll down to the Field Mappings section to connect source fields with matching destination fields. Fields that are indicated with a red asterisk are required. For example, click Select source field that corresponds to Optimizely Graph's Mime Type. The Select Source Field window displays.
-
Select the source field you want to map. For example, select the Bynder source field Type to map to Optimizely Graph's Mime Type.
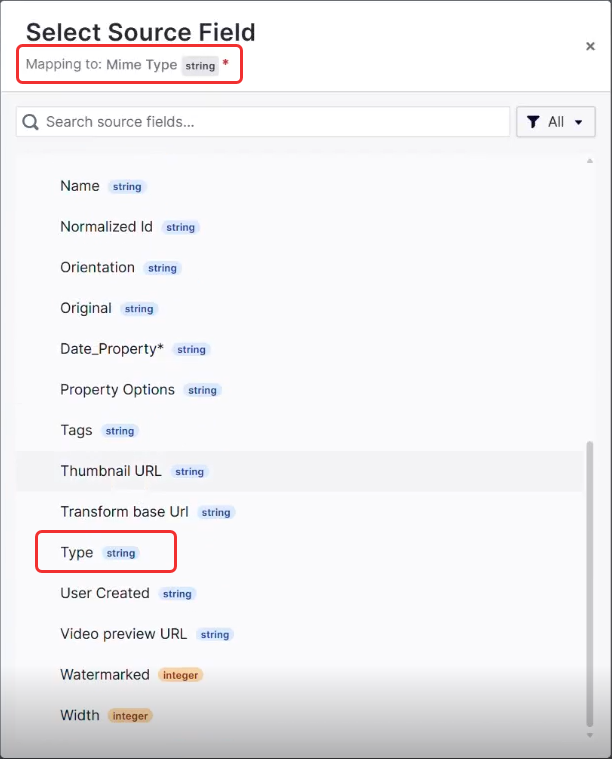
Continue selecting matching fields until all required fields are mapped.
-
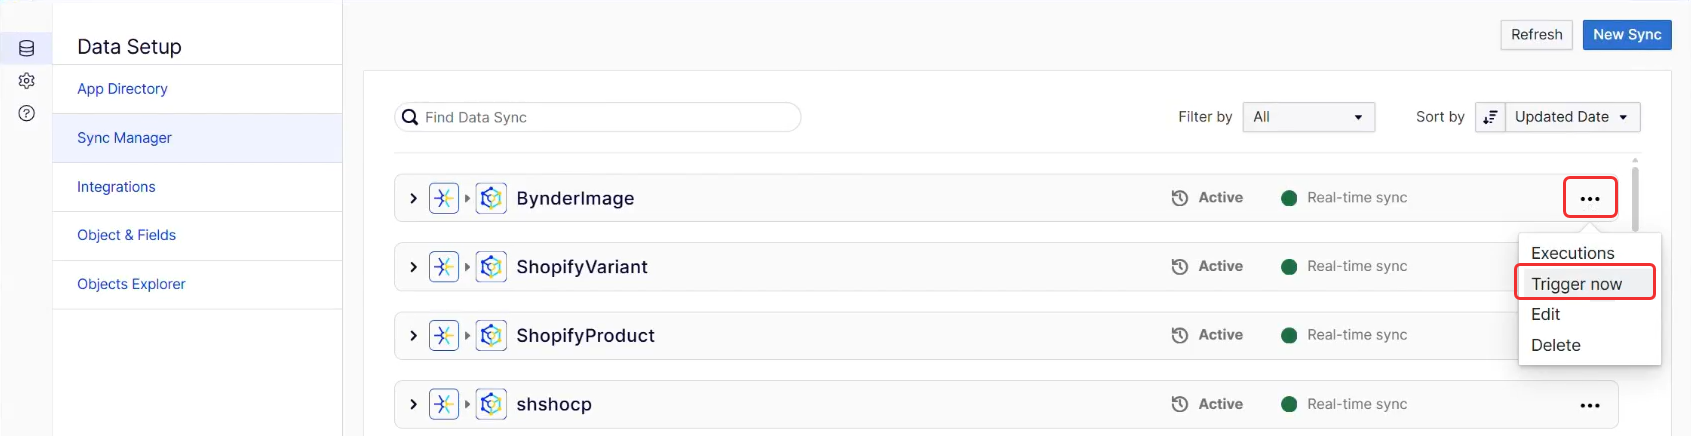
Click Save to create the sync, which displays as Active in the Sync Manager window.
NoteWhen the sync is created, everything that gets added, deleted, or modified in Bynder is automatically synced by OCP and made available in your CMS.
-
Select More (...) > Trigger Now to immediately trigger the initial data sync to make the assets from the source available to the CMS.
Part 2 – Use synced assets in CMS (SaaS)
Once your data sync is complete, you can immediately access and use individual synced assets, such as images, directly within your CMS. This is useful for scenarios where you need to select a single asset without requiring a full content type mapping to a CMS block.
After configuring your data sync, map the external content type to an existing CMS content type to ensure the synced content is usable. This mapping lets you integrate and display external assets directly within your CMS pages, for example, replacing images in a Teaser block.
-
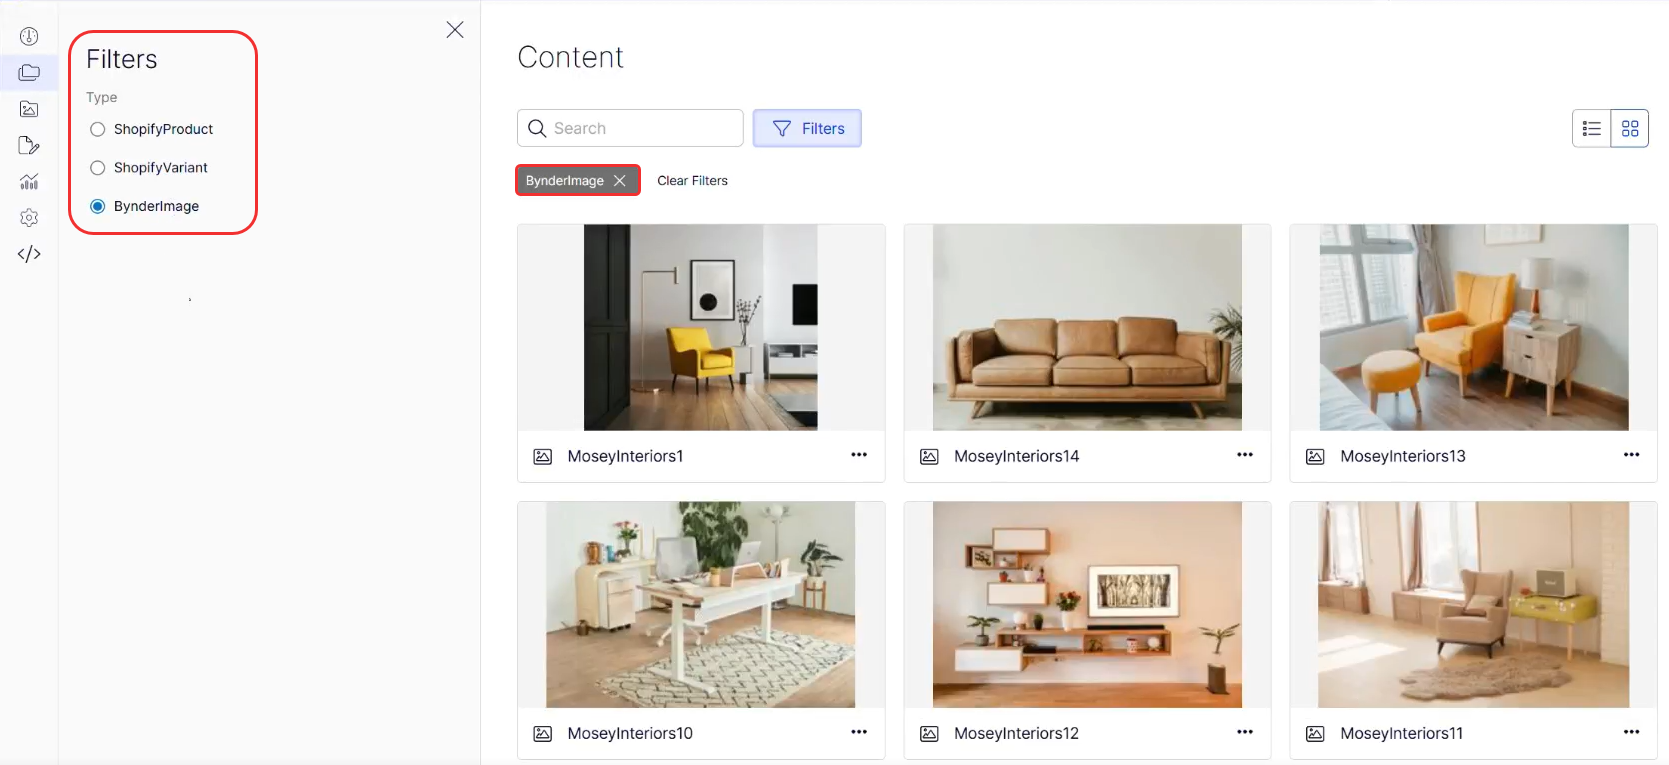
In Content Manager, select OCP. Content Manager displays only the content synced with OCP. You can select other content sources.
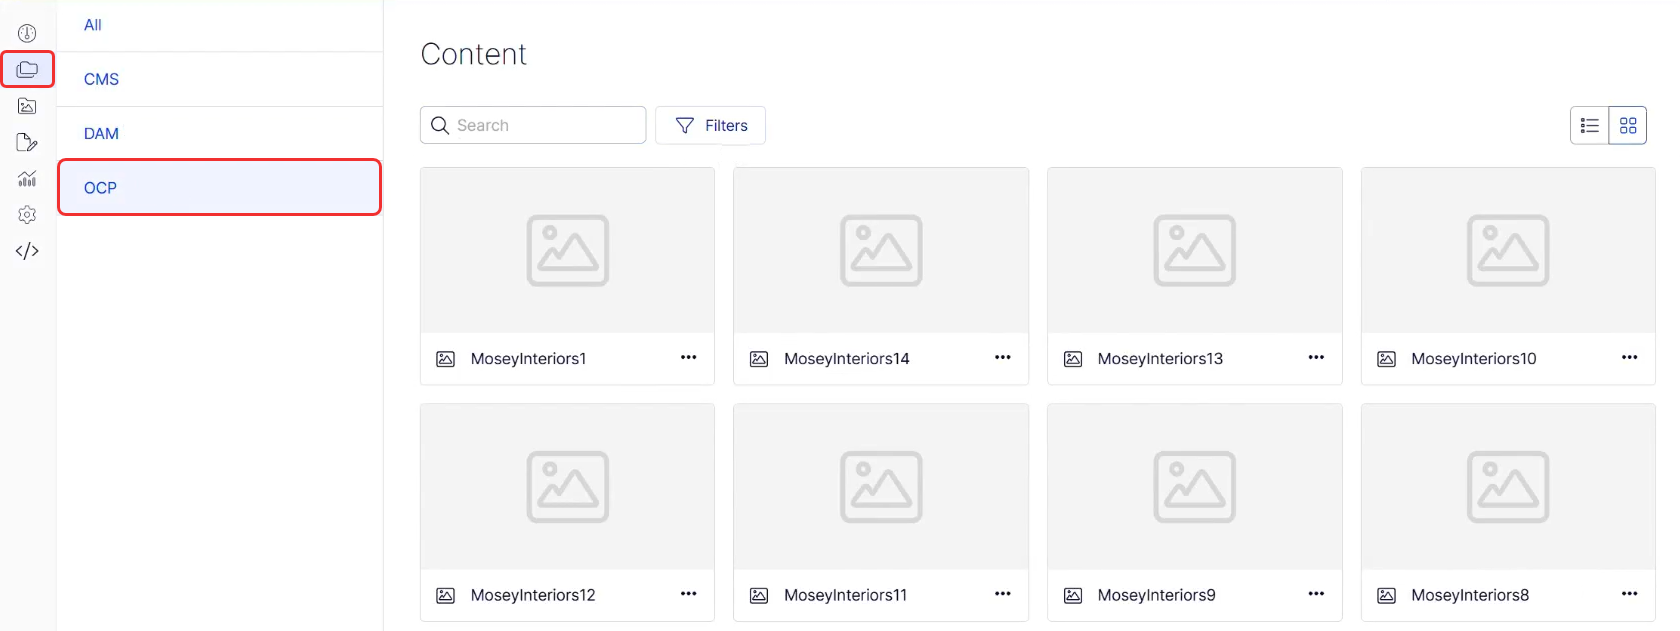
You can use filters to further refine the display. Clicking BynderImage displays the images synced between OCP and CMS (SaaS).
-
In the Visual Builder editor, the Teaser Block shows an image to replace with an image from your BynderImage content. Select More (...) > Replace.
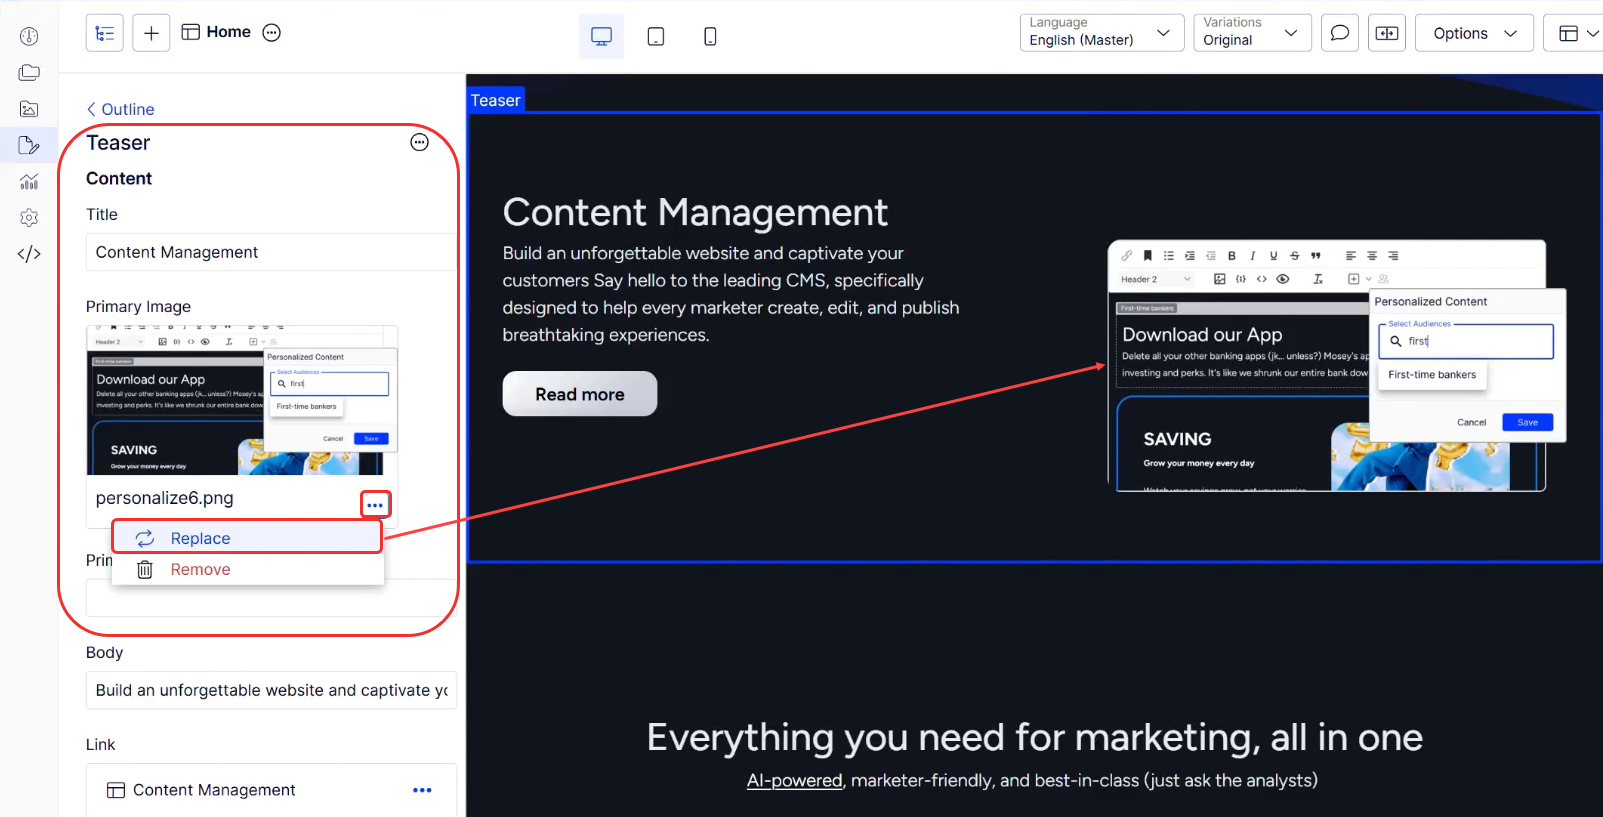
The Primary Image window displays.
-
Select the desired image. Details display in the right panel.
NoteWhen the image picker displays, you see images from all configured sources that match the image base type, including those from your DAM, CMS, and other integrated platforms.

-
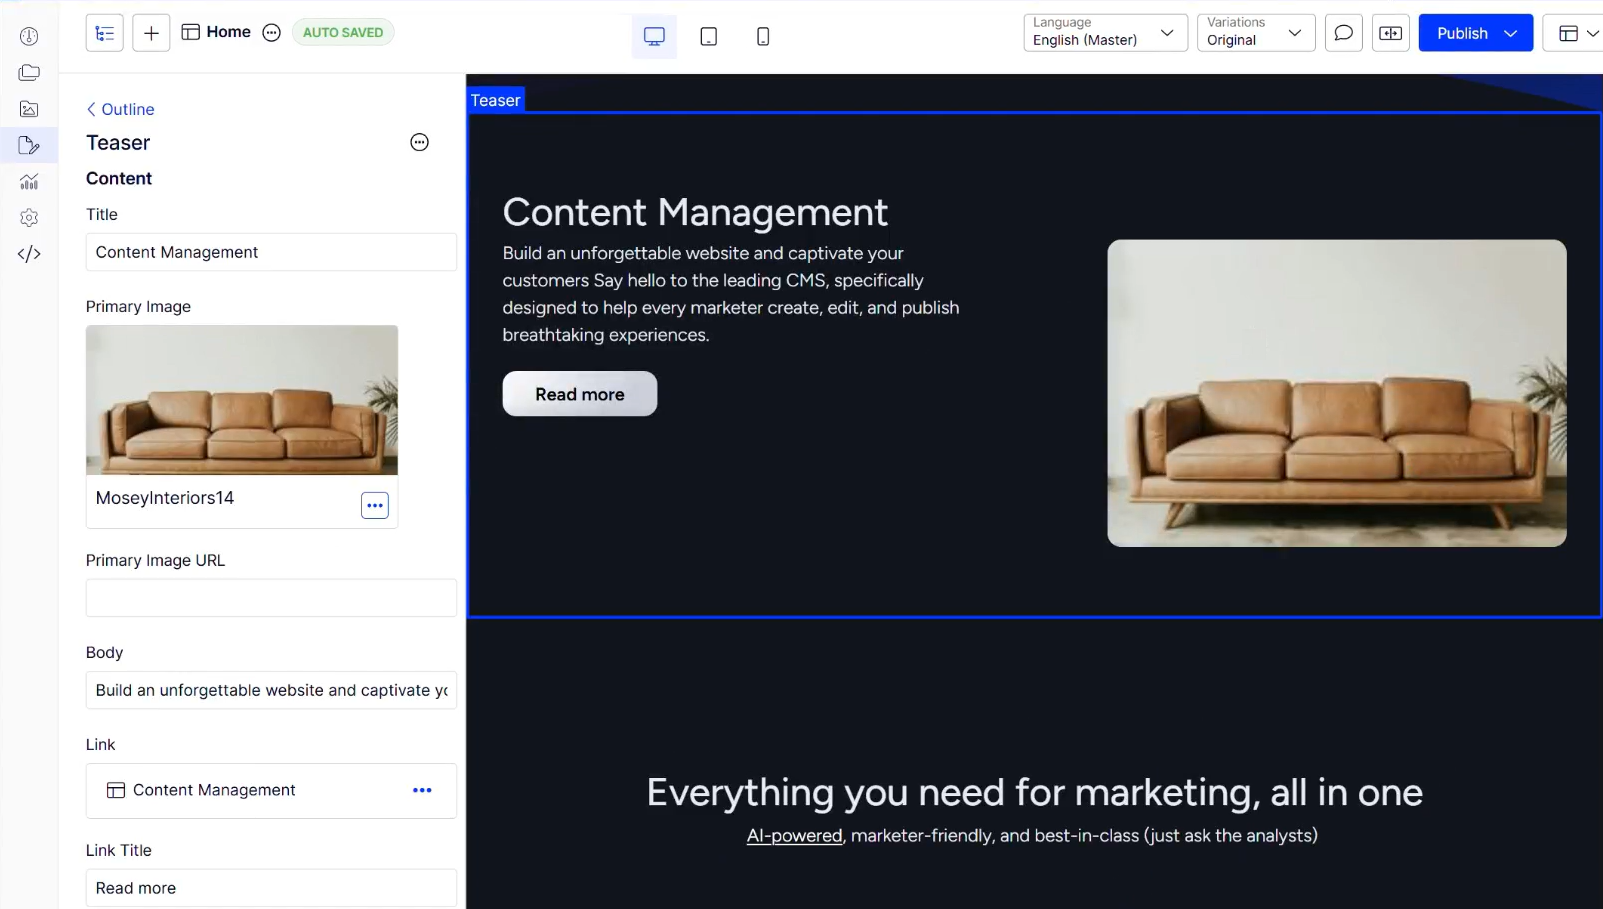
Click Select Image. Visual Builder replaces the image and displays it in the Teaser block.
Part 3 – Create content type mappings and map properties
After configuring your data sync, you must establish a content type mapping and then map individual properties. This two-step process links your external content type to a CMS content type and ensures that specific data points from your external source populate the corresponding fields within your CMS, making the synced content usable. Learn more about connecting content sources.
-
Go to Settings > Content Types and select the CMS content type to map, for example, the Teaser block.

-
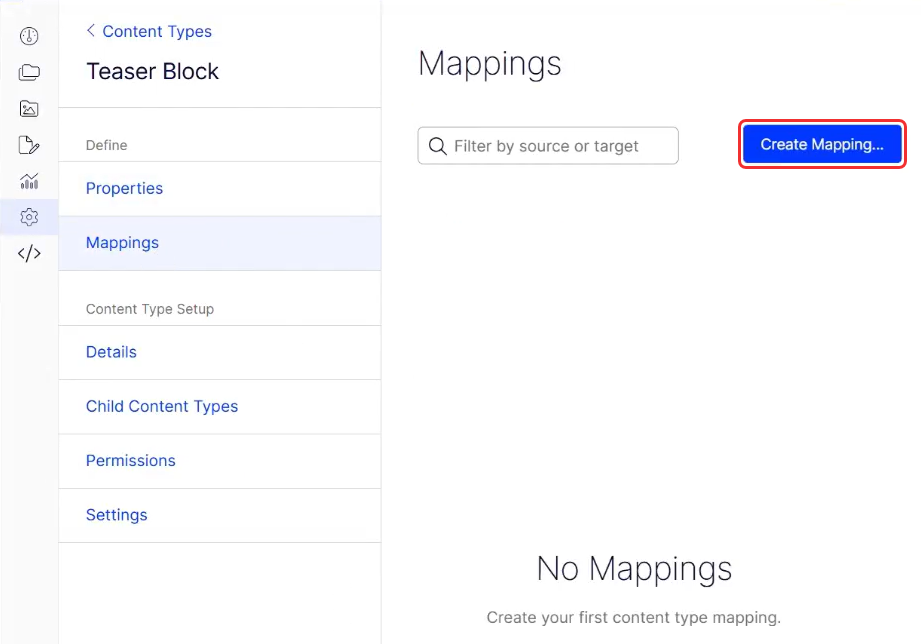
In the Teaser Block, select the Mappings tab.

-
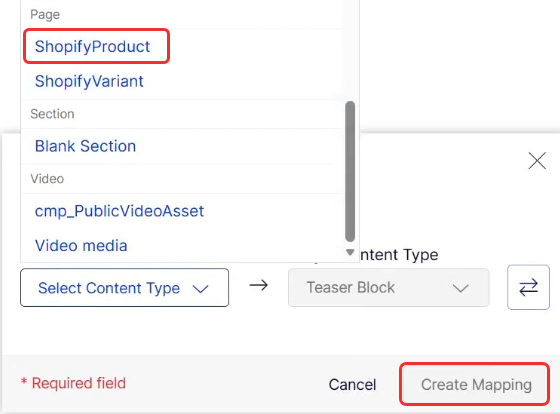
Click Create Mapping in the Mappings window.
-
Click the highlighted selector to ensure the Source Content Type is active and required.
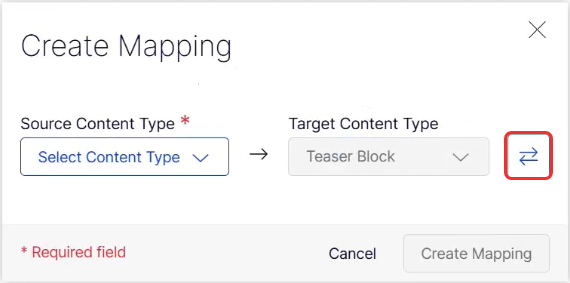
-
Source Content Type – Select the synced external content type, for example, ShopifyProduct.
-
Target Content Type – Select your CMS content type, for example, Teaser Block, which is selected by default.
-
-
Click Create Mapping. The Map Properties window displays the fields available for mapping.
-
The Map Properties window displays a list of target properties from your CMS content type (Teaser Block). It also displays properties without a match. For each Target property, select the corresponding Source Property from the external content type.
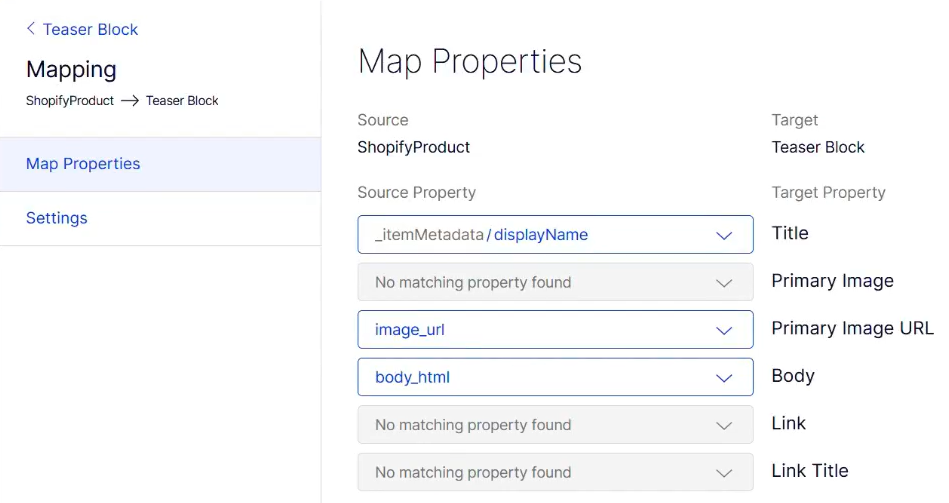
- Title – Select _itemMetadata / displayName.
- Primary Image URL – Select image_url.
- Body – Select body_html.
Part 4 – Use mapped content in CMS blocks
After configuring the data sync and mapping properties, you can use the synced content directly within your CMS pages. Add a content block that uses your mapped content type, and connect to the external content. The data from your external source will then automatically populate the block.
-
Go to a CMS page to use the synced content.
-
Add or select a content block that uses your mapped content type, for example, a Teaser Block.
-
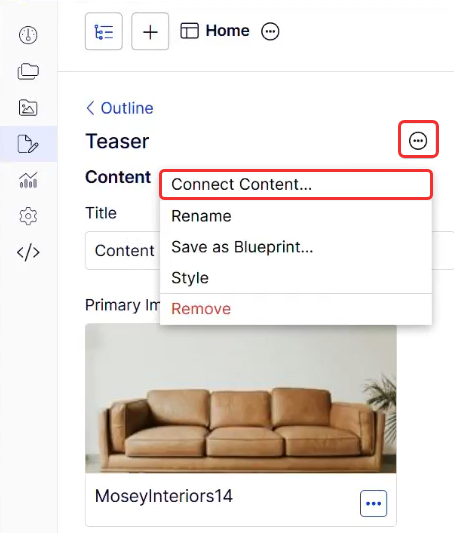
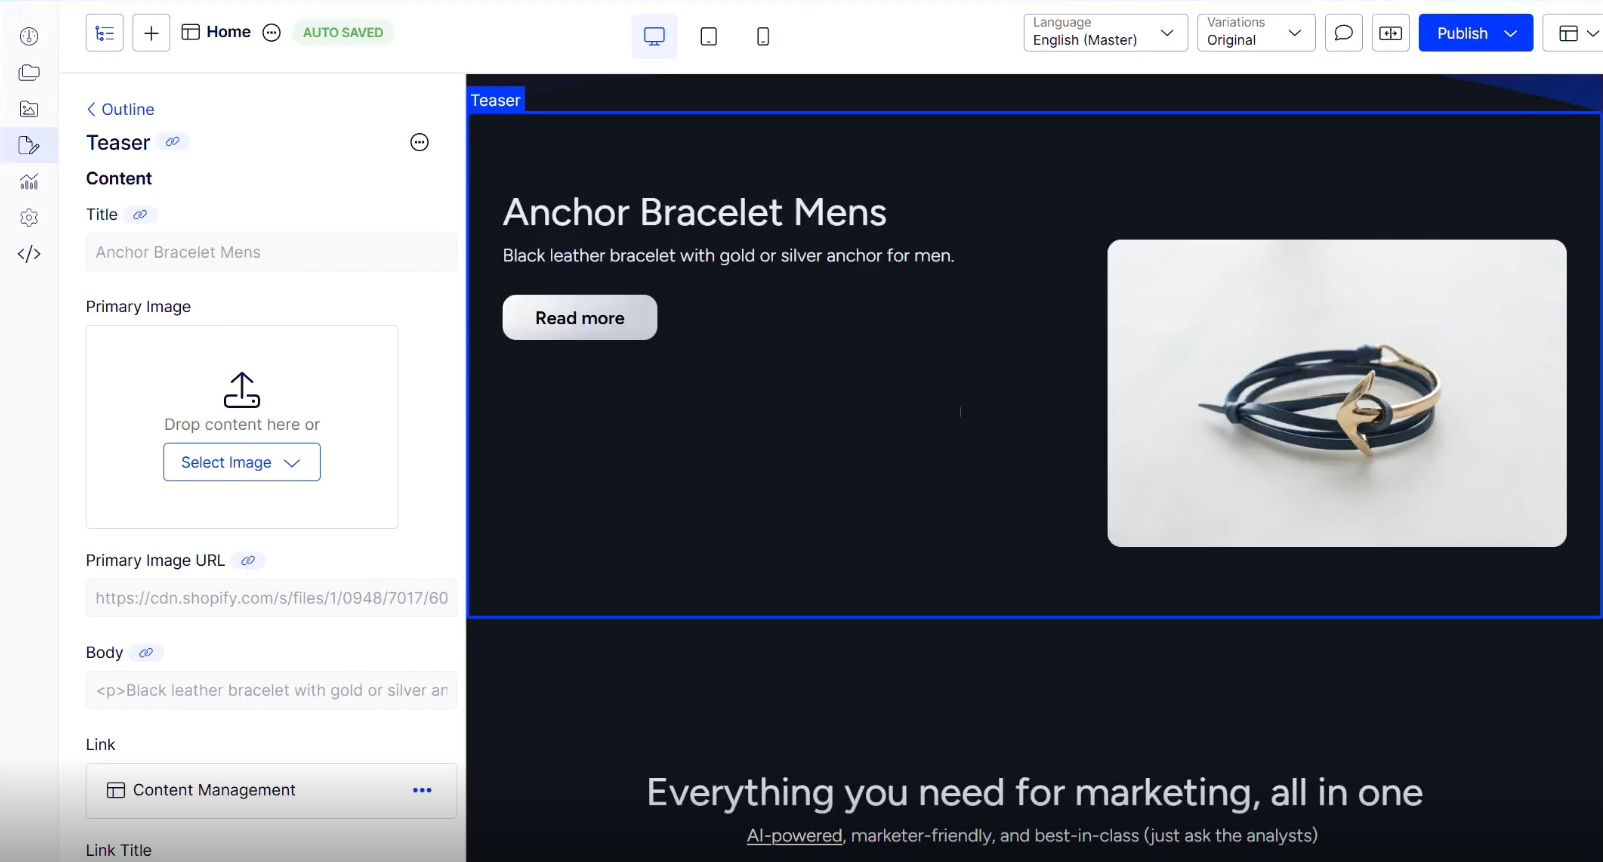
For fields that are mapped to external content, for example, the Primary Image field, select More (...) > Connect Content.
-
Content items synced from your external source display in the Connect Content window. Select the desired content item, for example, Anchor Bracelet Mens, and click Connect Content.
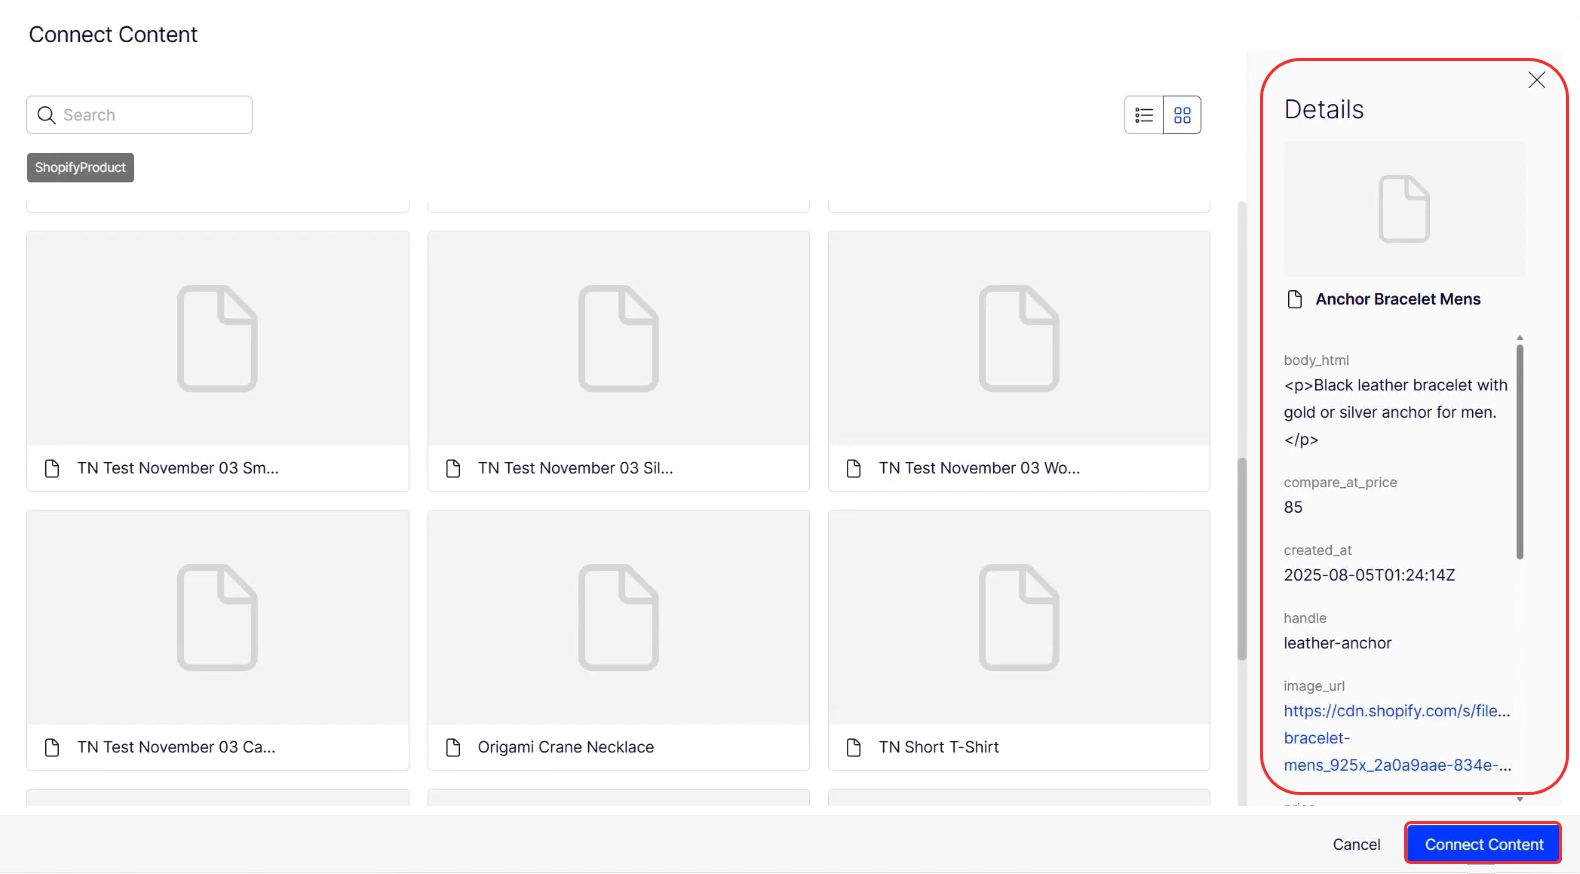
The data from your external source automatically populates the CMS content block, including images, titles, and body text.
Updated 5 days ago