Manage applications
Information on the Applications tab in the Optimizely CMS (SaaS) Settings.
Optimizely Content Management System (SaaS) Applications lets you configure and manage multiple applications. This includes configuring preview settings, managing hostnames, and defining application roots for routing purposes.
Unlike the approach where the front and back-end are tightly coupled, CMS (SaaS) does not have a bias regarding how to construct, organize, or manage routes (paths that determine how an application responds to a client request for a particular endpoint). This flexibility makes CMS (SaaS) more adaptable to let you design the routing in the way best suited to your use cases.
Application benefits
Create applications in the following scenarios to ensure that CMS (SaaS) remains organized, scalable, and aligned with your specific business needs:
- Isolated Management – Manage each application independently with specific configurations, settings, and content structures.
- Enhanced Organization – Keep the CMS organized, especially when dealing with multiple applications or projects.
- User Experience – Improve navigation and content management, making it easier for developers and marketers to work on specific applications without interference.
- Flexibility – Use a headless CMS approach, letting you build applications without being tied to a traditional CMS structure.
- Scalability – As your business grows, add applications to scale with your needs.
When should I create an application?
- Launch a new application – Create a separate application to manage independently from other applications.
- Multi-application management – Manage multiple applications under a single CMS instance by setting up each application as a separate application, providing better organization, dedicated settings, and easier-to-manage content for each application.
- Headless CMS implementation – Create an application to manage different front-end applications that consume content from CMS (SaaS) when you are implementing a headless CMS configuration (where the front end is decoupled from the back end).
- Marketing and campaign applications – Create an application to ensure that applications have their own specific configurations, content, and tracking for temporary or permanent marketing campaign applications.
- Internationalization – Create a separate application to manage localization settings for different regions or languages and content more efficiently.
- Development and preview environments – Create a separate application when you want to configure development or preview environments for new features to maintain a clean separation from the production environment.
Create an application
-
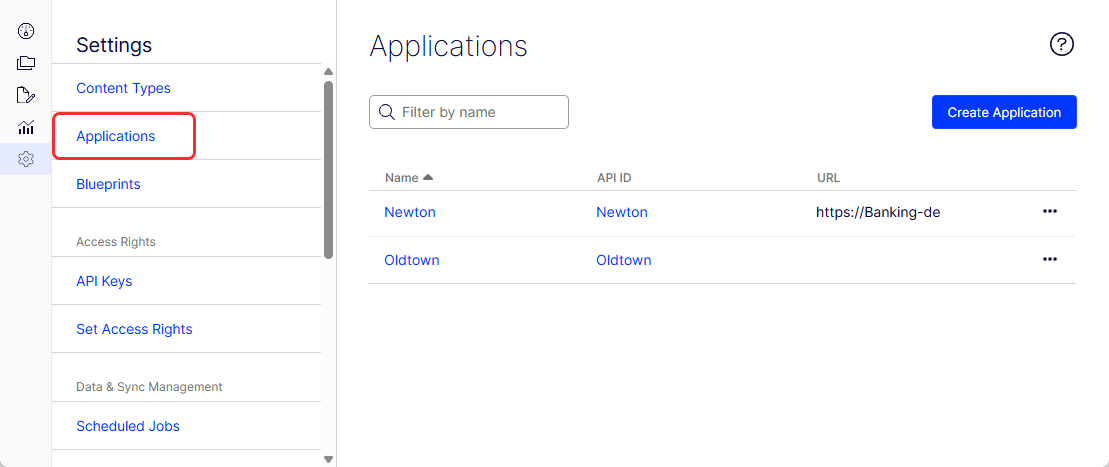
Go to Settings > Applications.
-
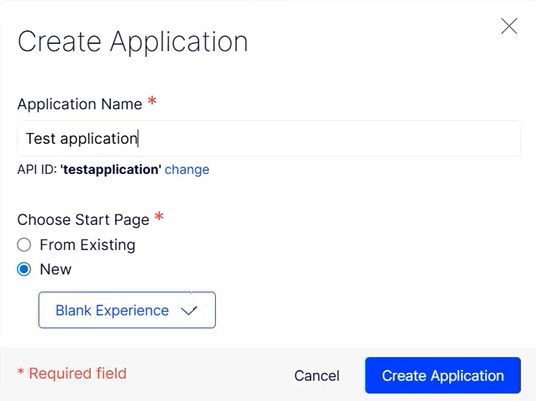
Click Create Application.
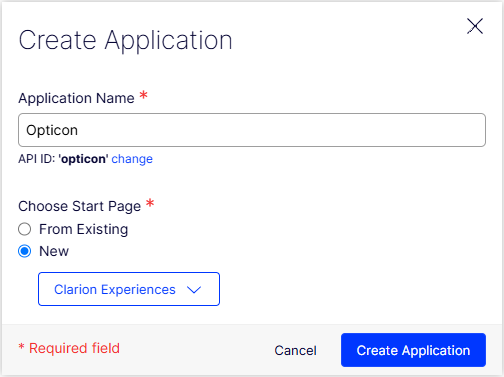
- Application Name – Enter the name of the application (analogous to a website). Must begin with a letter and contain only alphanumeric characters. Click change to modify the automatically generated API ID.
- Choose Start Page – Select the start page from the content tree.
- From Existing – Select a start page from the page tree that displays.
- New – Select a start page from a list of Experiences and Page Types.
-
Click Create Application. The application is added to the Applications list.
Configure an application
-
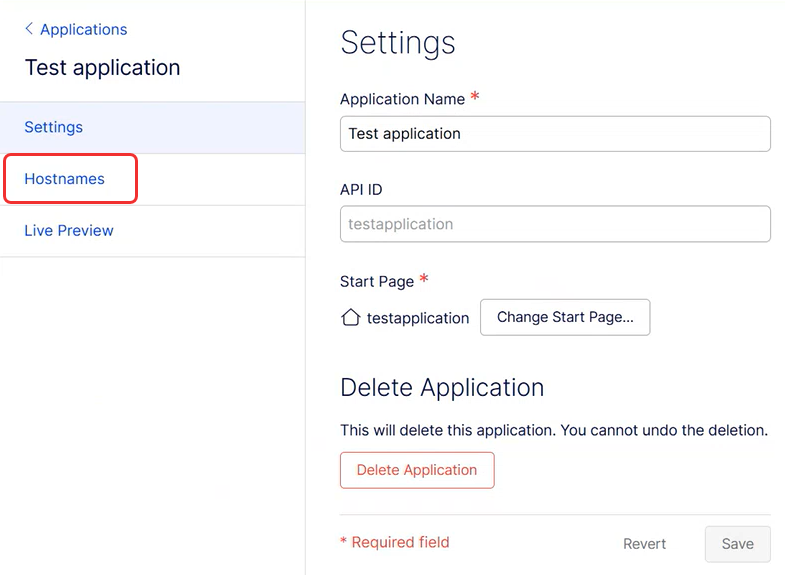
Click the name of an application in the Application list (or select More (...) > Edit) to configure the application. The Settings window displays.
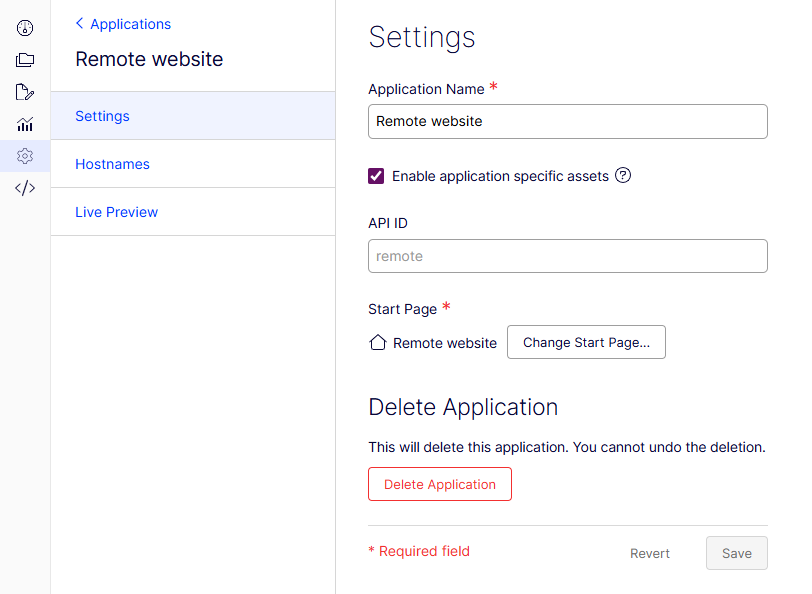
- Application name – Enter the application name or the application's start page.
- Enable application-specific assets – Select to ensure that this site's assets, such as blocks and media, are not available for use on other sites in the installation. This option affects the folder structure editors see in the assets panel.
- API ID – Specify a unique identifier for the application that is used in API calls. This ID is typically used to reference the application programmatically within the system, allowing for integration and communication with other services or components. In the screenshot, the API ID is set to "remote," indicating that this is the identifier for the application named "Remote website."
- Change Start Page – Select the page to which the visitor is sent if only a hostname is specified.
- Delete Application – Click to delete the application and remove it from the Application list.
-
Select Hostnames to configure the application further. You can edit an existing hostname or create another one. Configuring hostnames in CMS (SaaS) ensures that previews work correctly and links in Optimizely Graph are accurately resolved.
-
Click Add Hostname to open the Add Hostname pane.
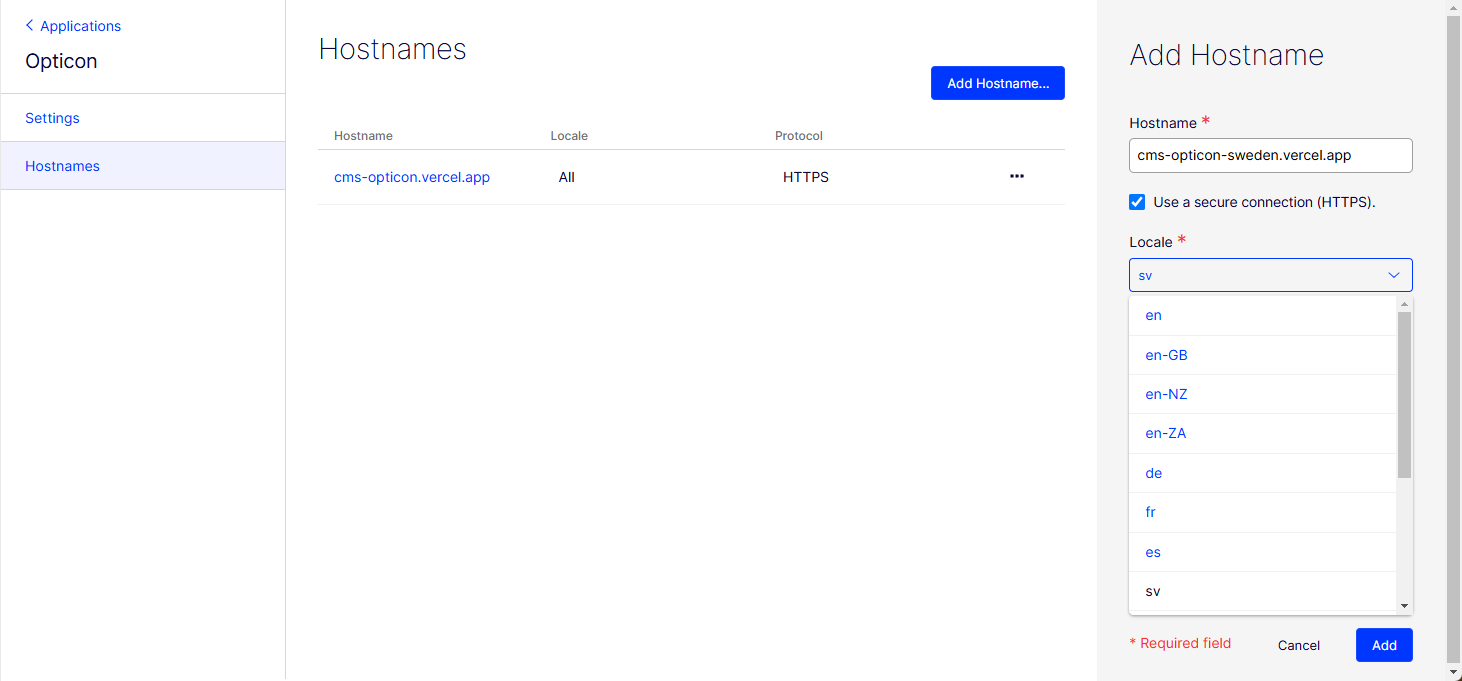
- Hostname – Enter a unique name of between 2 and 225 characters (letters, numbers, periods, underscores, hyphens, and an optional port number such as
hostname:8080) for a new primary host. Do not includehttp://orhtpps://in the name; use the Use a Secure connection (HTTPS) checkbox for that. - Use a Secure connection – Select for HTTPS. Clear for HTTP.
- Locale – Select a locale.
- Only one hostname can be primary per locale. If the selected locale already exists for another hostname, you are asked to confirm that you want to change the primary hostname for the selected locale. For example, if Oldtown has a locale of English (
en) and you add a Newton hostname with locale English (en), you are asked to confirm changing the primary hostname from Oldtown to Newton. - To have URLs indexed without a language segment (transforming
example.com/en/my-pagetoexample.com/my-page), map the hostname to the desired language. For example, mapexampleinexample.comto the languageen.
- Only one hostname can be primary per locale. If the selected locale already exists for another hostname, you are asked to confirm that you want to change the primary hostname for the selected locale. For example, if Oldtown has a locale of English (
- Hostname – Enter a unique name of between 2 and 225 characters (letters, numbers, periods, underscores, hyphens, and an optional port number such as
-
Click Add. The hostname is added to the list.

NoteIf you change hostnames, go to Settings > Scheduled Jobs and run the Optimizely Graph Full Synchronization job to update links for all content items.
Create custom preview routing
-
Click Create Application. The Create Application window displays.

-
Enter the Application Name and click Create Application. The application displays on the Applications panel.
-
Click the application name. The application Settings window displays.

-
Click Hostnames.
-
Click Add Hostname.
-
Enter the host name (such as
localhost:5299). -
Set Locale to All.
-
Click Add.

It is added to the list.

-
-
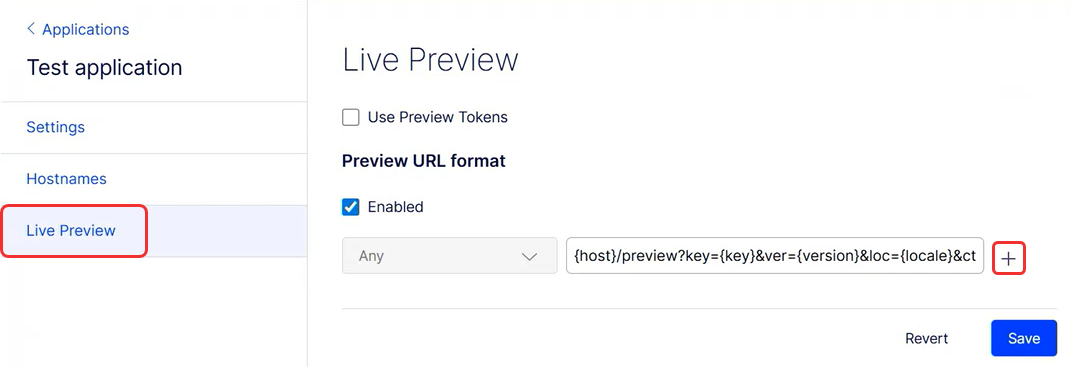
Click Live Preview. The Live Preview panel displays.
-
Use Preview Tokens – Automatically append preview tokens to the preview URL you use.
-
Enabled – Any is selected by default, but you must select Enabled to display the preview because you can customize the preview as follows.
-
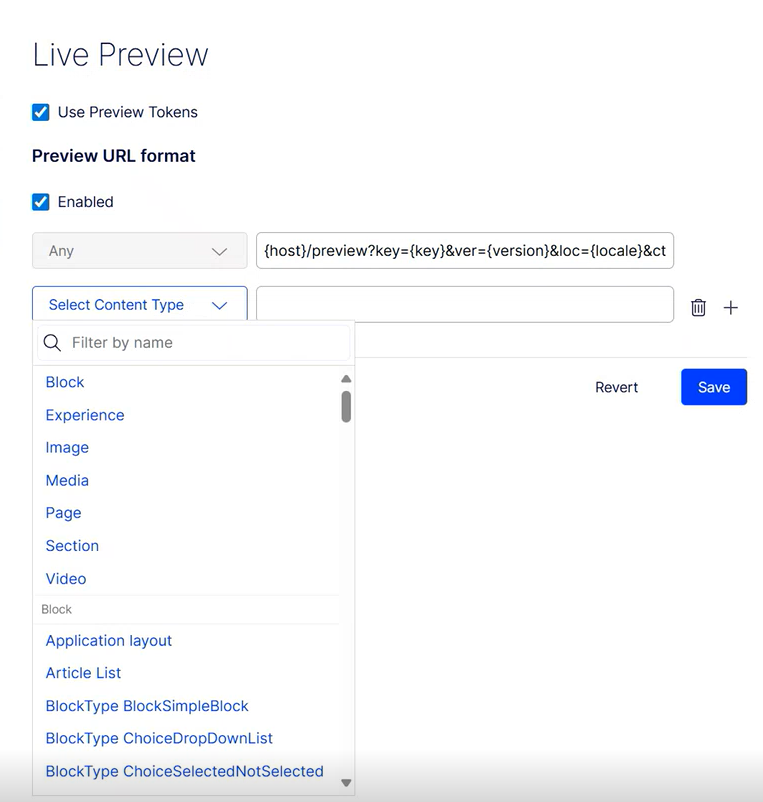
Add (+) – Click to add a selected Content Type row with a custom URL. Any is the default. If you remove the URL, you can preview only the items you specify.
-
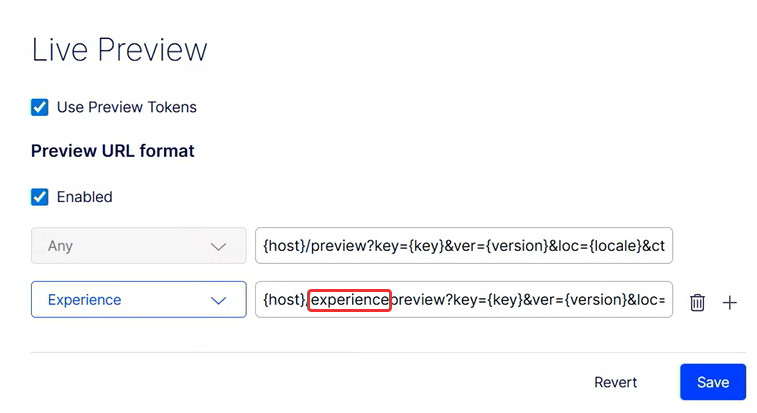
Modify the default token to create a custom preview
- Example: Add a custom preview by modifying the default token (adding
experienceto the token).
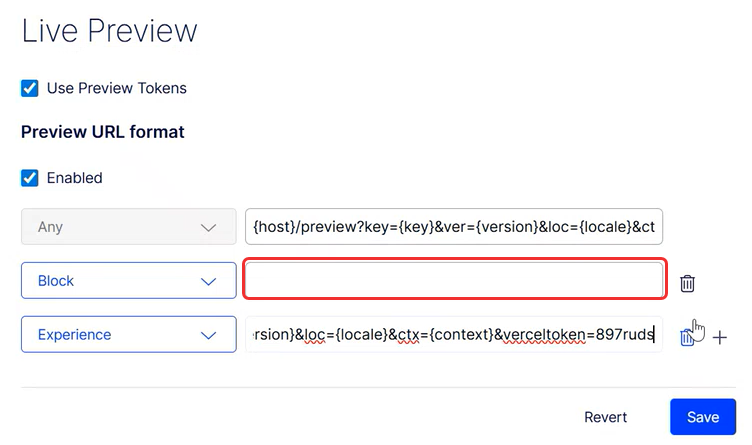
- Example: Leave the token field blank to disable preview (for blocks, for example).
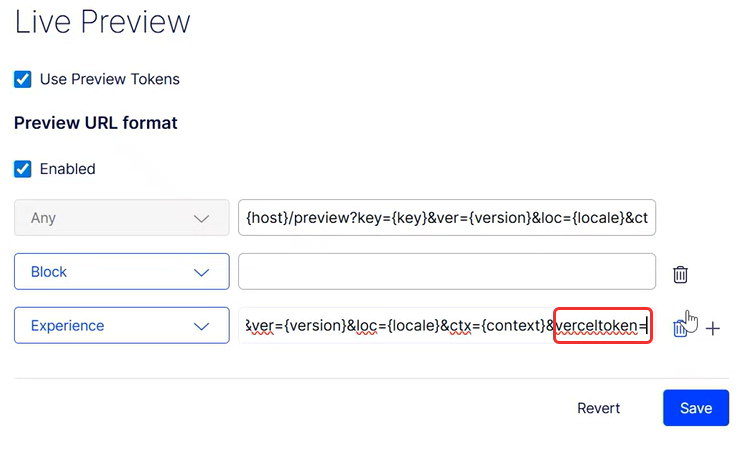
- Example: Add a
verceltokenparameter if you want to integrate with Vercel’s preview environment.
Delete an application
- Click the name of an application in the Application list (or select More (...) > Edit) to configure the application. The Settings window displays.
- Click Delete Application.
- Confirm the deletion. CMS (SaaS) removes the application from the Application list.
Updated 19 days ago
