Manage assets with DAM
Optimizely Digital Asset Manager stores, organizes, manages, and retrieves digital assets, such as images, videos, documents, and other multimedia content.
Optimizely Digital Asset Manager (DAM) stores, organizes, manages, and retrieves digital assets, including images, videos, documents, and other multimedia content. The DAM offers robust version control features to monitor and oversee changes to assets over time. You can create various renditions of assets, optimizing them for different platforms and purposes.
The following image and corresponding list show the DAM and its functions.
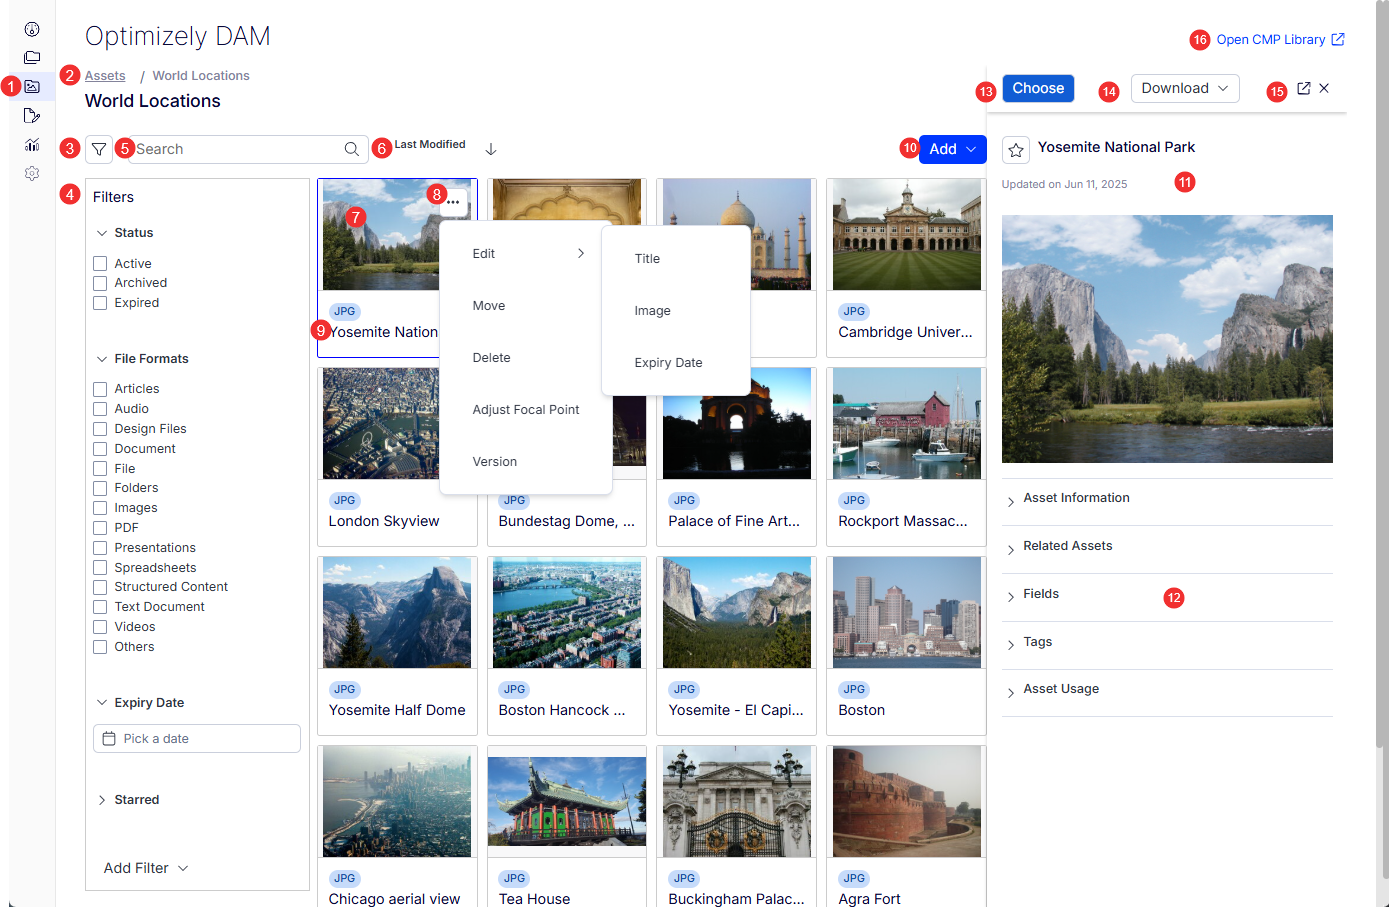
- DAM view – Click to open the DAM library.
- Breadcrumb – Displays the folder of the assets in a clickable hierarchy.
- Filter – Click to open the left filter pane.
- Filters – Select filters to find the digital assets you want.
- Search – Enter a partial string to narrow selections.
- Sort – Select Title, Type, Owner, Last Modified, or Date Created. Select also ascending or descending order.
- Asset details – Click an asset card to open the details pane on the right side of the window.
- Asset actions – The actions in this menu vary by asset type (image asset type shown).
- Asset detail focus – Click an asset name on an asset card to display the asset details in the main window.
- Add – Select to Create Folder or Upload an asset.
- Asset Detail Pane – Opens when you click an asset card.
- Modify asset information – Open and modify asset details.
- Choose – Select the asset to use in your content or project. This action might insert the chosen asset into a page, link it within content, or add it to a collection for further use.
- Download – Save a copy of the image asset in one of the following formats: JPG, PNG, PDF, WEBP.
- Asset detail focus – Click the icon to display the asset details in the main window.
- Open CMP Library – Access the Optimizely Content Marketing Platform (CMP) Library to manage your DAM from CMP.
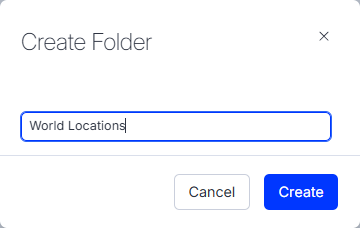
Add a folder
Create folders to organize your assets. Organizing assets into folders streamlines content management by providing a structured, easily navigable system that enhances efficiency and accessibility for users.
-
Select Add > Create Folder. The Create Folder window displays.
-
Enter a folder name.
-
Click Create. The folder is added.
Add images
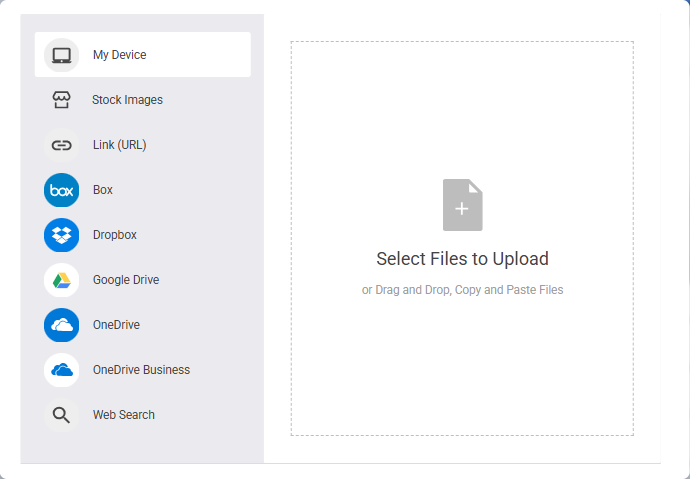
Select Add > Upload. A window displays various ways you can upload assets. The following example uploads image files from My Device.
After you select the files, they are uploaded but not yet placed in the DAM because you have the opportunity to edit asset details before completing the upload process. You can also remove selected assets before the upload is complete.
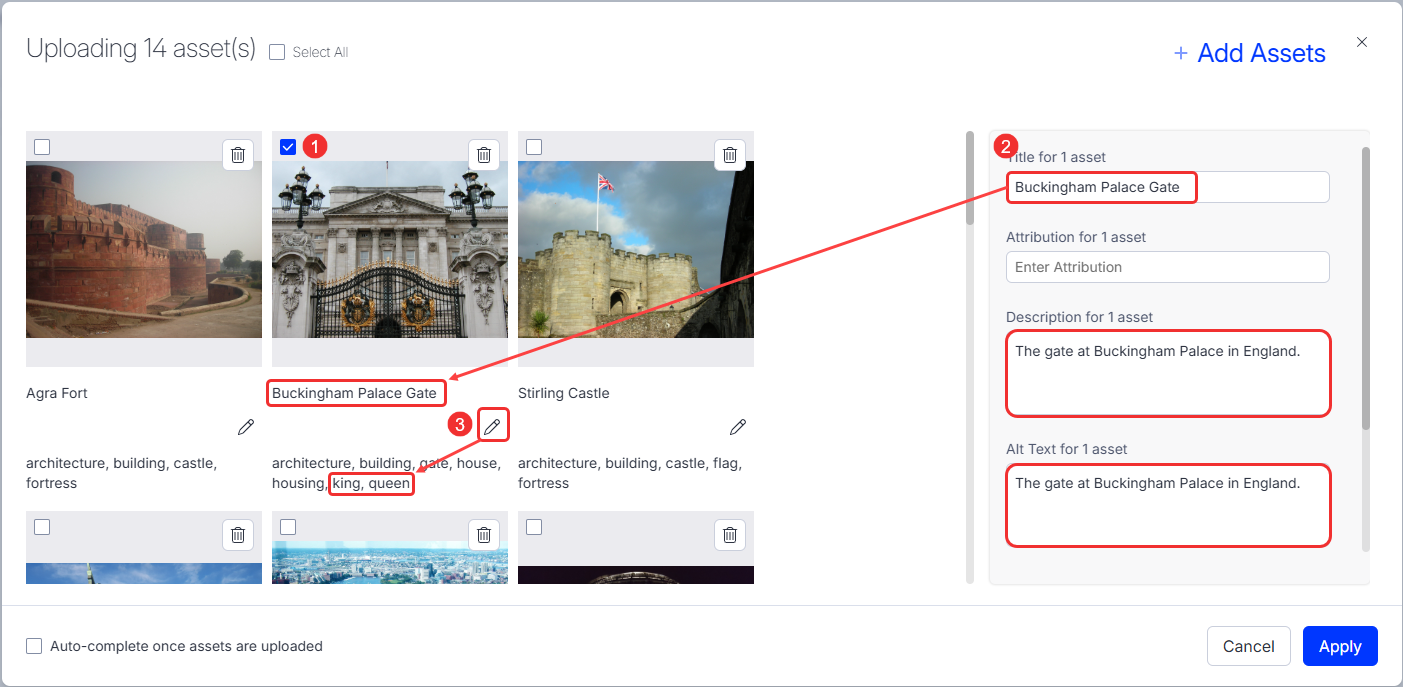
- Select asset – You can select one or more assets. The example in the image shows one asset selected. Its details are displayed in the right pane.
- Modify field – You can change the following details (or change them later from the DAM).
- Title – The name given to an asset to identify and reference it within the system.
- Attribution – Information about the creator or source of the asset, often used to give credit in accordance with licensing agreements.
- Description – A detailed explanation or summary of the asset's content, purpose, and any other relevant information to provide context.
- Alt Text – Alternative text that describes the asset, primarily used for accessibility purposes to help users who cannot view the asset directly.
- Asset Expiry Date – The date after which the asset should no longer be used or displayed, often set in compliance with licensing agreements or content lifecycle policies.
- Fields – Specific data points or metadata associated with the asset, used to categorize and manage it within the system.
- Tags – Keywords or labels assigned to an asset to facilitate searchability and organization within the asset management system.
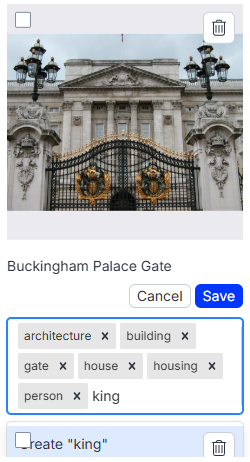
- Edit tag list – You can edit tags from the asset card. Click Edit (pencil icon). The DAM provides suggested tags, but you may want to edit them. For example, in the following image, you can remove the person tag (click x), and add a king tag and a queen tag.
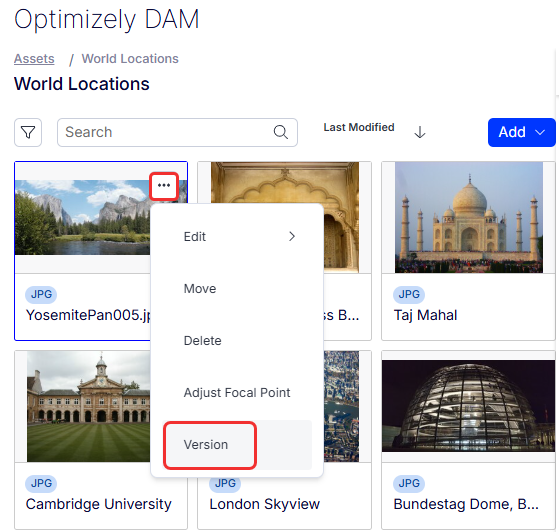
Add a version of an asset
-
On an asset, click More (...) > Version.
-
Click Add Version (+).
-
Select another image from your files and click Open.
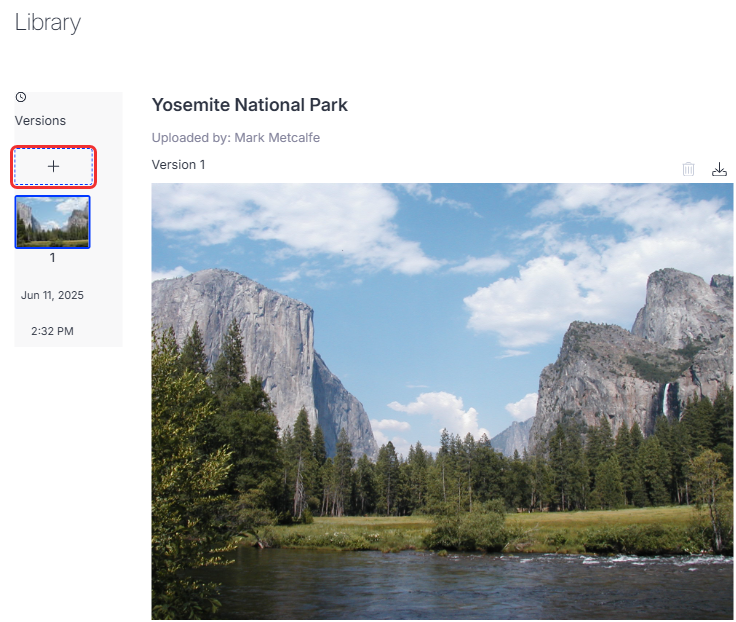
The image becomes the new version. The older versions are shown also if you want to revert to an older version.
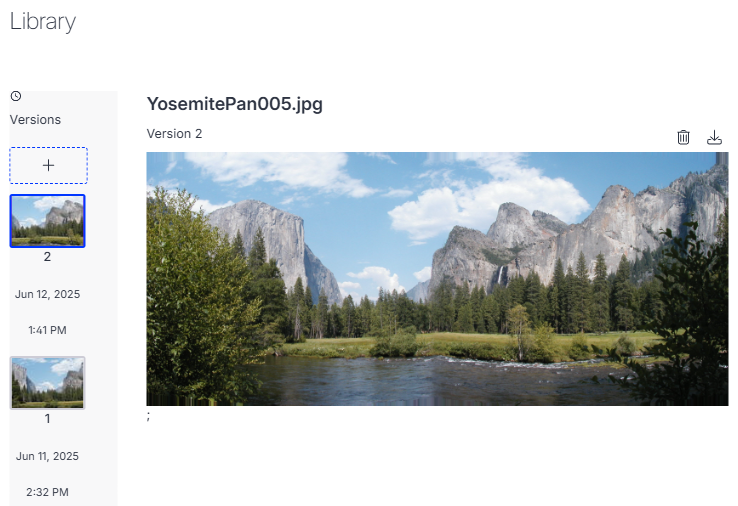
The latest version of an image is used in content. To revert to a previous version, you must make it the latest (current) version. You can do this in a couple of ways:
- Click an earlier version and download that image. Then click Add (+) to upload it to the newest version.
- Or, you can delete newer versions.
Modify assets
You can modify asset details several ways.
- In the Asset Pane
- In the main window
- During upload of assets. See Add images above.
Modify details from the Asset pane
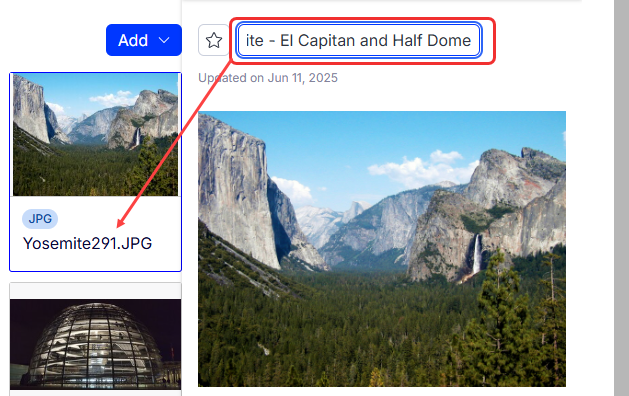
When you click an asset (not the asset name), the Asset Details pane displays on the right side of the window. You can modify asset details from this pane. In the following example, you can click the title to change it from Yosemite291.JPG to Yosemite - El Capitan and Half Dome. When you press Enter, the asset card name changes accordingly.
Modify details in the main window
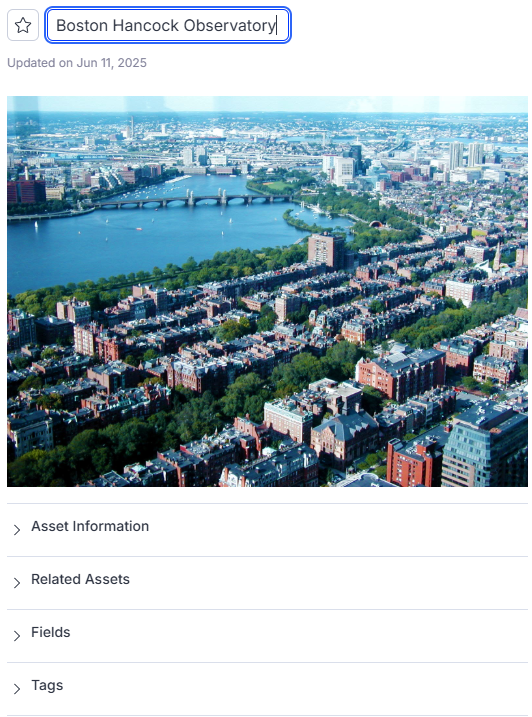
When you click an asset name in the asset card, the asset details display in the main window. In the following example, you can click the title to change it from Boston462.JPG to Boston Hancock Observatory. When you press Enter, the asset card name changes accordingly.
Filter assets
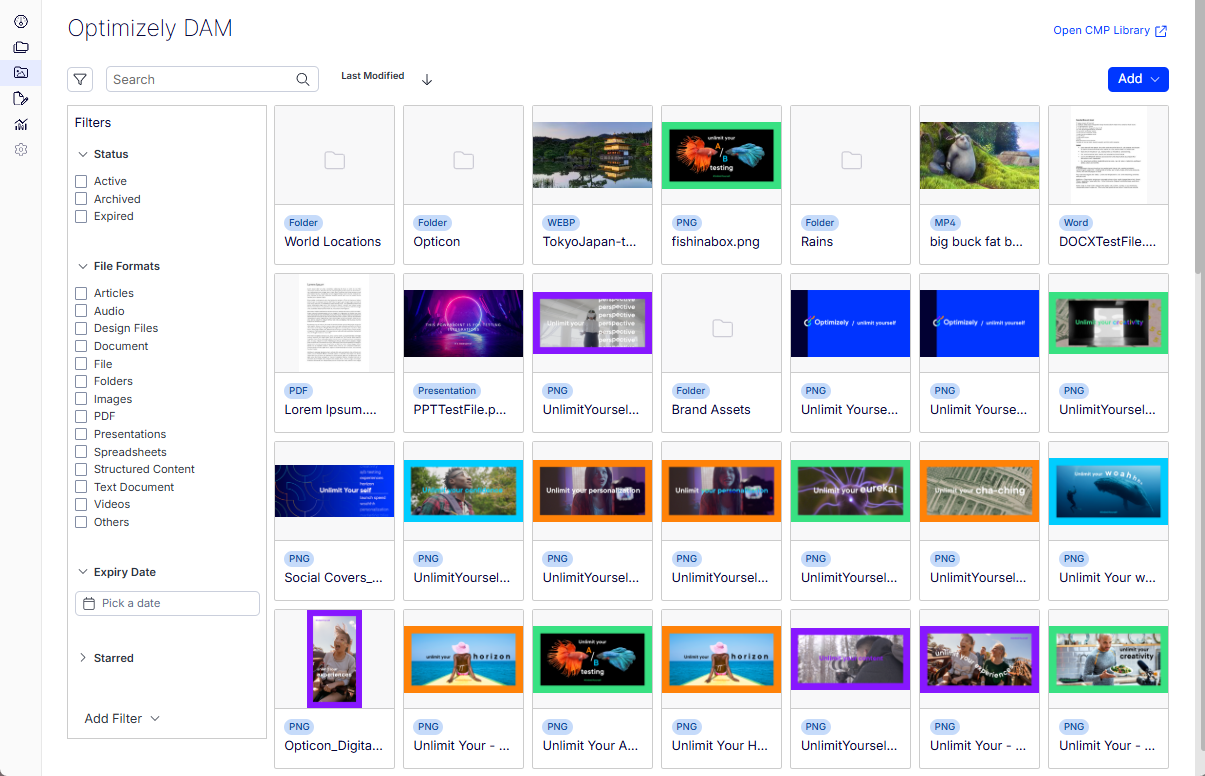
Unfiltered assets are displayed by ascending or descending sort types similar to the following image. Click the Filter toggle to open the Filters pane. Select the filters you want to find the assets you want.
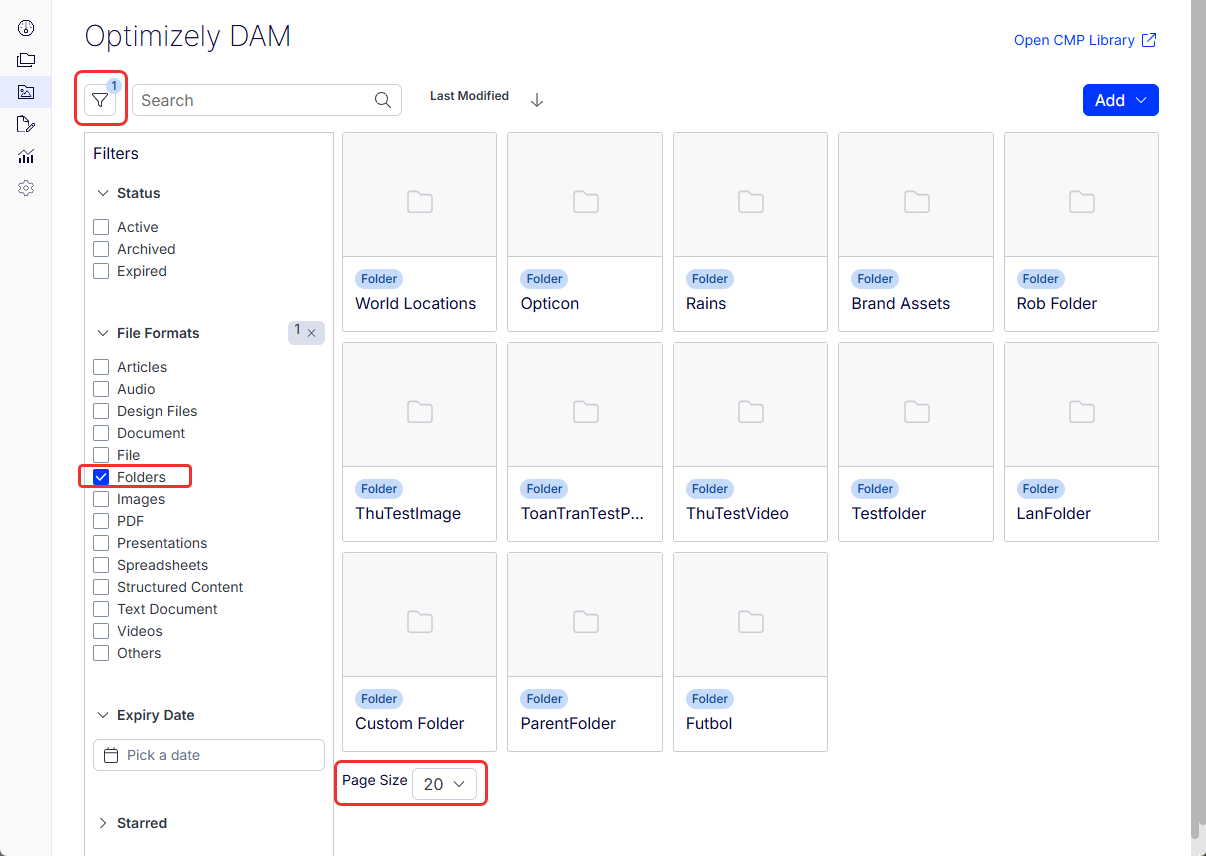
The following image shows one filter (Folders) to show only the folders in the DAM. In this case, The Page Size filter indicates that 20 or fewer folders are displayed. You can display up to 20, 30, 50, or 100 assets at a time. Additional assets are displayed on subsequent pages.
Use assets in Visual Builder
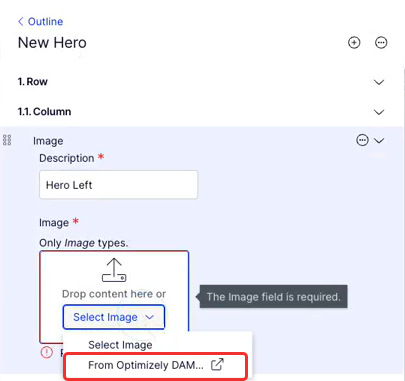
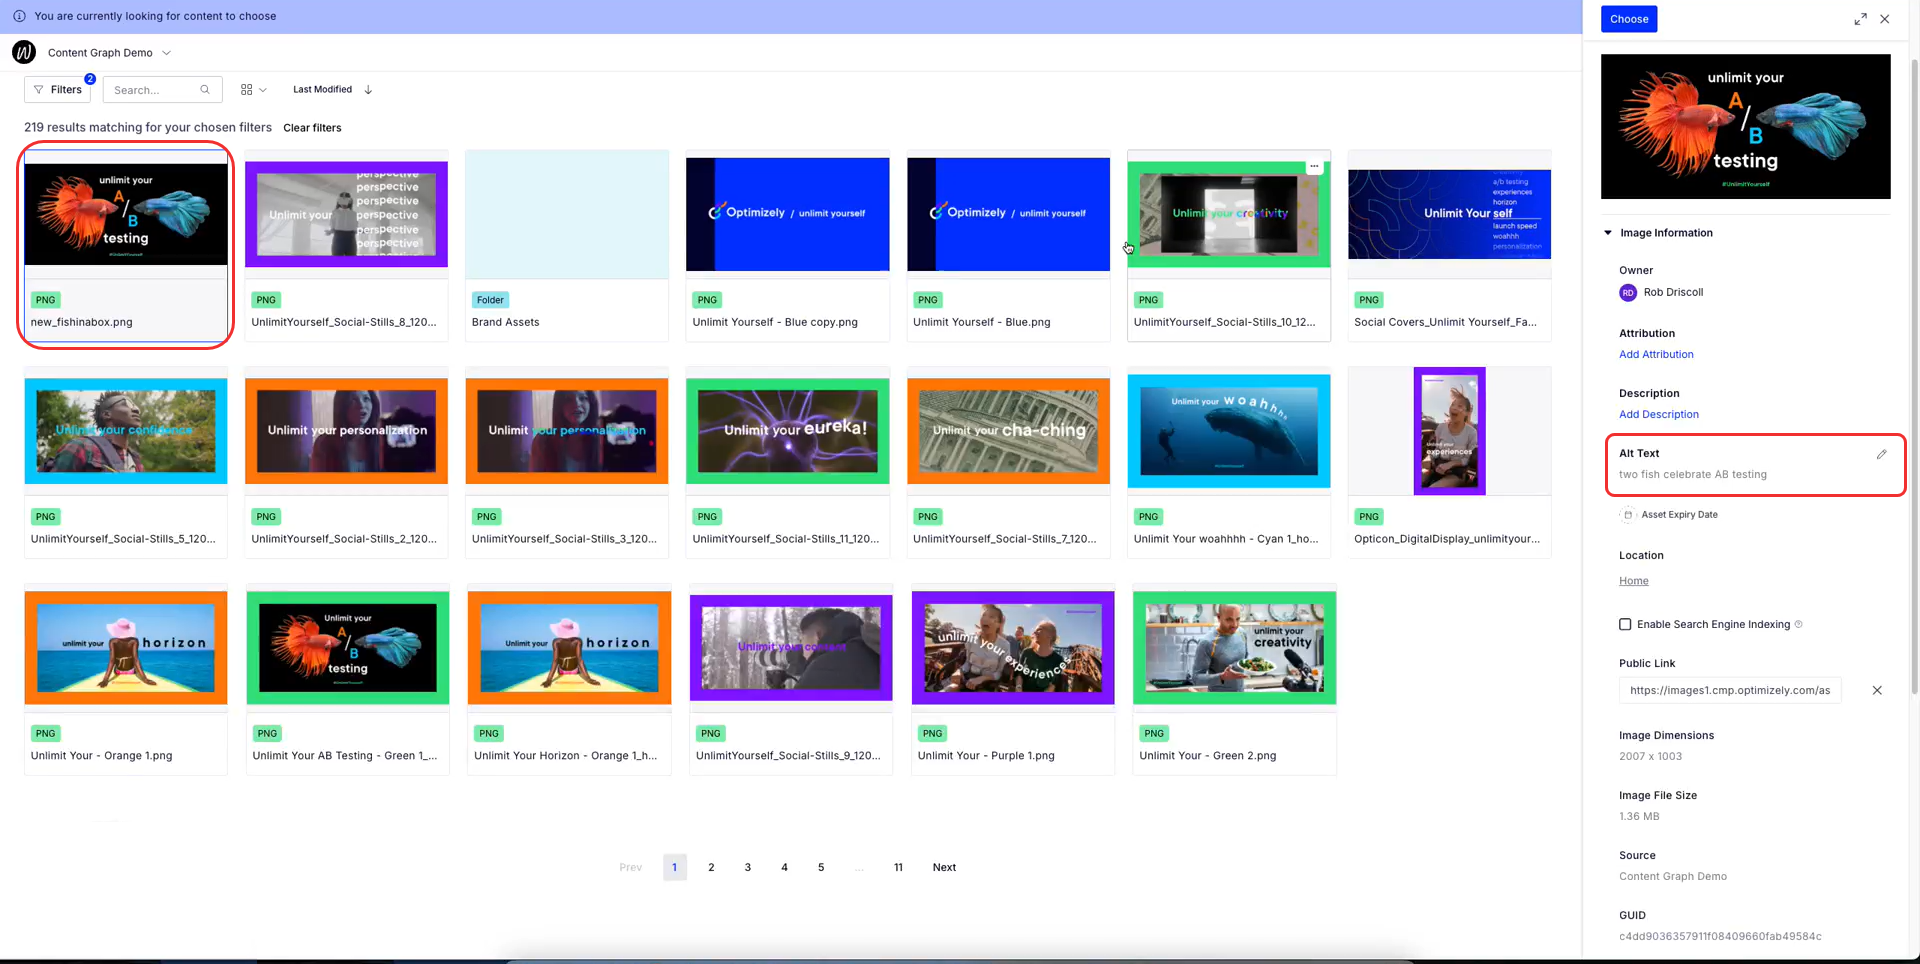
- In a Visual Builder image element, click Select Image > From Optimizely DAM.
-
Select the version of the image. The details pane show the updated image and any other changes you made, such as adding Alt Text.
Folders and assets for a deleted user
When a team member leaves, DAM handles their folders and assets in the following way:
- Folders – The creator's name still displays on the folder with a (Deleted) tag beside their name.
- Files within the folders – DAM shows the deleted user as the owner of the file without a (Deleted) tag.
Both the folders and their files remain visible and accessible to any other user with whom they were originally shared.
Updated 24 days ago