Live preview with React
Configure live preview in a Next.js application to let editors see and interact with real-time content changes in Optimizely CMS (SaaS) before publishing.
Live preview lets editors see content changes in real time before publishing. When an editor updates content in Optimizely CMS (SaaS), the preview updates immediately without leaving the editor. Use this guide to configure live preview for a Next.js application using the Optimizely JavaScript SDK.
Prerequisites
Before you begin, ensure you have:
- A React-based application that uses the Optimizely JavaScript SDK (Next.js in this example).
- Defined content types and registered React components.
- Access to your Optimizely CMS instance URL.
- Optimizely Graph credentials (a single key and gateway URL).
Create a preview route
Create a dedicated route to handle preview requests from CMS (SaaS).
-
In your Next.js project, create the following file:
src/app/preview/page.tsx -
Add the following code:
import { GraphClient, type PreviewParams } from '@optimizely/cms-sdk';
import { OptimizelyComponent } from '@optimizely/cms-sdk/react/server';
import { PreviewComponent } from '@optimizely/cms-sdk/react/client';
import Script from 'next/script';

type Props = {
  searchParams: Promise<{ [key: string]: string | string[] | undefined }>;
};

export default async function Page({ searchParams }: Props) {
  const client = new GraphClient(process.env.OPTIMIZELY_GRAPH_SINGLE_KEY!, {
    graphUrl: process.env.OPTIMIZELY_GRAPH_GATEWAY,
  });

  const response = await client.getPreviewContent(
    (await searchParams) as PreviewParams
  );

  return (
    <>
      <Script
        src={`${process.env.OPTIMIZELY_CMS_URL}/util/javascript/communicationinjector.js`}
      ></Script>
      <PreviewComponent />
      <OptimizelyComponent content={response} />
    </>
  );
}
The following breaks down what is happening in the previous code:
Step 1 – Initialize the Graph client
/*From Line 11 - 13 */
const client = new GraphClient(process.env.OPTIMIZELY_GRAPH_SINGLE_KEY!, {
  graphUrl: process.env.OPTIMIZELY_GRAPH_GATEWAY,
});
The GraphClient authenticates requests to Optimizely Graph. Store credentials in environment variables.
Step 2 – Fetch preview content
/*From Line 15 - 17 */
const response = await client.getPreviewContent(
  (await searchParams) as PreviewParams,
);
getPreviewContent resolves the correct draft version based on preview parameters sent by the CMS.
Step 3 – Render preview content
/*From Line 19 - 28 */
return (
  <>
    <Script
      src={`${process.env.OPTIMIZELY_CMS_URL}/util/javascript/communicationinjector.js`}
    ></Script>
    <PreviewComponent />
    <OptimizelyComponent content={response} />
  </>
);
These elements work together as follows:
- Communication injector script – Enables two-way communication between the CMS (SaaS) editor and the preview window.
PreviewComponent– Listens for live updates and triggers re-renders when editors make changes.OptimizelyComponent– Renders content using the registered React component for the content type.
Configure environment variables
Add the following environment variables to your .env.local file:
OPTIMIZELY_GRAPH_SINGLE_KEY=YOUR_SINGLE_KEY_HERE
OPTIMIZELY_GRAPH_GATEWAY=https://cg.optimizely.com/content/v2
OPTIMIZELY_CMS_URL=https://YOUR_CMS_INSTANCE.optimizely.com
Replace the following values with your actual information:
OPTIMIZELY_GRAPH_SINGLE_KEY– Your Optimizely Graph single key.OPTIMIZELY_GRAPH_GATEWAY– Your Optimizely Graph gateway URL (default that displayed previously).OPTIMIZELY_CMS_URL– Your Optimizely CMS (SaaS) instance URL (without the trailing slash).
ImportantNever commit your
.env.localfile to version control. Add it to your.gitignoreto keep your credentials secure.
Configure hostname and preview in CMS (SaaS)
Add hostname
- Open your application and go to the Hostnames tab.
- Click Add Hostname and enter your application URL:
- local development –
http://localhost:3000. - production –
https://yourdomain.com.
- local development –
- Select Use a secure connection (HTTPS) if applicable.
- Click Add.
Configure preview url
- Go to the Live Preview tab.
- Select Use Preview Tokens.
- Click Enabled under Preview URL format.
- (Optional) Edit or add rows for specific content types. The system adds a default format automatically.
- Update the preview URL to point to your preview route:
- For local development:
http://localhost:3000/preview. - For production:
https://yourdomain.com/preview.
- For local development:
- Click Save
NoteYou can configure different preview URLs for multiple environments (for example, local, staging, or production) to test content across different deployment stages.
Use preview in other frameworks
While this guide focuses on Next.js, the JavaScript SDK supports preview in other React-based frameworks. The core concepts remain the same.
- Create a preview route that accepts query parameters.
- Use
GraphClient.getPreviewContent()to fetch the content. - Load the communication injector script.
- Render with
PreviewComponentandOptimizelyComponent.
Implementation details vary based on routing and rendering strategy.
Use preview utilities for on-page editing
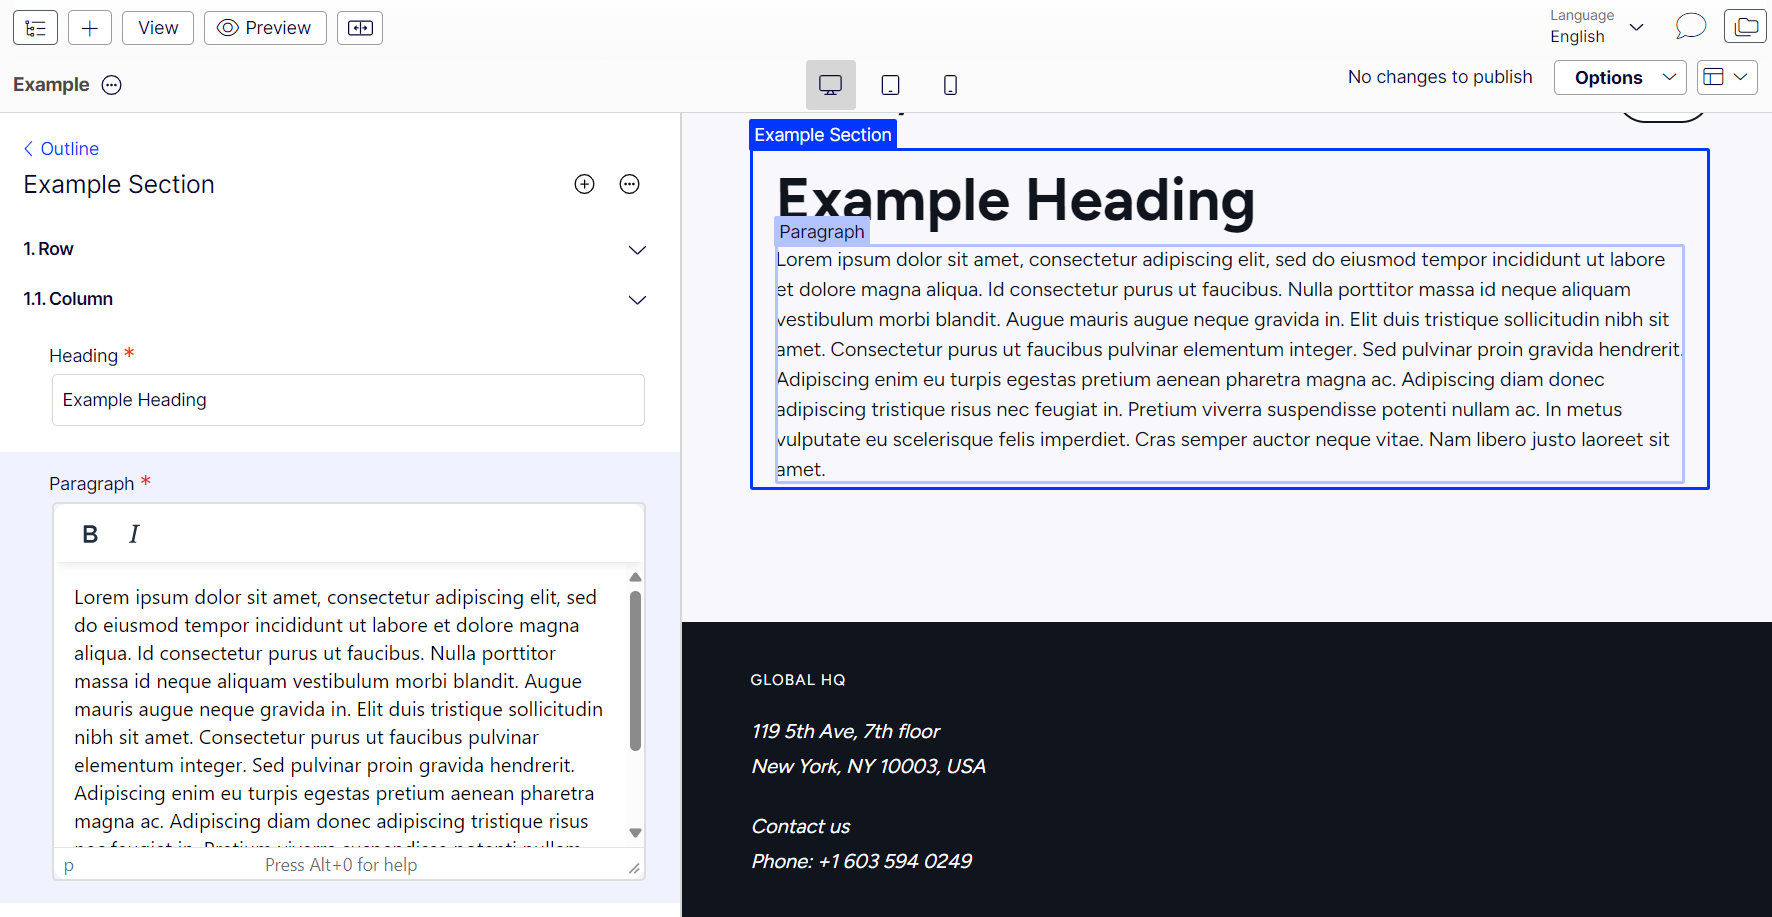
To enable click-to-edit behavior in preview, add preview attributes to rendered elements using getPreviewUtils. This is how it displays on Live Preview.
Preview attributes
To implement on-page editing functionality in your code, add preview attributes to your HTML or JSX elements using the getPreviewUtils utility. These attributes enable the click-to-edit behavior that lets content editors go directly from the preview to the corresponding field in the CMS (SaaS) editor.
Understand preview attributes (pa)
pa)The pa function (short for preview attributes) lets you edit visually in CMS (SaaS). When editors hover over elements with these attributes, the system highlights them to show they are editable. Clicking them jumps directly to the corresponding field in the CMS (SaaS) editor.
Complete example
The following is a complete component that demonstrates both pa for preview attributes and src for resolving content references:
import { contentType, damAssets, ContentProps } from '@optimizely/cms-sdk';
import { RichText } from '@optimizely/cms-sdk/react/richText';
import { getPreviewUtils } from '@optimizely/cms-sdk/react/server';

export const AboutUsContentType = contentType({
  key: 'AboutUs',
  baseType: '_component',
  properties: {
    heading: { type: 'string' },
    body: { type: 'richText' },
    image: {
      type: 'contentReference',
      allowedTypes: ['_image'],
    },
  },
});

type AboutUsProps = {
  content: ContentProps<typeof AboutUsContentType>;
};

export default function AboutUs({ content }: AboutUsProps) {
  const { pa, src } = getPreviewUtils(content);
  const { getSrcset, getAlt } = damAssets(content);

  return (
    <section className="about-us">
      {content.image && (
        <div className="about-us-image">
          <img
            {...pa('image')}
            src={src(content.image)}
            srcSet={getSrcset(content.image)}
            sizes="(max-width: 768px) 100vw, 50vw"
            alt={getAlt(content.image, 'About us image')}
          />
        </div>
      )}
      <h2 {...pa('heading')}>{content.heading}</h2>
      <div {...pa('body')} className="about-us-content">
        <RichText content={content.body?.json} />
      </div>
    </section>
  );
}
Key functions
pa('propertyName')– Spreads preview attributes onto elements to enable on-page editing. Use this for all content properties (text, rich text, images, and so on). The property name must match your content type definition.src(reference)– Resolves content reference URLs correctly in both preview and published states.
NoteApply
pa()to all content properties to enable the full on-page editing experience. This lets editors click elements in the preview and jump directly to the corresponding field in CMS (SaaS).
Updated 24 days ago