CMS + CMP publishing integration
How to install and configure the publishing experience between CMS and CMP.
This integration connects the Optimizely Content Management System (CMS) and Optimizely Content Marketing Platform (CMP). When configured, teams can manage the content production lifecycle of CMS pages using tasks and workflows in CMP.
NoteThis integration does not currently work with CMS (SaaS) sites.
Prerequisites
- CMS v12.28+
- CMP
- Opti ID or ASP.net
Remove prior versions
For beta users — Remove the prior version of this integration and dependencies before installing.
dotnet remove package EPiServer.CMS.OrchestrateIntegration

# If explicitly installed, also run:
dotnet remove package Optimizely.Content.Service
dotnet remove package Optimizely.Cmp.Client
Install the package
The package installs the dependencies needed for the CMS + CMP publishing integration.
dotnet add package Optimizely.Cms.Cmp.PublishingCreate an app in CMP
-
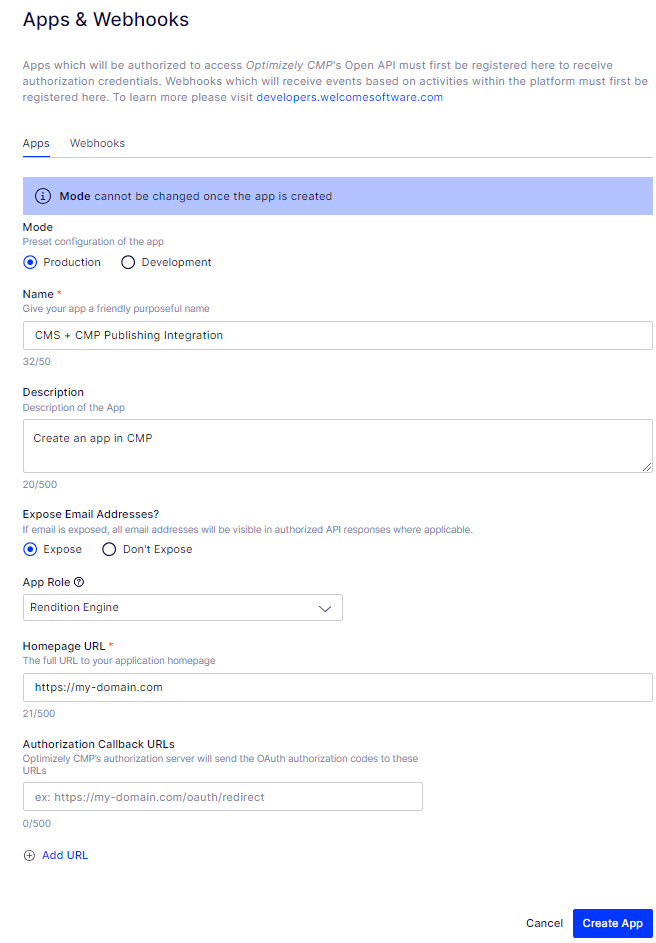
In CMP, go to Settings > Apps and Webhooks or select your avatar > Apps and Webhooks. This requires an administrator role in CMP. Trial accounts do not have access to advanced settings.
-
Click Register App to create an app. This generates a Client ID and Secret, which you will use in CMS for
Optimizely:Cmp:Client:ClientIdandOptimizely:Cmp:Client:ClientSecret.-
Enter a Name, such as CMS + CMP Publishing Integration.
-
(Optional) Add a description.
-
Allow emails to be exposed in API responses.
-
Set the App Role.
-
Enter a Homepage URL for the CMS site you connect to.
-
Enter the Authorization Callback URL using the same URL as the previous step; this may be used in future versions.
-
Click Create App
-
Configure the package in CMS
In CMS, add or modify the following code block in the appsettings.json file. This OauthClient must be the first listed in the Optimizely.Cms.Service block CMS to use this client automatically and for this integration to work properly.
NoteThis is separate from the Optimizely block.
"Optimizely": {
  "Cms": {
    "Service": {
      "OauthClients": [
        {
          // Set as first client if using multiple clients in CMS. You should use
          // this ClientID to identify it. This will be used in when creating the
          // integration in CMP.
          "ClientId": "cmp_publishing_integration",
          "ClientSecret": "a secret",
          // If using OptiID, set AllowActAs to true. If not, the integration will rely on
          // permissions set for the above OAuth user for ALL CMP users.
          "AllowActAs": true,
          // If the site is NOT on DXP, uncomment and replace this with a 32 character string
          // "SigningKey": "ABCDEFGHKLMANOPQABCDEFGHKLMANOPQ"
        }
      ]
    }
  },
  "Cmp": {
    "Client": {
      // This ClientId/ClientSecret will be provided when you create an app in CMP
      "ClientId": "Replace with CMP Client Id settings",
      "ClientSecret": "Replace with CMP Client Secret settings"
     }
  }
} -
Cms:Service:OauthClients— Allows CMP to connect to CMS and manage content. ThisClientIdandClientSecretare used when enabling the integration in CMP.ClientId— You should usecmp_publishing_integration(but you can use any ID you want).ClientSecret— Set this to any secret you want.AllowActAs— If Opti ID is enabled, the integration acts as the user currently logged in so CMS and CMP know which authorized user is making changes, publishing content, or updating anything else in the CMS.SigningKey— If you are not on Optimizely Digital Experience Platform (DXP), enter a 32-character signing key.
-
Cmp:Client— Lets CMS connect to CMP and provide real-time events and information when changes are made. This same block and credentials can be used for the CMP DAM Asset Picker. Use the credentials generated when you created the app in CMP in the prior section.ClientId— Use from CMP.ClientSecret— Use from CMP.
Add the following to your startup class to let the CMS editor load in CMP. It also changes how some site cookies work, but it is up to a developer to implement a content security policy.
private readonly IWebHostEnvironment _webHostingEnvironment;
private readonly IConfiguration _configuration;
public Startup(IWebHostEnvironment webHostingEnvironment, IConfiguration configuration) {
  _webHostingEnvironment = webHostingEnvironment;
  _configuration = configuration;
}
public void ConfigureServices(IServiceCollection services) {
  ...
  // Added this after .AddCms()
  services.AddCmsCmpPublishing();

  // Allow the quick editor to be embedded into CMP via an iframe
  services.AddAntiforgery(options => {
    options.Cookie.SameSite = SameSiteMode.None;
    options.Cookie.SecurePolicy = CookieSecurePolicy.Always;
  });

  // If using ASP.NET Identity
  // Allow the quick editor to be embedded into CMP via an iframe
  services.ConfigureApplicationCookie(options => {
    options.Cookie.SameSite = SameSiteMode.None;
    options.Cookie.SecurePolicy = CookieSecurePolicy.Always;
  });

  // If using OptiID
  // Allow the quick editor to be embedded into CMP via an iframe
  services.Configure < CookieAuthenticationOptions > (OptimizelyIdentityDefaults.CookieSchemeName, options => {
    options.Cookie.SameSite = SameSiteMode.None;
    options.Cookie.SecurePolicy = CookieSecurePolicy.Always;
  });
  if (_webHostingEnvironment.IsProduction()) {
    services.AddCmsCloudPlatformSupport(_configuration);
  }
}
public void Configure(IApplicationBuilder app, IWebHostEnvironment env) {
  ...
  // NOTE! Add these after app.UseAuthentication and before app.UseAuthorization
  app.UseRouting();
  app.UseCors();
  app.UseAuthentication();
  app.UseCmsCmpPublishingPreviewLinks();
  app.UseAuthorization();
  ...
}
If you run CMS on a non-DXP environment running in development mode, also configure the following in your startup class:
// To allow use of AddDevelopmentSigningCredentials.
using Optimizely.Cms.DependencyInjection;
using Optimizely.Cms.Preview1;

if (_webHostingEnvironment.IsDevelopment()) {
  // This automatically configures dev signing credentials to call Integration API
  services.Configure < CmsServiceOptions > (o => {
    o.AddDevelopmentSigningCredentials();
  });
}
Configure available languages in CMS
This integration uses the available languages configured for your content. To configure available languages, go to Admin > Manage Website Languages. Ensure that at least one language is set to Enabled.
When completed, go to Edit and select your website's Start Page. Select the Tools dropdown and click Language Settings.
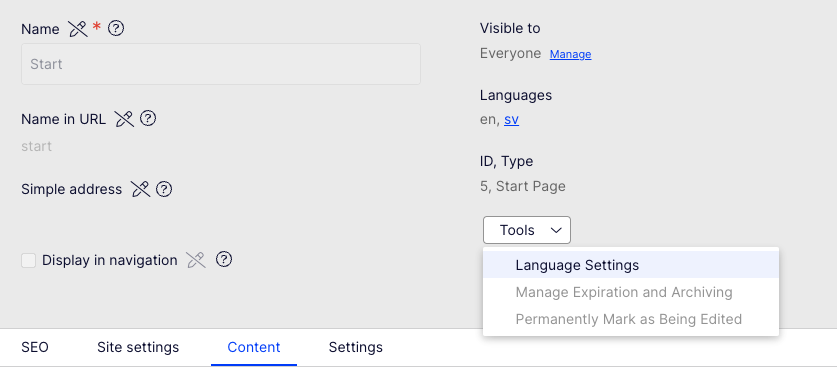
From the window that opens, confirm that at least one available language is selected for your editors:
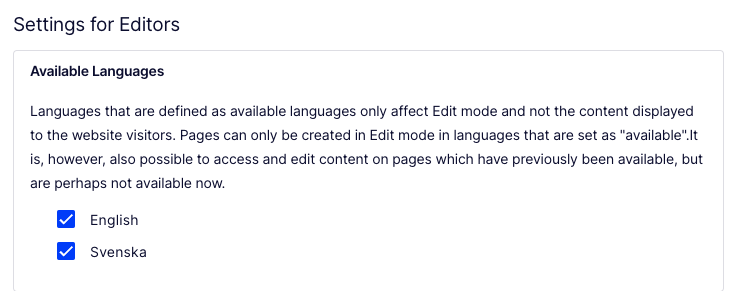
Click Save to set the available languages and close the window.
Configure access rights in CMS
The configured OAuth client needs access to content in CMS. To configure access rights for Optimizely:Cms:Service:OauthClients:0:ClientId, go to Admin > Access Rights in CMS.
You should grant the minimum access rights needed to integrate CMP and CMS.
- Grant access to the
rootfolder.- Select the
rootfolder. - Scroll down and click Add User/Group.
- Select the Client ID configured in
appsettings.json. - Assign Read permission to the
Client ID. - Save access rights.
- Select the
- Grant access to your site
startfolder. Do this for each start folder you want to connect to CMP.- Select your
startfolder. - Scroll down and click Add User/Group.
- Select the
Client IDconfigured inappsettings.json. - Assign Read, Create, Change, Delete, and Publish permissions to the
Client ID. - Save access rights.
- Select your
NoteRepeat this process for any folders that you want to manage from CMP and do not inherit their access settings from the
startfolder.
Configure multiple CMP instances per CMS site
Define the following settings to support multiple CMP instances per CMS site:
- ApplicationId (StartPage GUID). You could look up this value in Database, or access the page in EditMode. Open the browser inspector, access the
xhrrequest response, and extract the page GUID. - CMP instance Id (Organization Id) associated with the site
- OAuth settings (client id and secret) to authenticate with Integration API and Orchestrate API
- OAuth settings (client id and secret) to authenticate with CMP API.
The settings format could be put in Optimizely:Cmp section as below:
"MultiInstances": {
  "Mappings": [
    {
      "Application": {
        "ApplicationId": "4F2BE131-9AA7-4954-9C46-90CADC76146B",
        "ClientId": "cms_client_1",
        "ClientSecret": "mysecret",
        "AllowActAs": false
      },
      "CmpInstance": {
        "ClientId": "cmp_client_1",
        "ClientSecret": "bigsecret",
        "OrgSSOId": "",
        "DegradedMode": true
      }
    },
    {
      "Application": {
        "ApplicationId": "E13D9D50-5C81-4F36-A60D-F8DBBF735239",
        "ClientId": "cms_client_2",
        "ClientSecret": "mysecret2",
        "AllowActAs": false
      },
      "CmpInstance": {
        "ClientId": "cmp_client_2",
        "ClientSecret": "bigsecret",
        "OrgSSOId": "",
        "DegradedMode": true
      }
    }]
}
NoteThe
Application.ClientIdmust be unique among sites.
Enable the integration in CMP
- In CMP, go to Settings > Integrations or select your avatar > Integrations. This requires an administrator role in CMP. Trial accounts do not have access to advanced settings.
- Select the Website, CMS & Feed tab at the top of the page.
- Click Add and select Optimizely CMS12
- Enable Allow Act As User to enable OptiID support. (This label will change in the future.)
- Enter a Website Name. You should enter something short and identifiable. It is shown when adding content to a Task.
- Enter a Website URL. This is the publicly accessible URL for your CMS site, such as,
https://www.optimizely.com. - Enter the Client ID from
Optimizely:Cms:Service:OauthClients:0:ClientID - Enter the Client Secret from
Optimizely:Cms:Service:OauthClients:0:ClientSecret - Select an Environment. This is a decorative label shown in the integration list.
- Click Save
- Activate the integration by opening your integration from the list and toggle the Active switch.
- Configure aliases for the integration. This provides a list of favorites to users when creating content. See Set CMS destination folders in CMP.
- Open the Publishing tab in the integration.
- Select a folder from CMS and assign a user-friendly name.
- Click Save.
Enable support for CMP analytics in CMS (optional)
If you want CMP analytics in CMS, add CmpTrackingPixel to CMS content types that should support tracking; the property is automatically assigned for content published from CMP.
The following procedure uses the CMS Alloy sample site. You must customize it for implementing templates in CMS.
-
Add a reference to the analytics JavaScript; you can retrieve the URL for a specific account from CMP. In Alloy, add it to
_Root.layout.<script async src="//analytics.newscred.com/analytics_<CMP_ID>.js"></script> -
Add the property to page types that should support analytics. In Alloy, add the property to
SitePageData.csto have it on all page types.[Display(GroupName = SystemTabNames.Settings, Order = 400)] [CultureSpecific] public virtual string CmpTrackingPixel { get; set; } -
Add the tracking pixel to the templates. In Alloy, add the tracking pixel into
_Root.layoutto render it on all pages. When possible, add the tag directly before the closing</body>tag to fully enable the scroll depth analytics.@if (Model.CurrentPage.CmpTrackingPixel != null) { <img src="@Model.CurrentPage.CmpTrackingPixel" /> }
Troubleshoot
-
I am running my CMS site locally for development. Can I still connect it to CMP?
Yes! By using a service such as Ngrok to provide a tunnel to a publicly accessible URL, CMP can connect to your CMS site. -
My dropdown is blank when I try to configure a destination mapping. What should I do?
- Check the credentials in the Information tab to match the OAuth Client Credentials.
- Check to ensure the OAuth Client has access rights to your site.
- Confirm that your CMS site is publicly accessible.
- Check your Network call log for a
structurerequest made when interacting with the Folder field or your Console log for any errors that may indicate a client-side connection issue.
-
I use multiple environments. Which one should I connect to?
- You should connect the environment that your team uses to create and publish content today. Typically that's your production environment, but there are cases where teams choose other environments.
- If you use a pre-production or staging environment and perform a push up to production in releases, you should connect the pre-production environment.
-
The preview content feature is not working, the IFRAME cannot load preview content.
X-Frame-Optionscould be one of the reasons. TheX-Frame-Optionsheader can be used to control whether a page can be placed in an IFRAME, and if the header is present in the response, the preview might fail to load. Change the value of the header to ALLOW-FROMhttp://your-domain.com
-
The content editing IFRAME forces me to login every time I open it. To make IFRAME work, you need to do the following:
- Enable
SameSite.Noneat all places. - Enable Third party cookies in the browser.
- Enable
If you have any other questions, contact Optimizely Support.
Updated 1 day ago